Transforming your driveway into a welcoming and aesthetically pleasing entryway is an art that combines functionality with creativity. Driveway landscaping is more than just choosing the right plants or materials—it’s about creating a harmonious balance that complements your home’s architecture while enhancing its curb appeal. Whether you desire a lush, green oasis or a minimalist, modern look, the right landscaping ideas can make your driveway not just a path, but a statement. Explore various approaches that can cater to different climates, terrains, and personal styles, ensuring your driveway is both practical and picturesque.
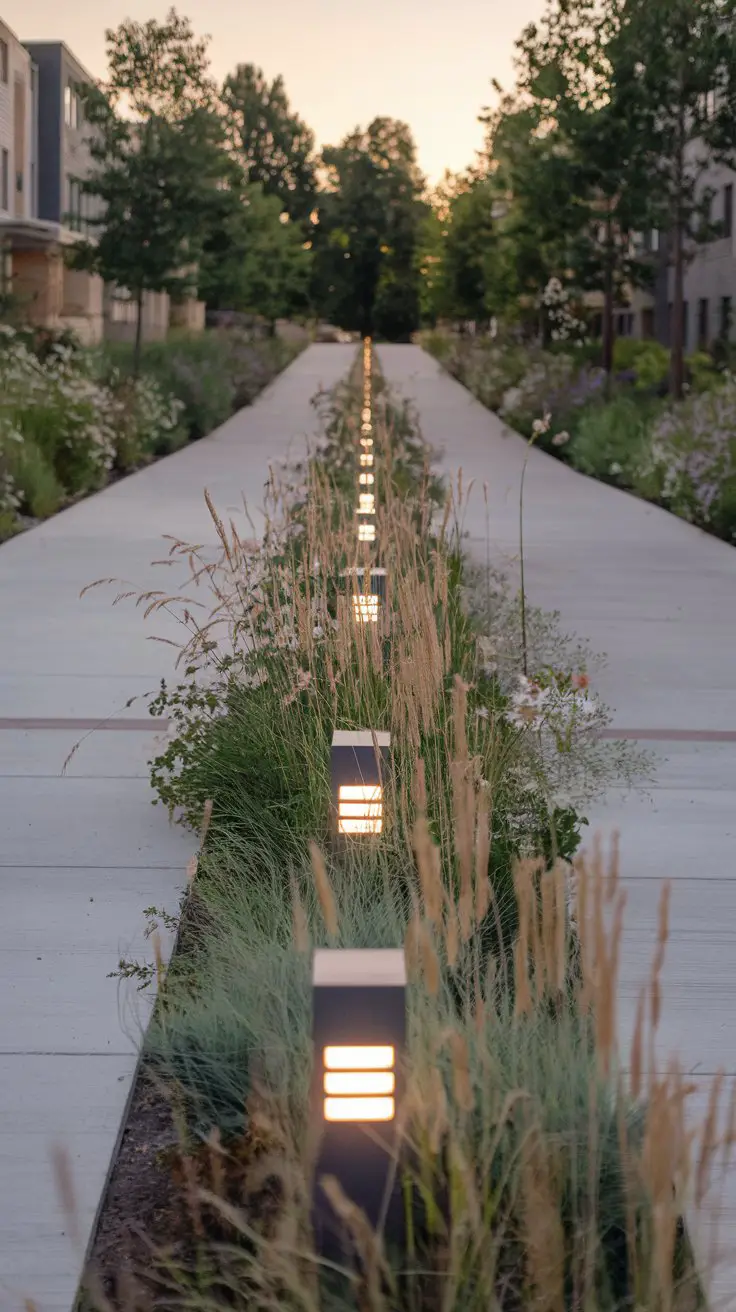
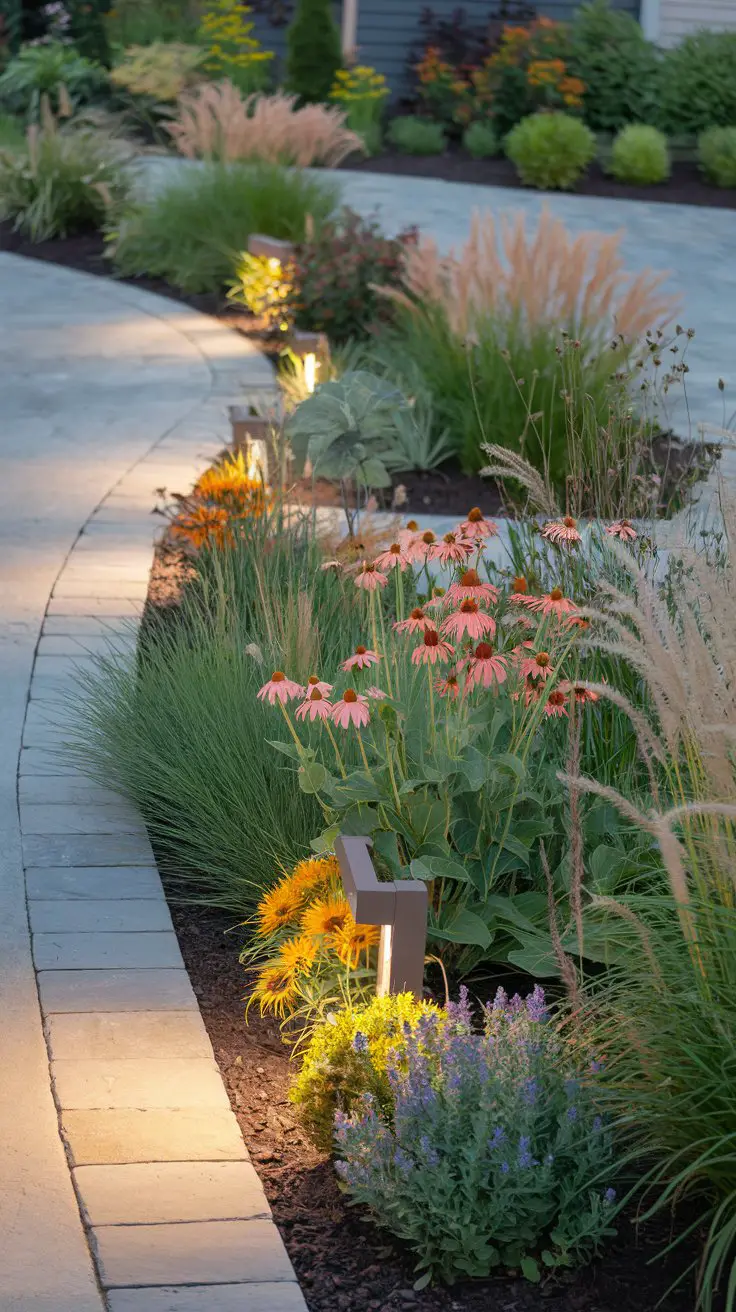
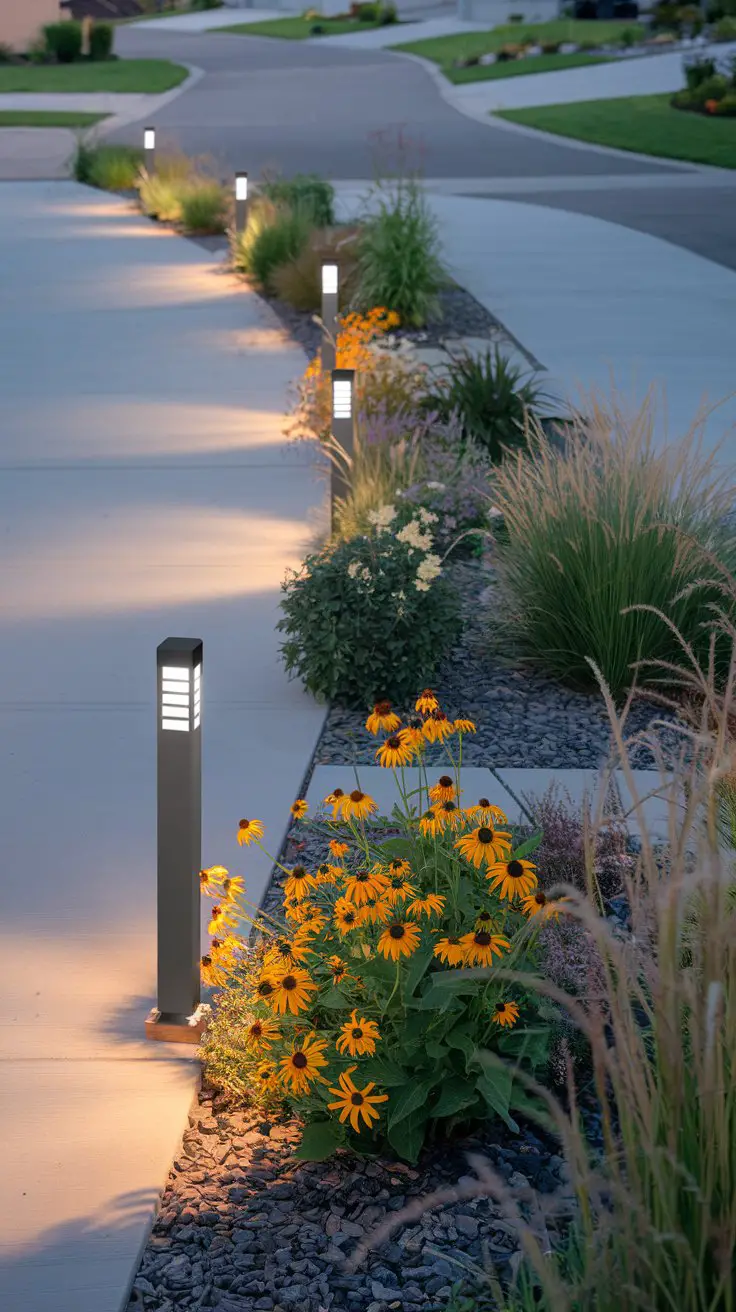
Illuminated Pathway with Native Plants
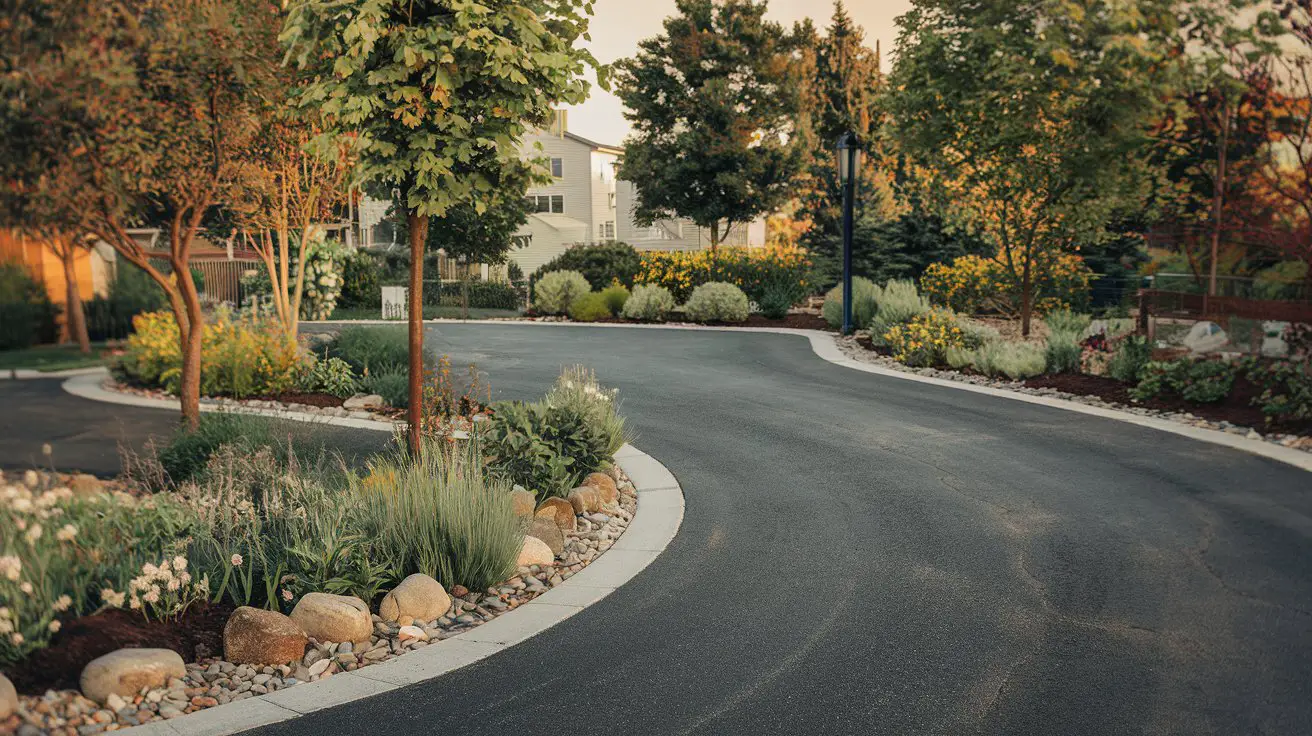
Creating a beautifully illuminated pathway framed by native plants can enhance the aesthetic appeal of any driveway, providing both practical lighting and stunning visual charm. This approach not only improves safety by lighting the way for visitors and homeowners alike but also incorporates sustainability by using regional flora that thrive in local conditions with minimal upkeep.
How to Achieve an Illuminated Pathway with Native Plants
Select Native Plants
:
– Choose a variety of native plants that are low-maintenance and can tolerate the local climate.
– Consider including a mix of shrubs, grasses, and flowering perennials to add texture and color.
– Popular choices may include ornamental grasses or native wildflowers like coneflowers or black-eyed Susans.
Plan the Pathway Layout
:
– Decide on a design that complements your driveway, whether it’s a straight path or a gently curving route.
– Ensure there is ample space on either side of the pathway for plant growth while maintaining a clear walking area.
Install Pathway Lighting
:
– Opt for energy-efficient LED lights or solar-powered options to enhance sustainability.
– Place lights strategically along the path’s edge or incorporate uplighting to highlight taller plants.
– Select fixtures with weather-resistant finishes to withstand outdoor conditions.
Choose a Color Scheme
:
– Consider a harmonious palette that complements both the house and driveway materials.
– Use natural greens and earth tones as the base, with splashes of seasonal colors from flowering plants.
Lay the Pathway and Plant
:
– Outline the pathway with durable materials like stone, brick, or gravel.
– Ensure proper drainage to prevent water accumulation.
– Space plants evenly along the pathway, considering future growth and visibility of the lighting at night.
Maintain and Refresh
:
– Regularly prune plants to maintain their shape and health.
– Check lighting systems periodically for any required maintenance or fixture adjustments.
– Reapply mulch and clean pathway surfaces as needed to keep the area tidy and fresh.
Artistic Stone Mosaic Driveway Border
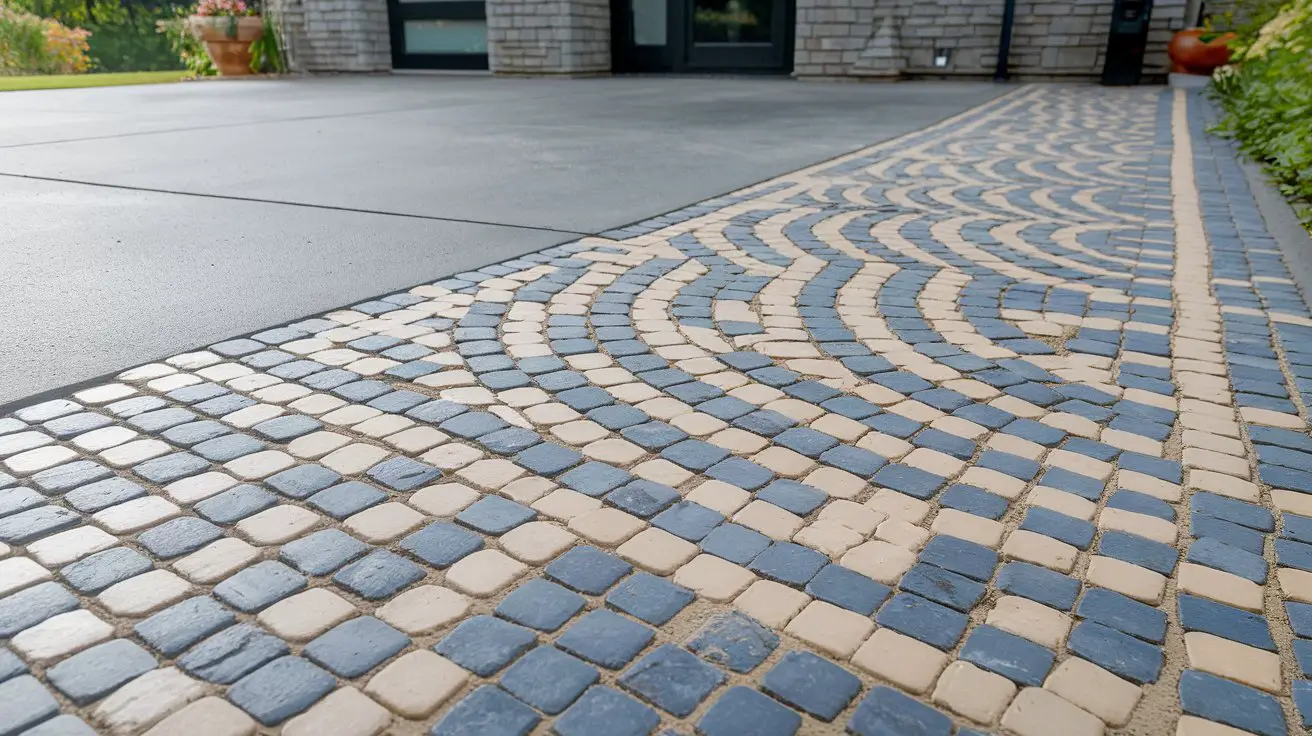
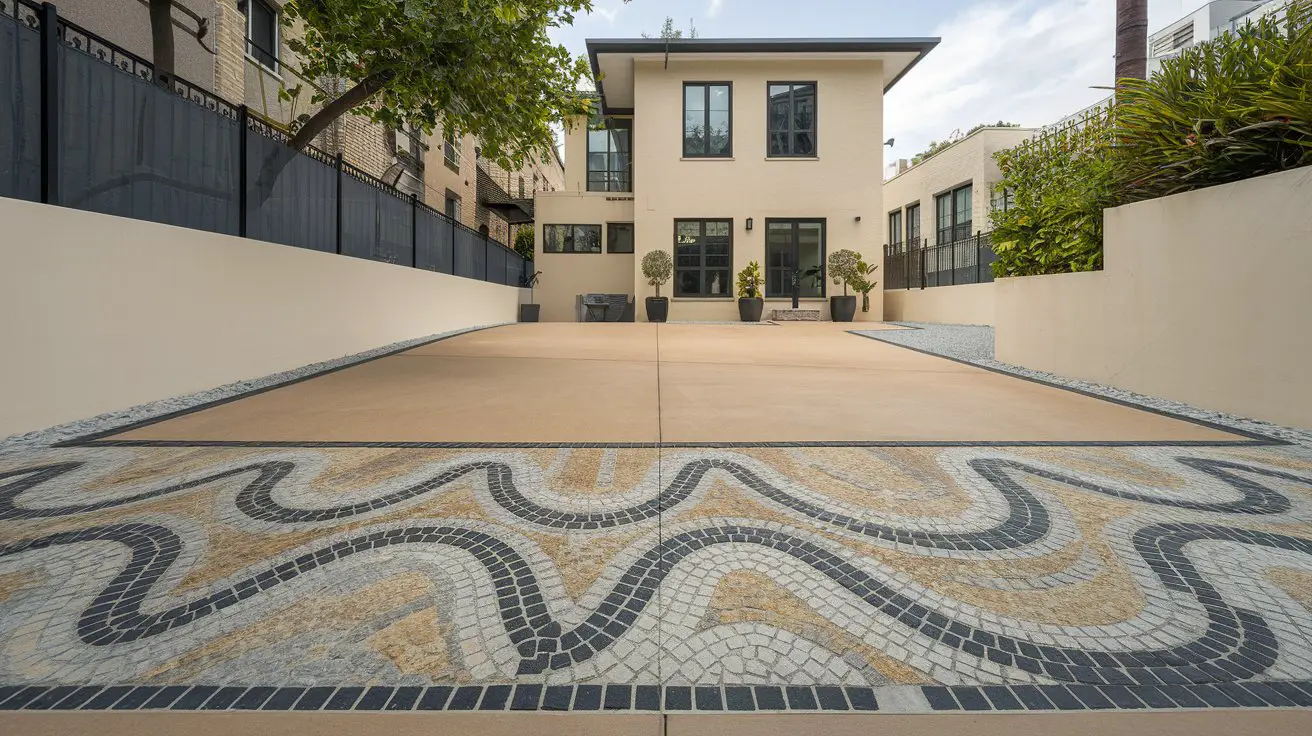
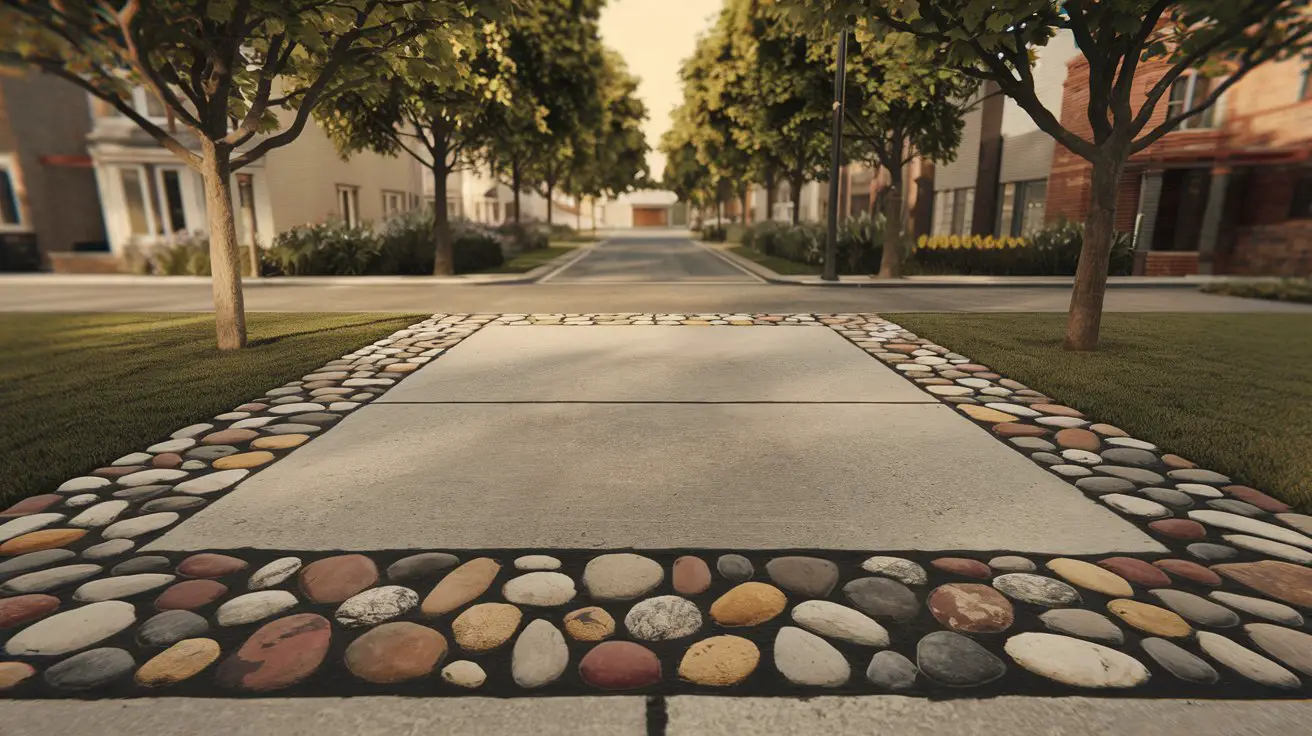
Incorporating an artistic stone mosaic border along your driveway not only elevates its visual appeal but also adds a unique personal touch. This creative approach involves using a variety of stones, pebbles, and tiles to create intricate patterns or images, forming a captivating frame that highlights the driveway and complements the home’s architectural style.
How to Achieve an Artistic Stone Mosaic Driveway Border
Plan Your Design
:
– Sketch out the design you’d like to feature, whether abstract patterns, geometric shapes, or nature-inspired motifs.
– Ensure the design complements the overall aesthetic of your home and landscape.
Select Materials
:
– Choose durable stones and tiles that can withstand outdoor conditions, such as granite, marble, or ceramic.
– Consider including colorful pebbles or glass pieces for added vibrancy.
Prepare the Border Area
:
– Clear the area along the driveway where the mosaic will be placed, removing any grass or debris.
– Level the ground to create a stable base for the mosaic.
Lay the Base and Stones
:
– Spread a layer of sand or fine gravel as a base to help with leveling and drainage.
– Lay out your design in sections, carefully placing each stone and adjusting the arrangement until satisfied.
Secure the Stones
:
– Use a strong outdoor adhesive or mortar to fix the stones in place, ensuring they are firmly set.
– Allow sufficient drying time based on the adhesive or mortar guidelines.
Seal and Protect
:
– Apply a sealant to protect the mosaic from weather damage and enhance the stones’ natural colors.
– Reapply the sealant periodically to maintain the mosaic’s appearance and longevity.
Color Scheme
:
– Opt for natural tones like grays, browns, and whites to blend subtly with surrounding landscapes.
– Introduce sporadic bursts of color with brighter stones or tiles to catch the eye and add visual interest.
Vertical Gardens Along the Driveway
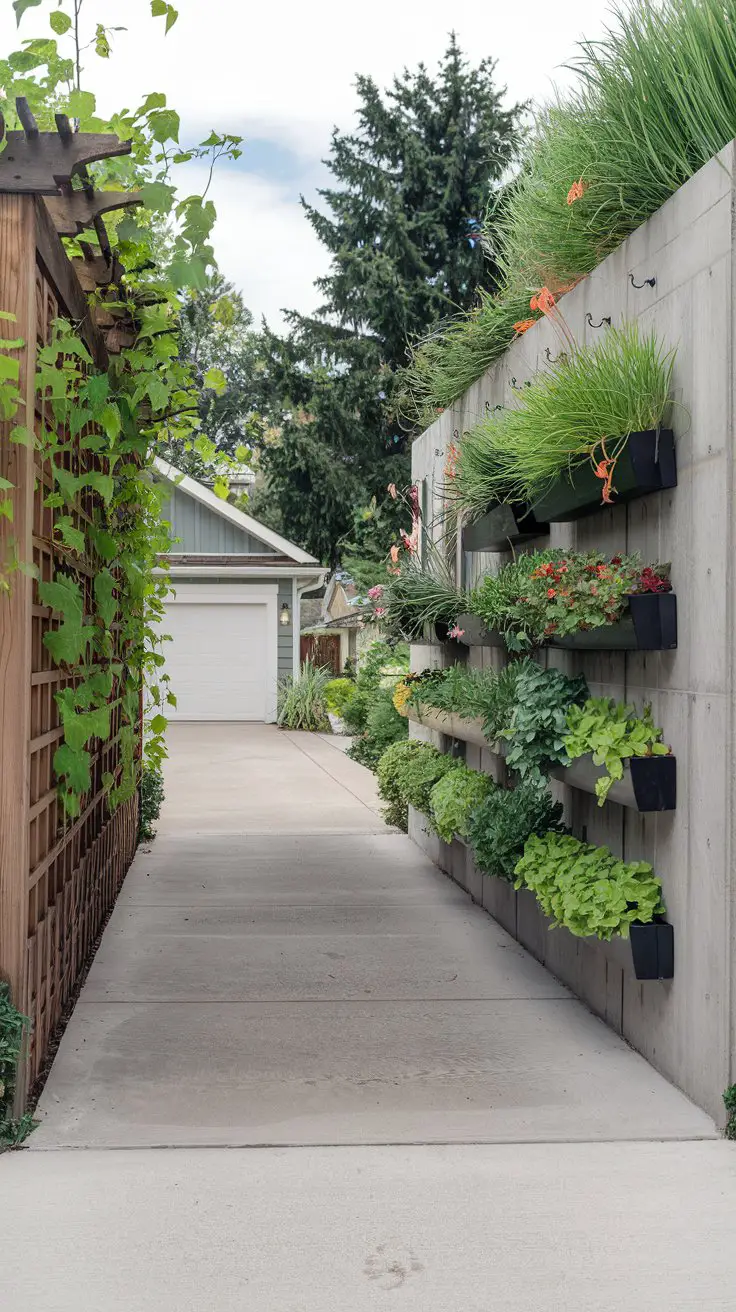
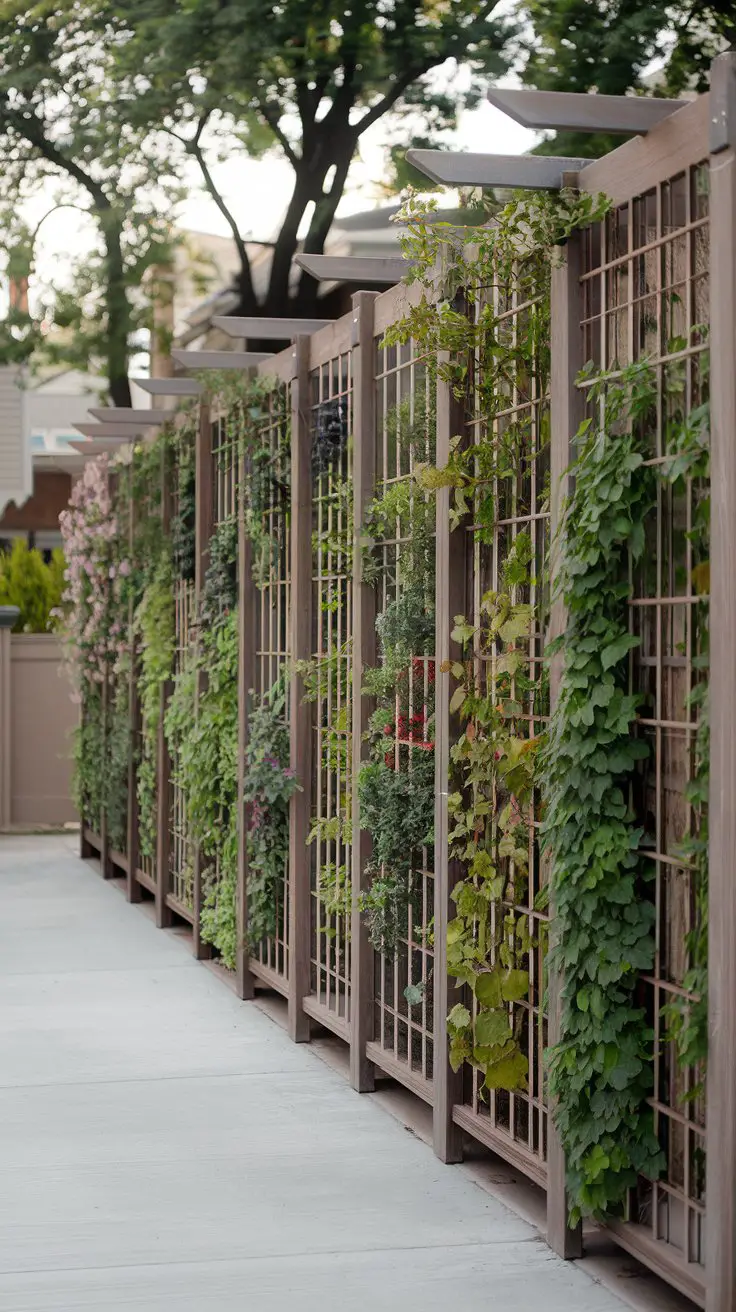
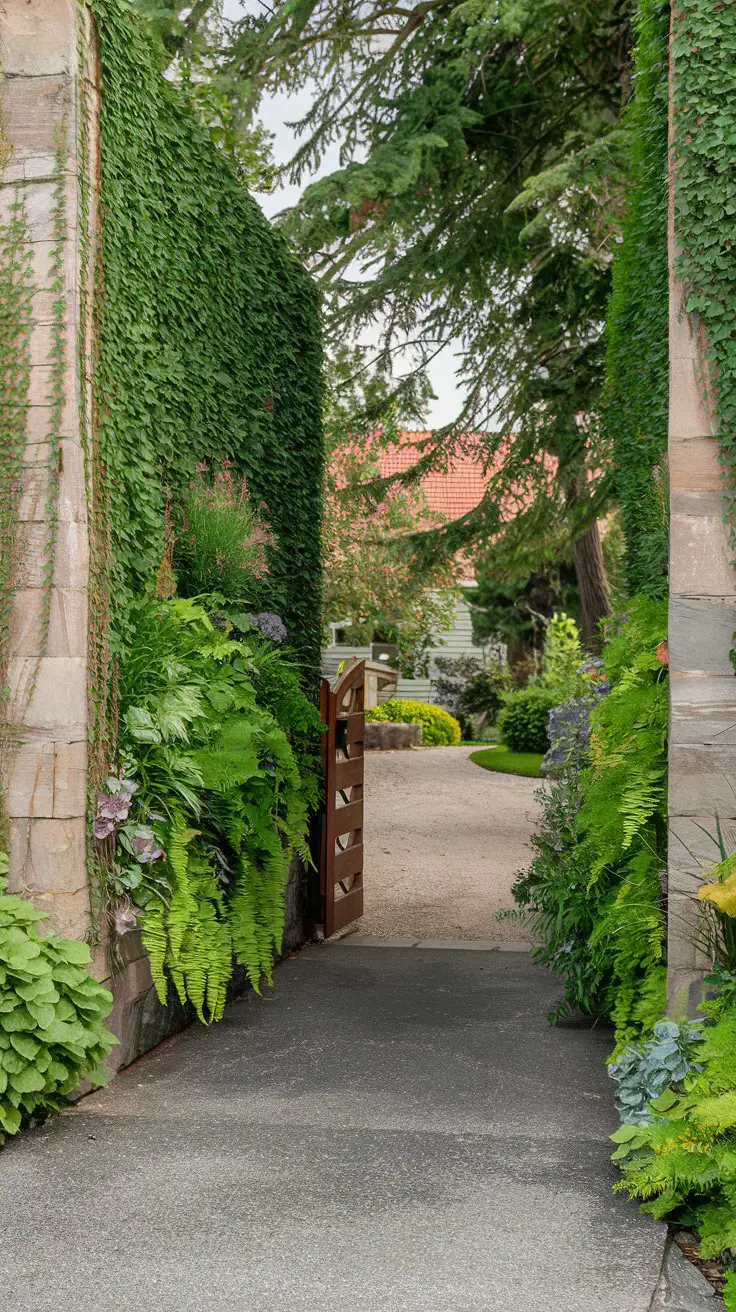
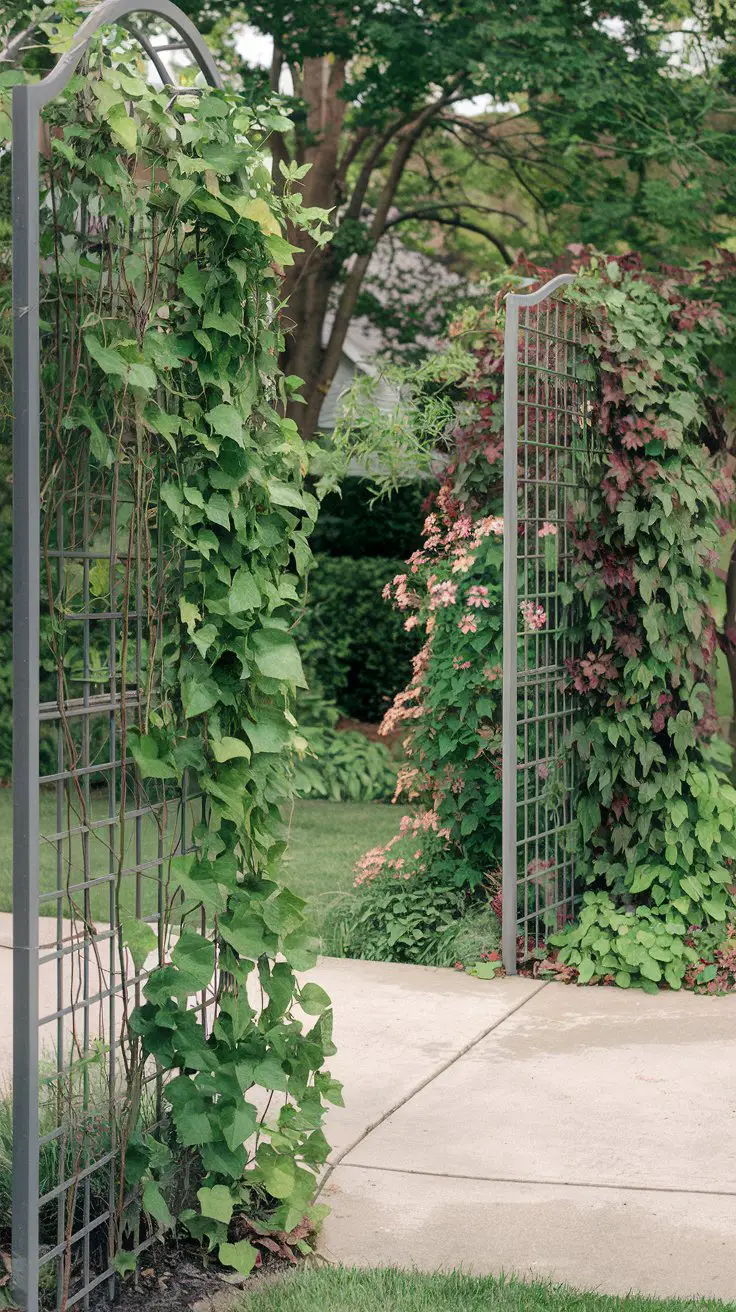
Introducing vertical gardens along the driveway can transform a mundane space into a lush and vibrant corridor. This innovative landscaping technique uses vertical structures or trellises to support climbing plants and vines, offering a fresh, green aesthetic without occupying much horizontal space. Vertical gardens can improve air quality, enhance privacy, and add visual interest with their varied textures and colors.
How to Achieve Vertical Gardens Along the Driveway
Select Suitable Plants
:
– Opt for hardy, climbing plants that thrive in your climate, such as clematis, jasmine, or ivy.
– Consider including a mix of flowering and evergreen options for year-round appeal.
– Prioritize plants with varying leaf shapes and colors to create texture.
Choose Vertical Structures
:
– Use trellises, wall planters, or lattice panels as supports for the climbing plants.
– Ensure structures are made from durable materials like treated wood or metal to withstand outdoor conditions.
– They should be sturdy enough to support the weight of mature plants.
Install the Vertical Supports
:
– Position the structures evenly along the driveway edges, securing them firmly in the ground.
– Allow for enough space between structures and the driveway for plant growth.
– Ensure supports are anchored well to withstand wind and weather.
Plant and Train the Climbers
:
– Plant the selected climbing plants at the base of the vertical supports.
– Gently tie or weave the plant stems into the supports as they grow to guide their upward movement.
– Encourage branching out for fuller coverage.
Maintain the Gardens
:
– Regularly prune plants to prevent overgrowth and maintain desired shapes.
– Monitor for pests and diseases, using organic treatments when necessary.
– Ensure consistent watering and nutrition to support healthy growth.
Color Scheme
:
– Choose foliage with various shades of green for a calming and unified look.
– Introduce bursts of color with seasonal flowering plants like passion flowers or honeysuckles.
– Harmonize with any existing color themes in your garden or home exterior.
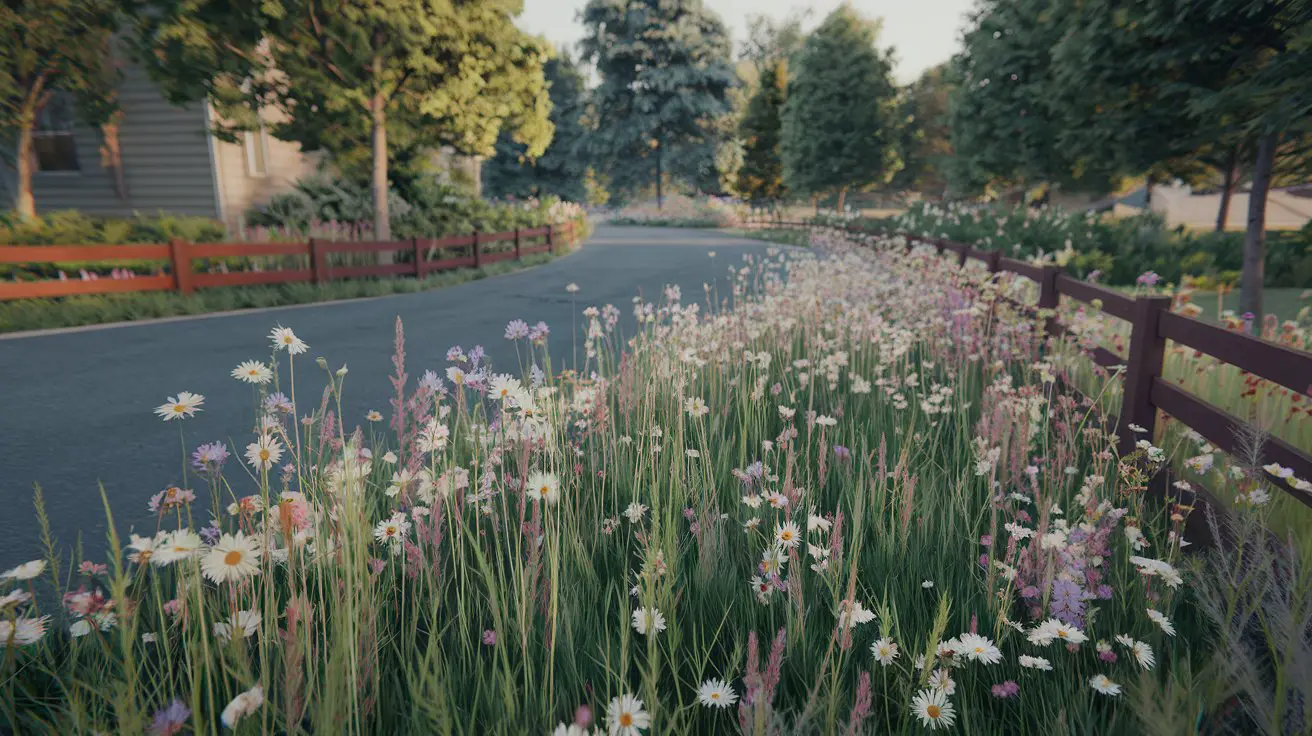
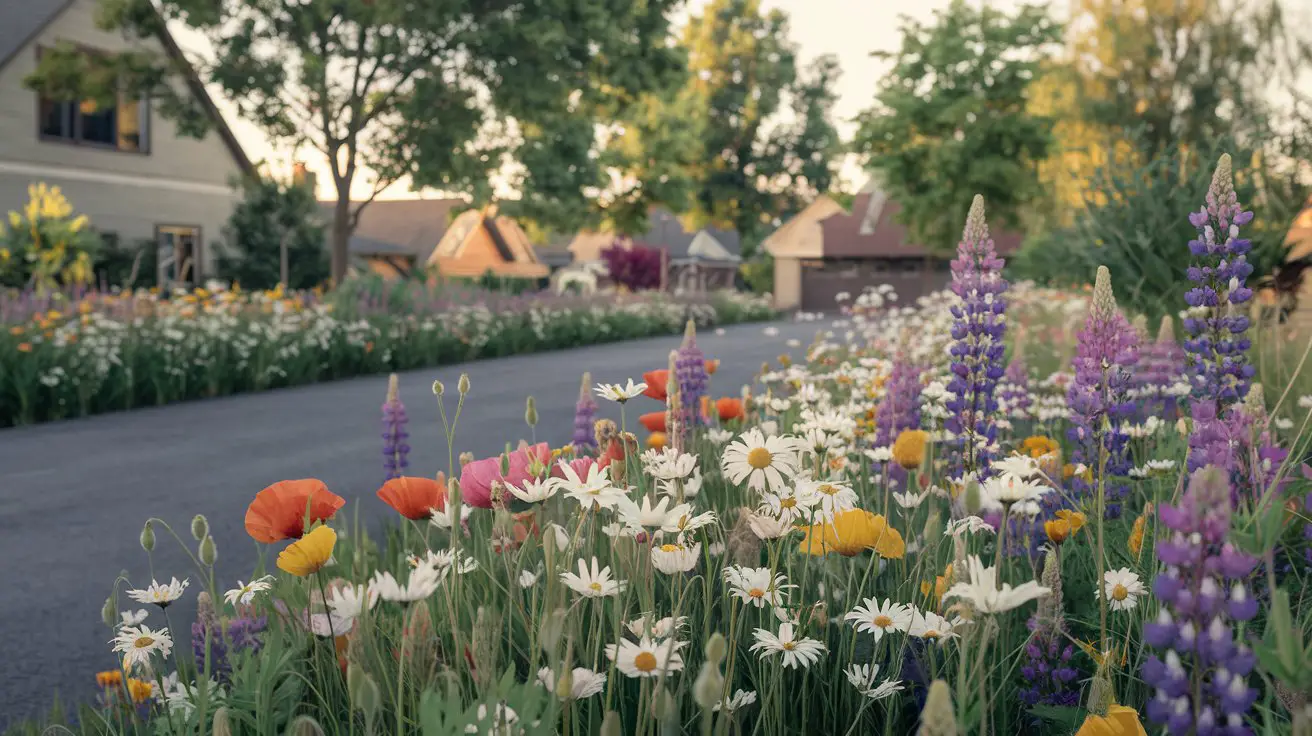
Wildflower Meadow Border
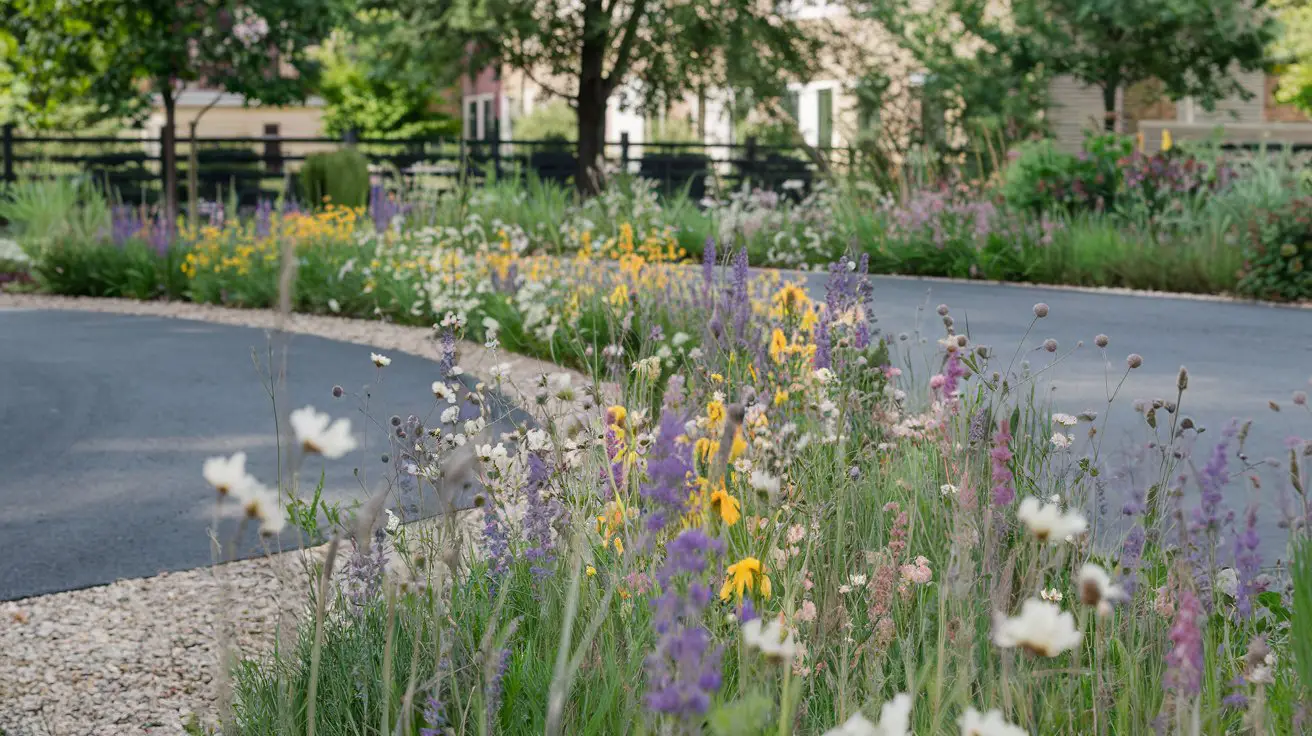
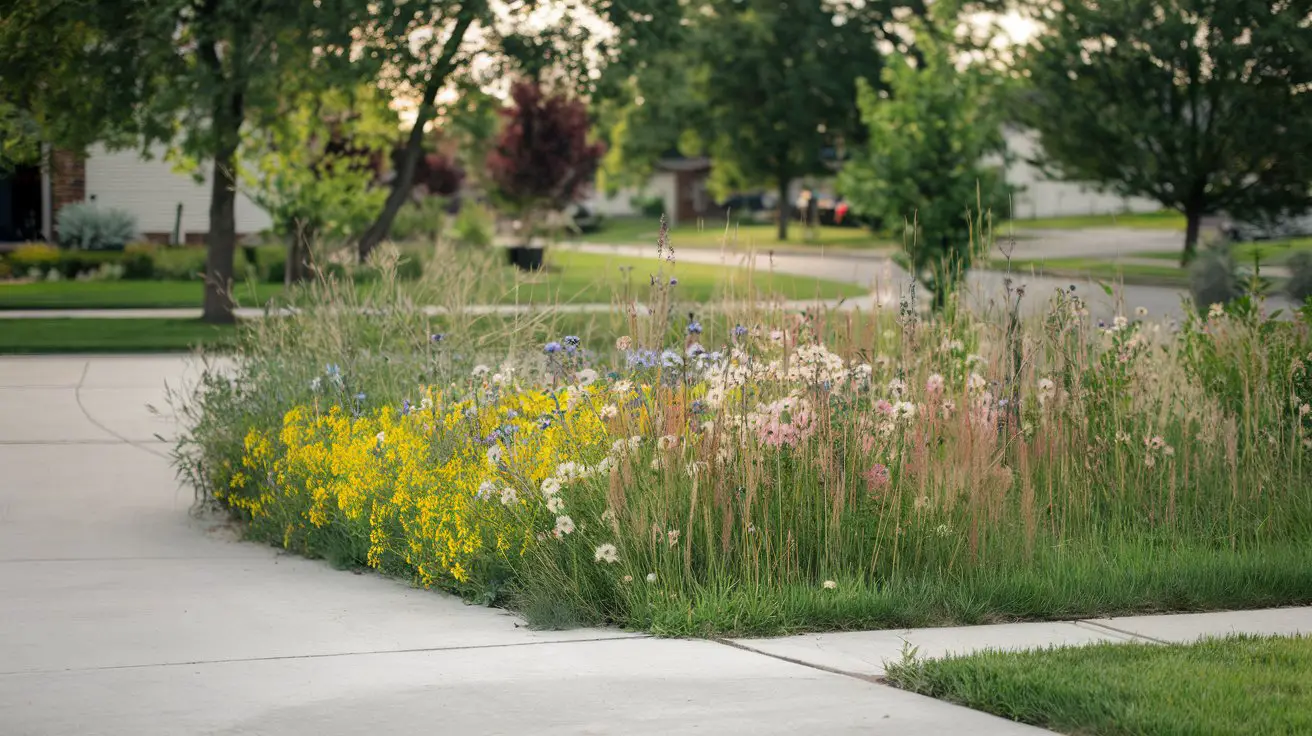
Transform the edges of your driveway into a vibrant wildflower meadow, offering a burst of color and biodiversity that blend seamlessly into the landscape. This enchanting border not only enhances the visual appeal of your property but also supports local wildlife, attracting pollinators like bees and butterflies. It provides a natural, informal look that’s low-maintenance and environmentally friendly.
How to Achieve a Wildflower Meadow Border
Choose Wildflower Seeds
:
– Select a mix of perennial and annual wildflower seeds suitable for your climate.
– Prioritize native species to ensure easy growth and sustainability.
– Consider plants like daisies, poppies, and lupines for variety and color.
Prepare the Soil
:
– Clear the border area of grass, weeds, or debris.
– Loosen the soil to ensure good seed-to-soil contact and proper drainage.
– Incorporate organic compost to enrich the soil.
Sow the Seeds
:
– Distribute seeds evenly across the prepared soil, following the instructions for each species.
– Lightly rake the area to cover seeds with a thin layer of soil.
– Water gently to encourage germination.
Initial Watering and Care
:
– Water the seeds regularly during initial growth, but avoid overwatering.
– Monitor for weeds and remove them to reduce competition for nutrients.
Maintain the Meadow
:
– Allow the plants to grow naturally without excessive intervention.
– After blooming, mow the area to encourage reseeding if desired.
– Trim dead plants back in late fall to prepare for the next growth cycle.
Color Scheme
:
– Embrace a kaleidoscope of colors from wildflowers like cornflowers and calendulas.
– Incorporate mixtures that provide continuous blooms from spring to late summer.
– Use wildflowers to complement any existing garden features or natural landscape elements.
Zen Garden Entrance
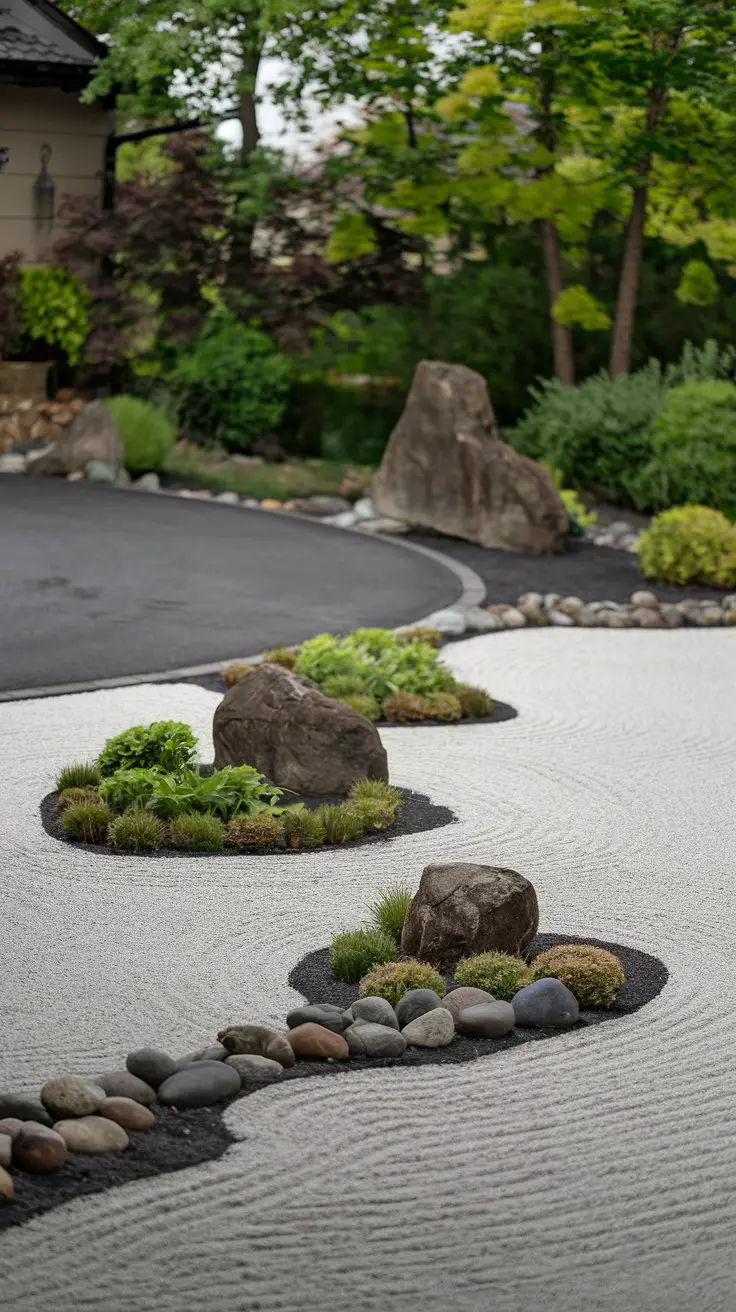
Create a calm and serene entrance to your driveway with a Zen garden-inspired landscape. This minimalist approach uses elements like sand, gravel, and strategically placed rocks to evoke a sense of tranquility and reflection. Incorporate carefully curated plants like bonsai trees or ornamental grasses to add a touch of greenery while maintaining a meditative atmosphere. The simplicity of a Zen garden fosters mindfulness and presents an elegant, timeless aesthetic that complements modern and traditional homes alike.
How to Achieve a Zen Garden Entrance
Plan the Layout
:
– Decide on the size and shape of the Zen garden area along your driveway.
– Incorporate curved lines and asymmetrical balance to foster a natural feel.
Select Materials
:
– Use fine sand or gravel for the base, providing a blank canvas for designs.
– Choose smooth stones and larger rocks for focal points and natural structure.
Design the Garden
:
– Arrange rocks and stones intentionally to mimic natural landscapes.
– Rake the sand or gravel into patterns such as waves or ripples for added texture.
Incorporate Plants
:
– Select low-maintenance plants like moss, ferns, or dwarf conifers to complement the garden’s minimalist design.
– Position plants to accentuate features without overwhelming the space.
Add Authentic Elements
:
– Consider traditional Zen elements like bamboo screens or stone lanterns for authenticity.
– Use natural wood features to further enhance tranquility.
Color Scheme
:
– Focus on neutral tones and natural hues such as greys, greens, and sandy browns.
– Use minimal color to maintain the calm and peaceful ambiance of the Zen style.
Succulent Driveway Accent
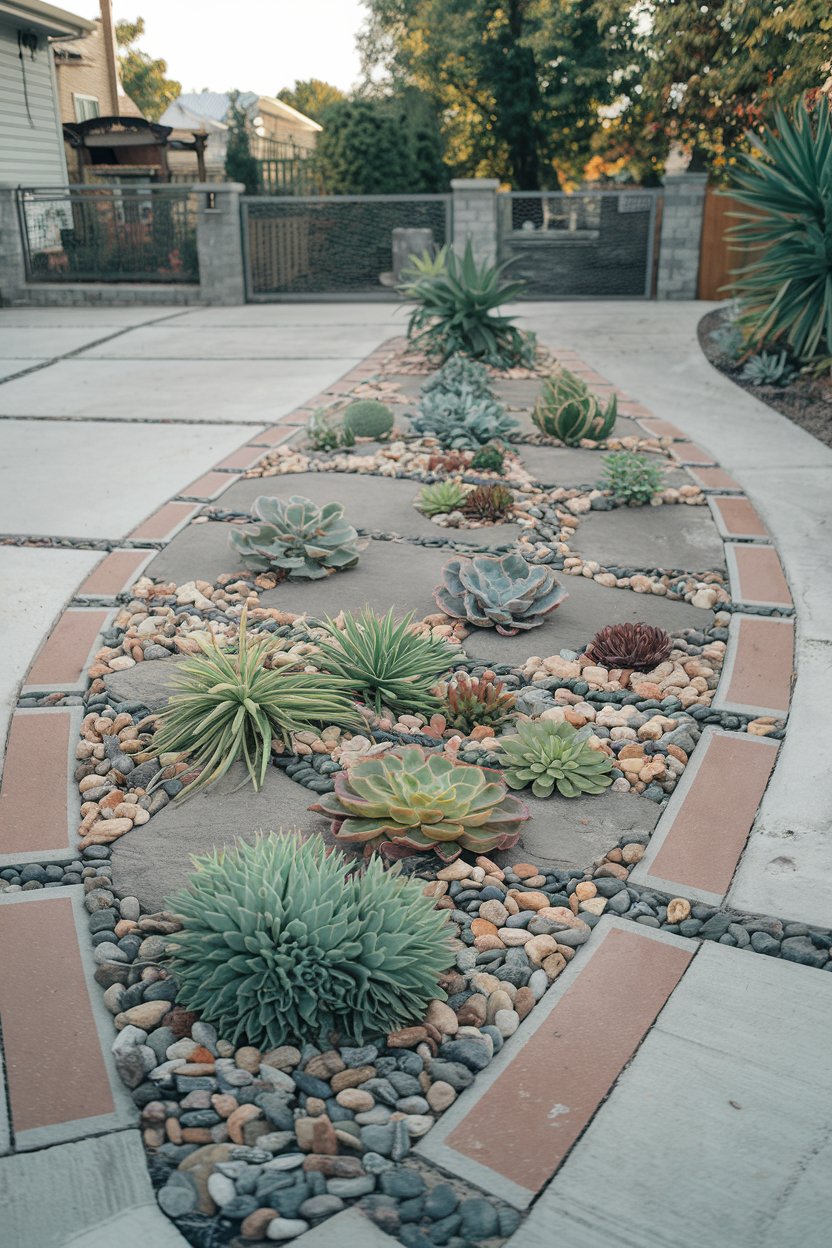
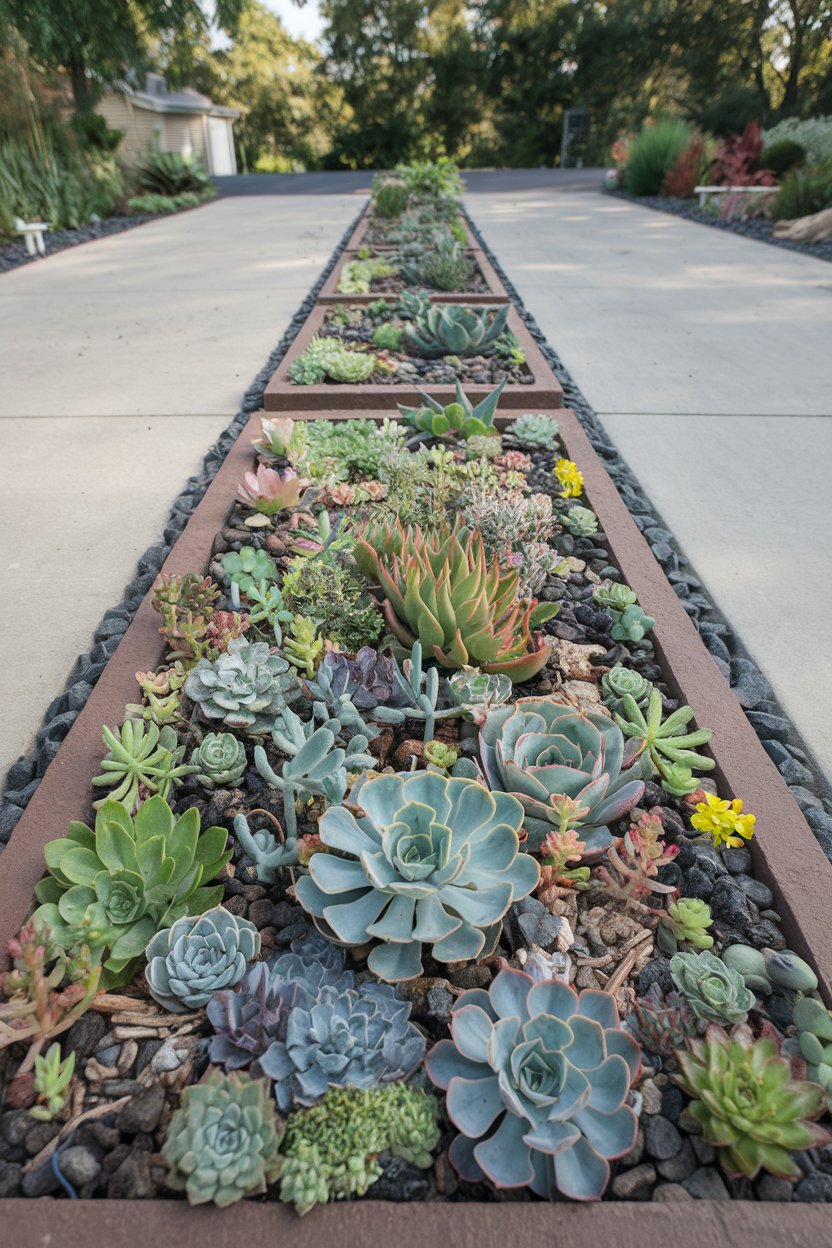
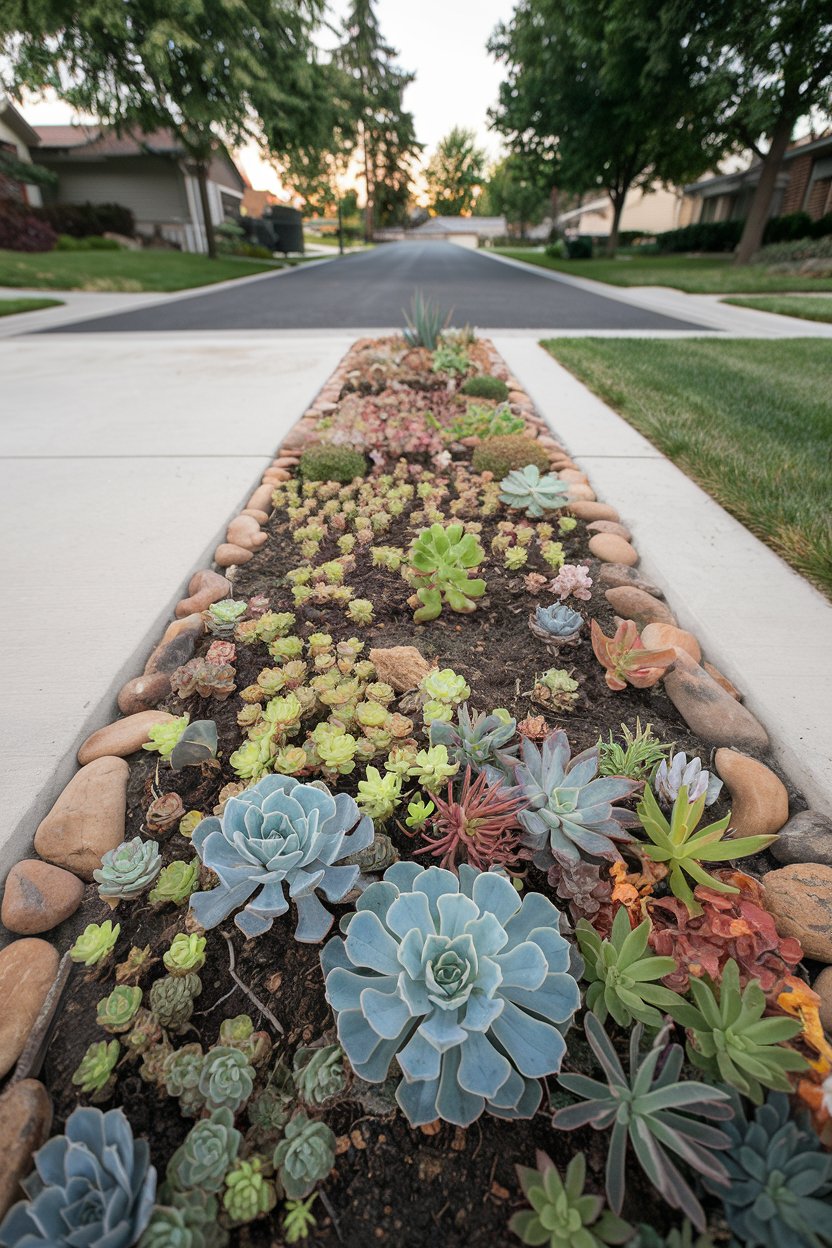
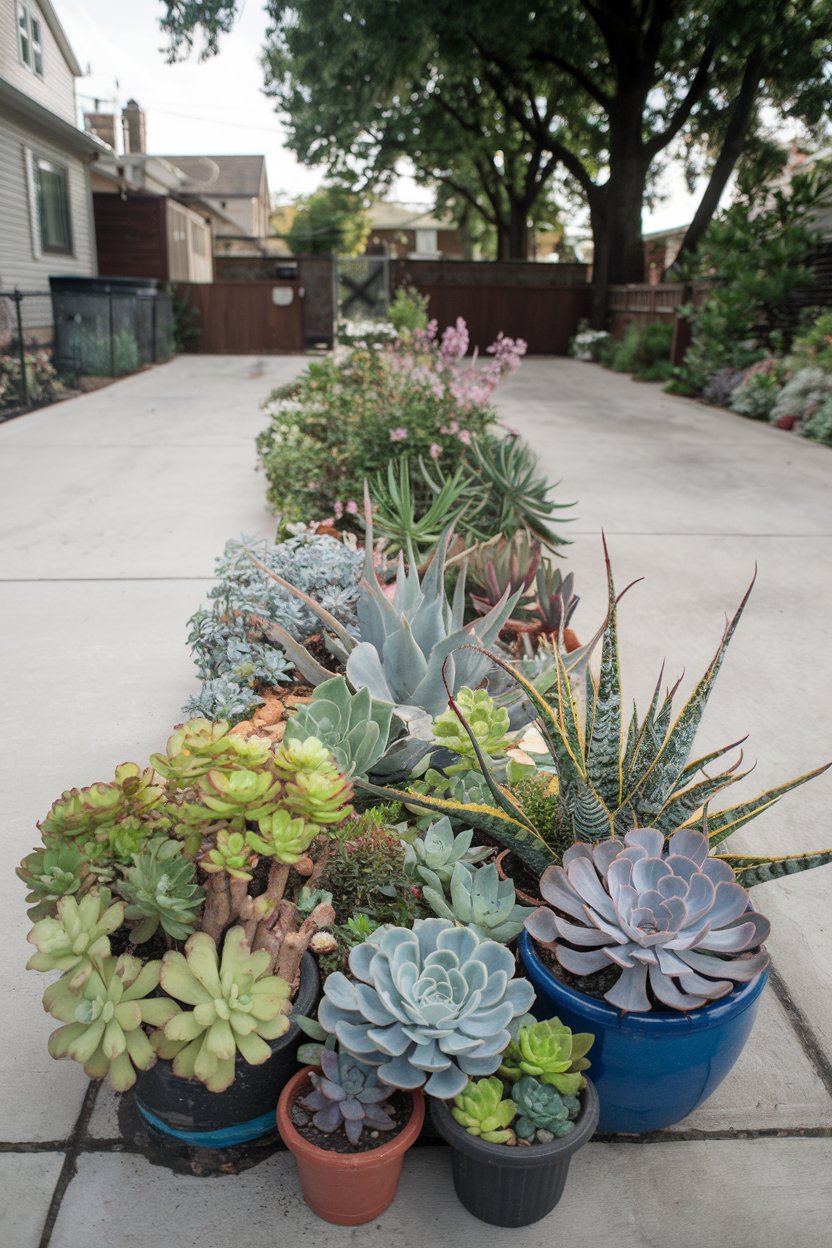
Incorporating a succulent garden along your driveway introduces a modern and low-maintenance landscape feature. Succulents are hardy plants known for their geometric shapes and vibrant colors, making them ideal for creating eye-catching designs. This approach not only adds textural interest and color but also promotes water conservation, as succulents require minimal watering compared to traditional plants.
How to Achieve a Succulent Driveway Accent
Select Suitable Succulents
:
– Choose succulents that thrive in your climate, considering varieties like sedum, echeveria, and agave.
– Opt for a mix of sizes and colors to create visual interest and dimension.
Plan the Layout
:
– Determine the area along the driveway that will be dedicated to the succulent accent.
– Design patterns or groupings to maximize visual impact, incorporating various heights and shapes.
Prepare the Soil
:
– Amend the soil with sand or gravel to ensure well-draining conditions, crucial for succulents.
– Remove any weeds or debris prior to planting.
Plant the Succulents
:
– Arrange the succulents according to your planned design, ensuring adequate space for growth.
– Avoid overcrowding to prevent competition for nutrients and maintain the design’s aesthetic.
Water and Maintenance
:
– Water sparingly, allowing the soil to dry out completely between waterings.
– Remove any dead leaves or debris regularly to maintain a neat appearance.
Enhance with Hardscaping
:
– Use decorative stones, pebbles, or gravel around the plants to complement the succulents and enhance drainage.
– Incorporate edging materials to define the succulent area and prevent soil erosion.
Color Scheme
:
– Utilize a palette of greens, blues, and purples to highlight the unique beauty of succulents.
– Introduce pops of color with flowering varieties to add seasonal interest.
– Choose earth-toned stones and pebbles to maintain a cohesive and natural look.
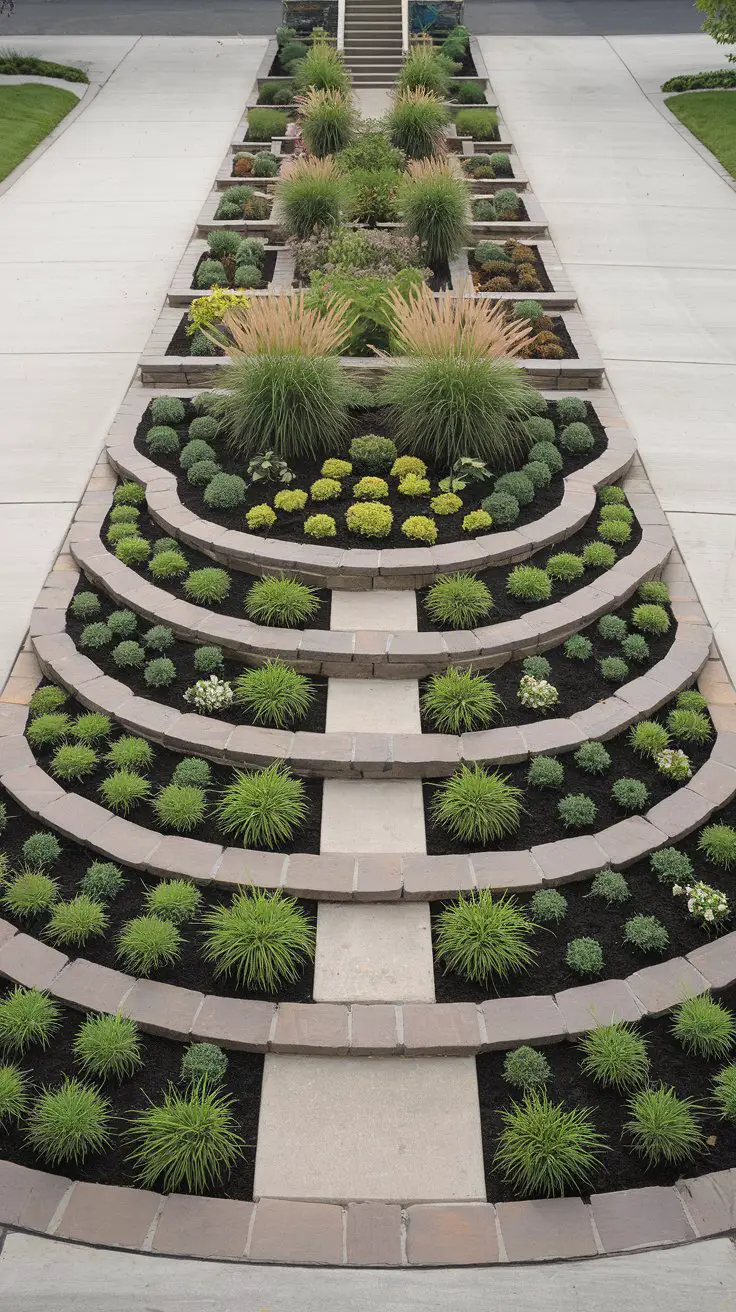
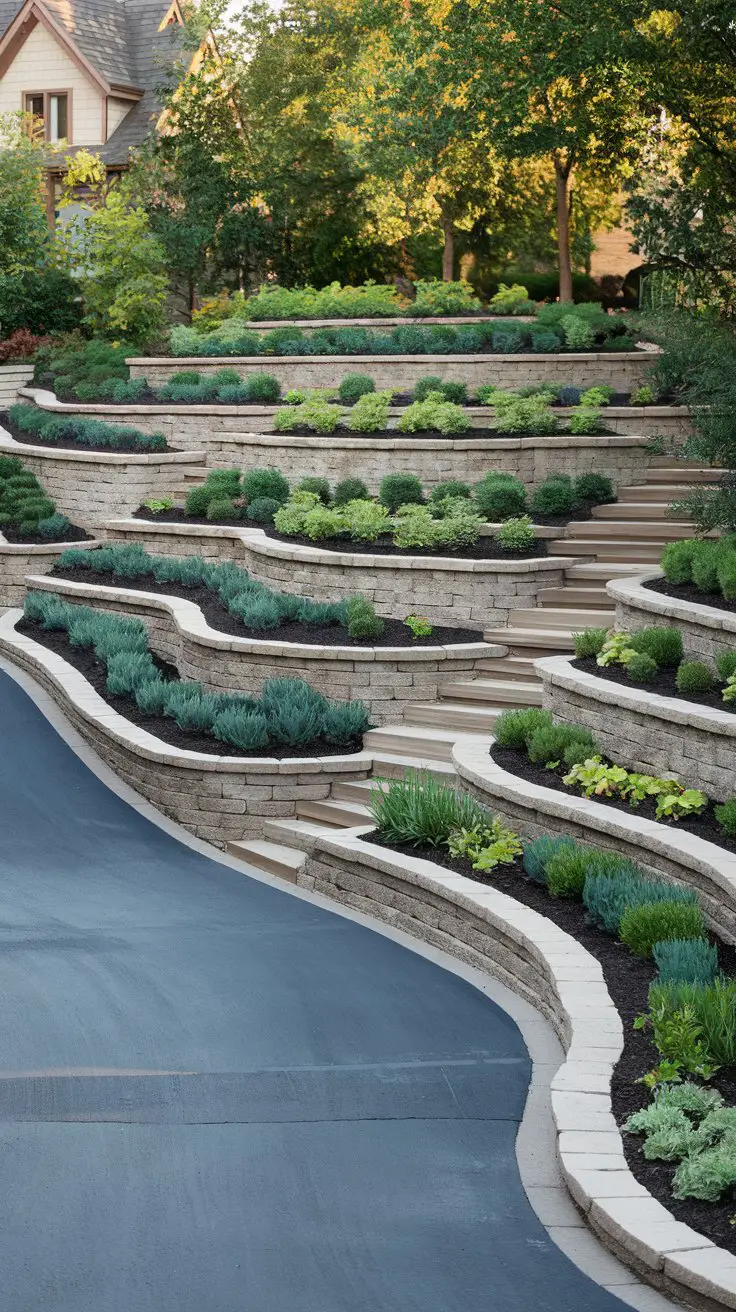
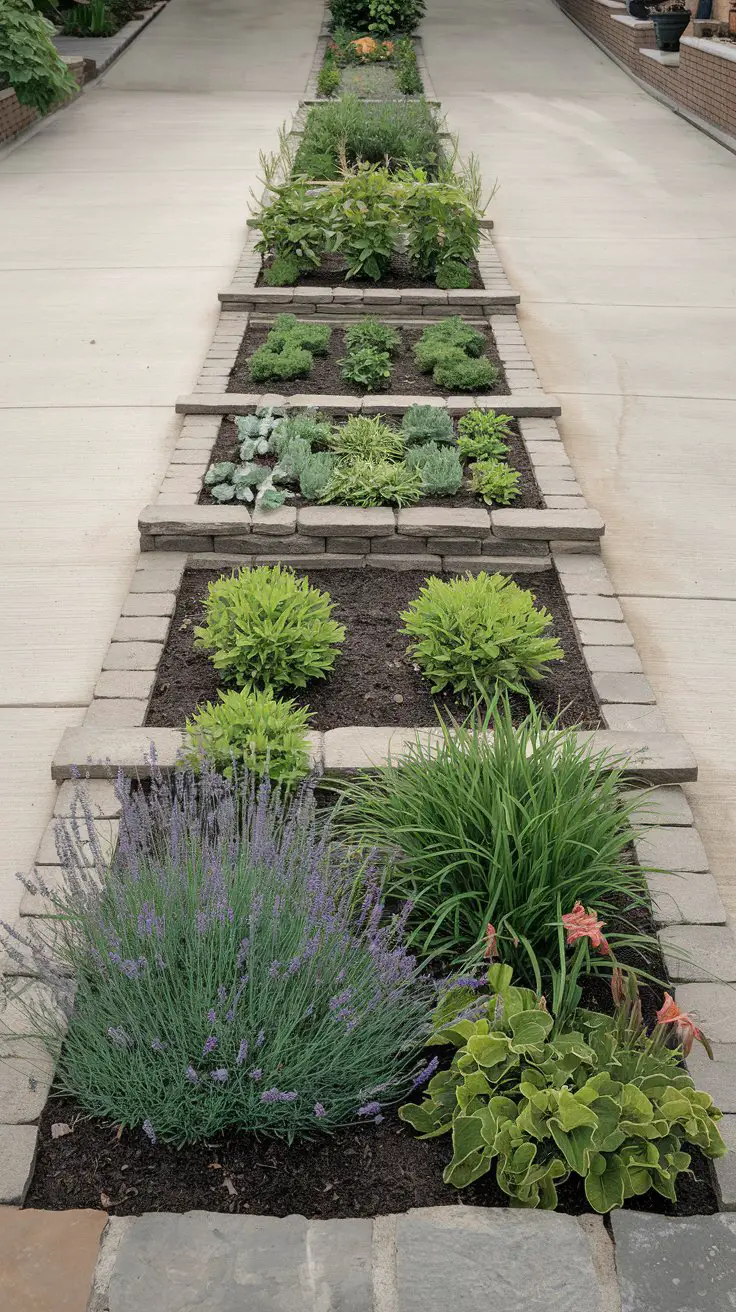
Tiered Driveway Garden Edging
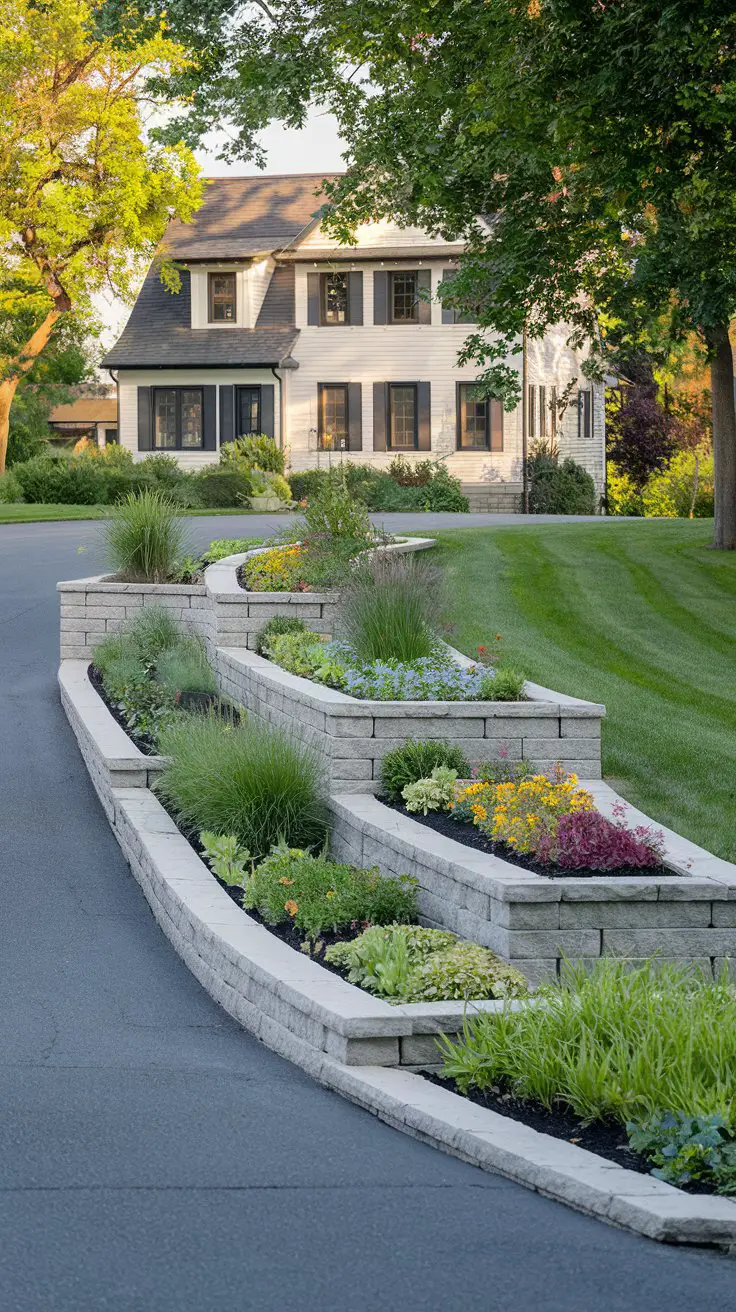
Add depth and visual interest to your driveway with tiered garden edging. This landscaping idea involves the creation of raised beds along the driveway edges using retaining walls or terraces. The tiered structure not only elevates the curb appeal but also allows for diverse planting options, enabling you to showcase a variety of plants at different heights. The multi-level effect can make your driveway appear more dynamic and inviting.
How to Achieve a Tiered Driveway Garden Edging
Design the Layout
:
– Sketch out the desired shape and size of the tiered structure along your driveway.
– Decide the number of tiers based on available space and overall look you want to achieve.
Select Building Materials
:
– Use durable materials such as stone, brick, or treated wood for the retaining walls.
– Choose materials that complement the style of your home and driveway.
Build the Terraces
:
– Begin with the lowest tier closest to the driveway, ensuring stability and proper drainage.
– Stack the retaining materials to create successive tiers, leaving room for planting soil.
Choose Plants
:
– Select a mix of plants that vary in height and texture, such as ornamental grasses, small shrubs, and flowering perennials.
– Consider seasonal varieties to ensure year-round interest and color.
Plant and Layer
:
– Start planting from the top tier downwards, ensuring each tier is filled with soil appropriately.
– Group plants with similar water and sunlight needs together.
Maintain the Garden
:
– Regularly water and fertilize according to plant needs.
– Prune and trim plants to maintain the desired shape and prevent overgrowth between tiers.
Color Scheme
:
– Opt for a mix of soothing greens with vibrant flowering plants like lavender or daylilies for pops of color.
– Use warm earth tones for the retaining materials to harmonize with the natural landscape.
This tiered approach can transform a plain driveway into an engaging, multi-dimensional landscape feature, providing an elegant and organized look that enhances the home’s exterior.
Living Wall Along Your Driveway
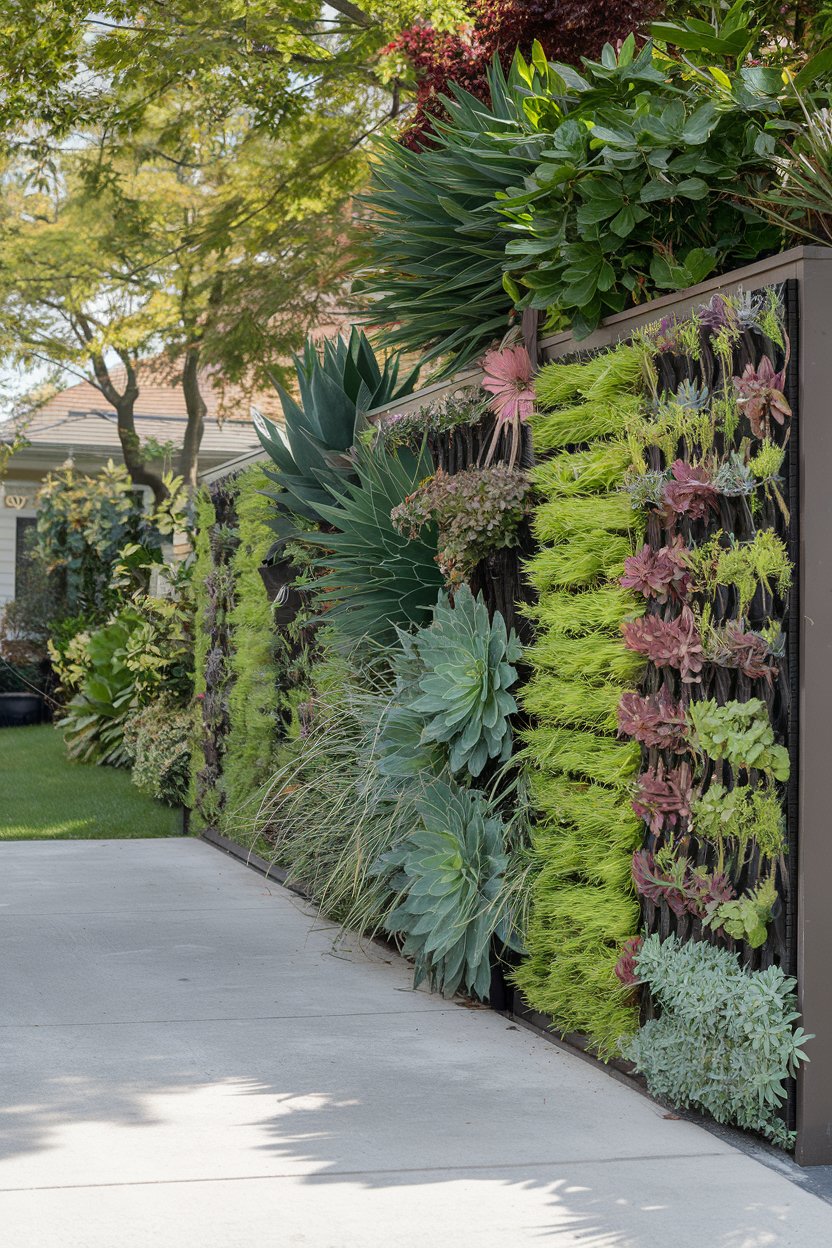
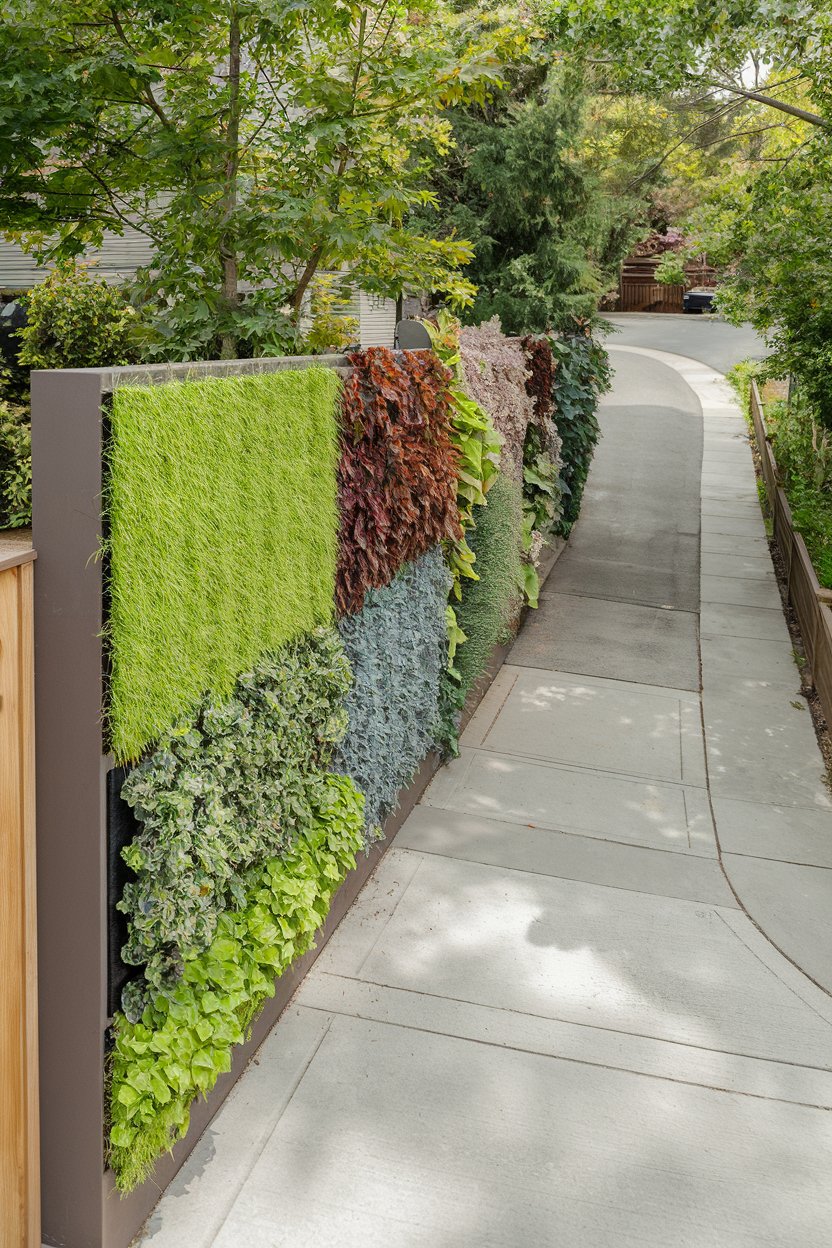
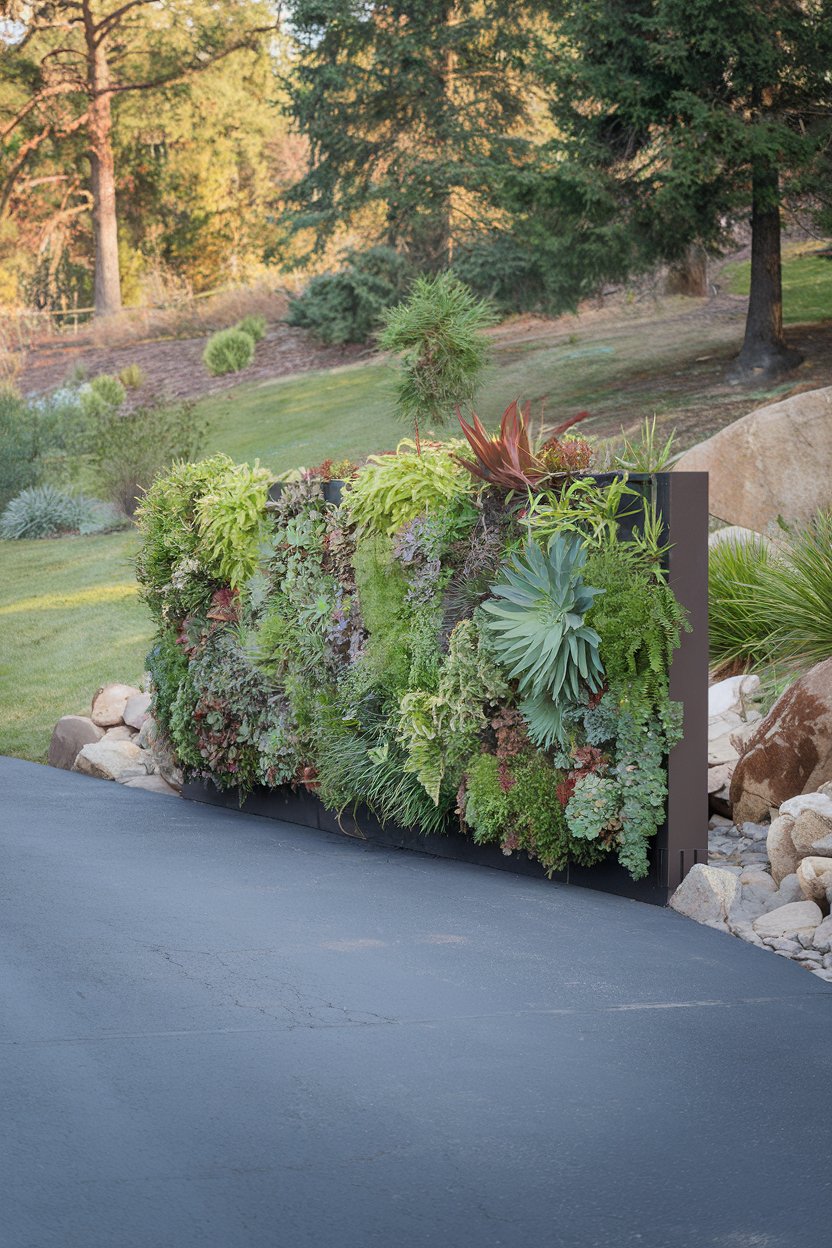
A living wall, or green wall, can transform the vertical surfaces along your driveway into lush, verdant art pieces. This innovative landscaping idea involves arranging a variety of plants on vertical panels, creating eye-catching textures and designs. A living wall is not only visually striking but also promotes better air quality, absorbs noise, and offers insulation benefits, making it a sustainable addition to any property.
How to Achieve a Living Wall Along Your Driveway
Choose the Wall Location
:
– Identify a suitable vertical surface along your driveway that’s sturdy enough to support the living wall structure.
– Ensure the location receives adequate sunlight based on the plants you plan to use.
Select Plant Species
:
– Opt for a mix of ferns, succulents, and perennials that thrive in your local climate.
– Choose plants with varying leaf shapes and colors to create visual interest and texture.
Choose the Wall System
:
– Select a modular panel system or pockets designed specifically for vertical gardens.
– Ensure the system is easy to install and provides good drainage and airflow for the plants.
Install the Structure
:
– Secure the wall system to the designated area, ensuring it is level and stable.
– Incorporate a drip irrigation system to maintain consistent watering.
Plant the Wall
:
– Arrange the plants according to your design plan, starting with larger plants and filling gaps with smaller varieties.
– Consider staggering colors and textures for a balanced and appealing look.
Maintain the Living Wall
:
– Regularly prune and deadhead plants to keep the wall looking tidy and healthy.
– Monitor the irrigation system and adjust watering schedules based on seasonal changes.
– Fertilize as needed to promote vigorous growth.
Color Scheme
:
– Use a soothing mix of greens complemented by shades of purple and yellow for added vibrancy.
– Incorporate plants with seasonal blooms to provide changing colors throughout the year.
– Choose container colors that harmonize with your home exterior for a cohesive look.

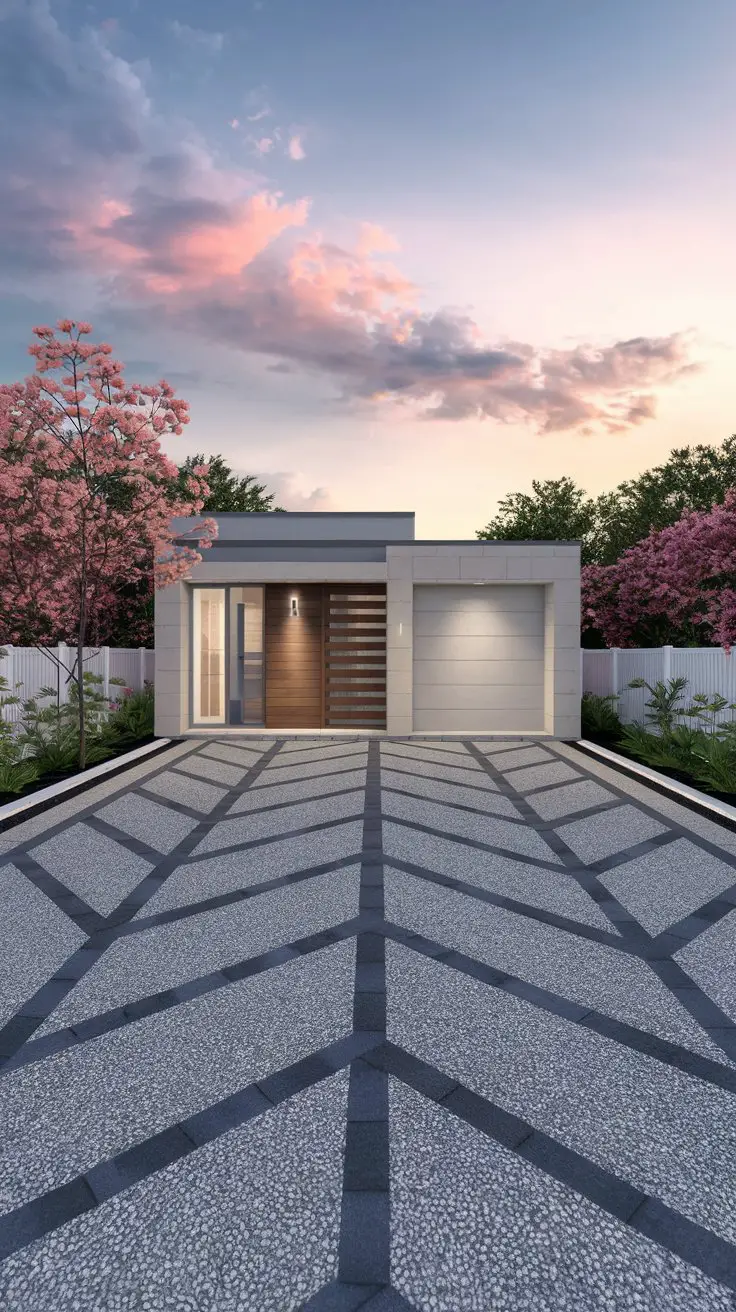
Modern Driveway with Gravel and Geometric Patterns
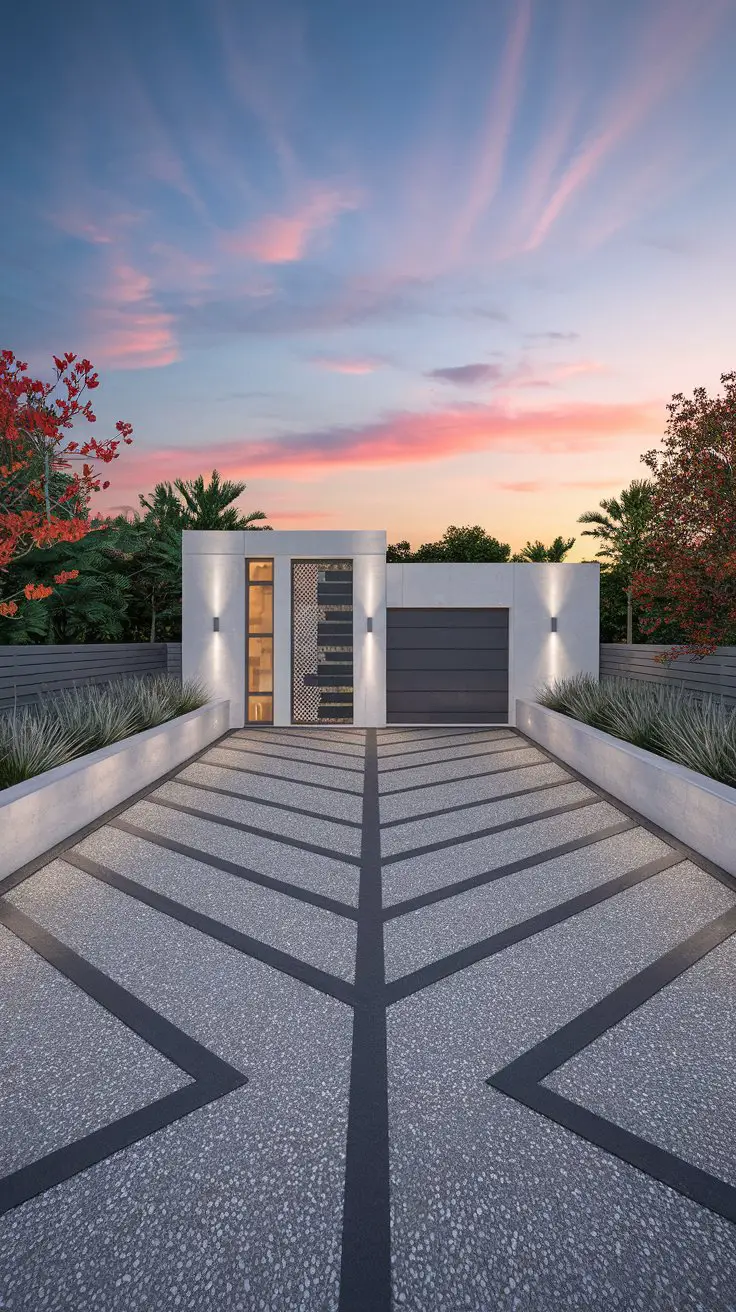
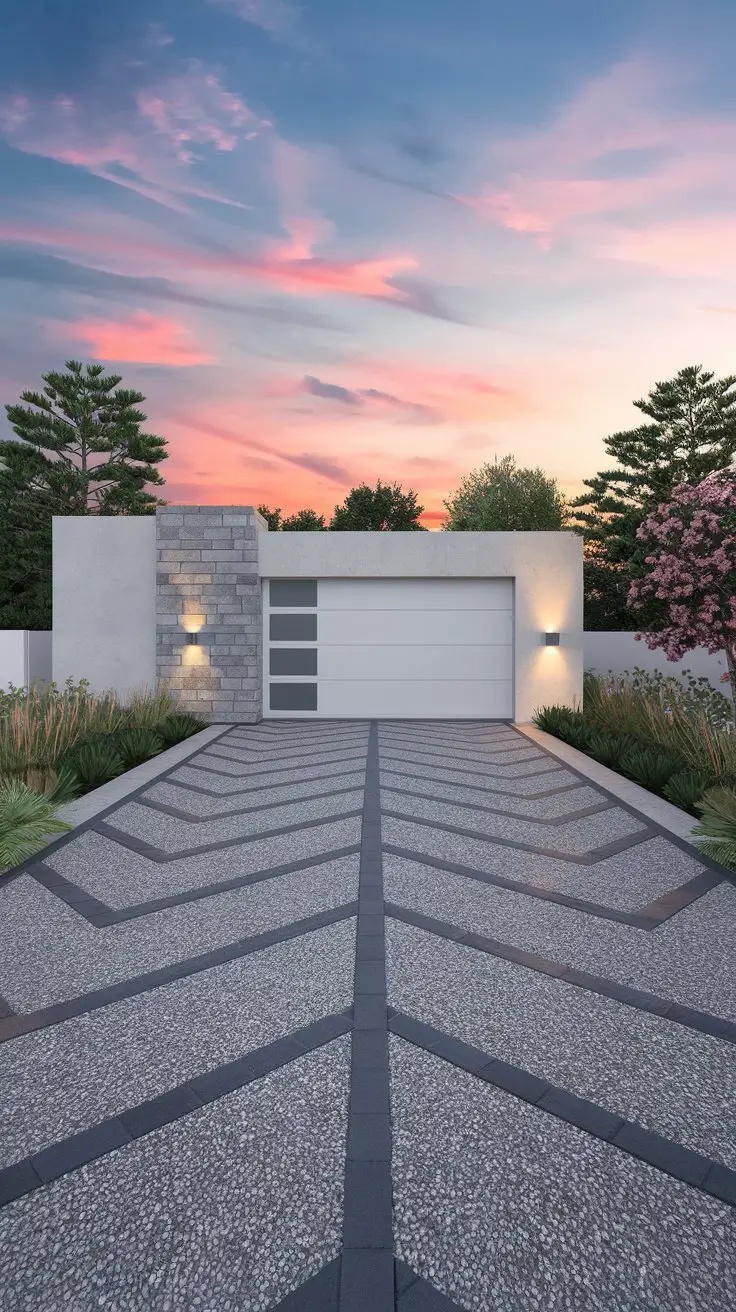
Transform your driveway into a contemporary masterpiece by incorporating gravel with sleek geometric patterns. This design style blends functionality with modern aesthetics, providing a durable surface that can withstand vehicle traffic while adding a unique visual element to your property. The use of gravel not only promotes water drainage but also introduces a textured look that can be customized with different colors and pattern designs.
How to Achieve a Modern Driveway with Gravel and Geometric Patterns
Design the Layout
:
– Outline your driveway design on paper, focusing on geometric patterns like chevrons, hexagons, or stripes.
– Consider how these shapes will align with the overall architecture of your home.
Select Gravel Type and Color
:
– Choose gravel in different sizes and colors to create contrast and depth in your pattern.
– Opt for neutral shades like grays, whites, and blacks to achieve a sleek, cohesive look.
Prepare the Driveway Base
:
– Clear the area of any old pavement, grass, or debris.
– Level the ground and install a weed barrier fabric to prevent unwanted growth.
Create the Geometric Patterns
:
– Use wooden stakes and string to outline the geometric shapes on the driveway.
– Place metal or plastic edging along the string lines to help maintain the shape during the gravel installation.
Spread the Gravel
:
– Fill the outlined sections with the chosen gravel type, ensuring an even thickness across the driveway.
– Compact the gravel using a tamping tool to provide a stable, durable surface.
Color Scheme
:
– Utilize contrasting colors within the gravel to define the geometric patterns clearly.
– Consider a monochromatic scheme with varying tones of a single color for a modern aesthetic.
– Enhance the design with minimalistic plantings or lighting along the edges for added visual impact.

Whimsical Garden Arches
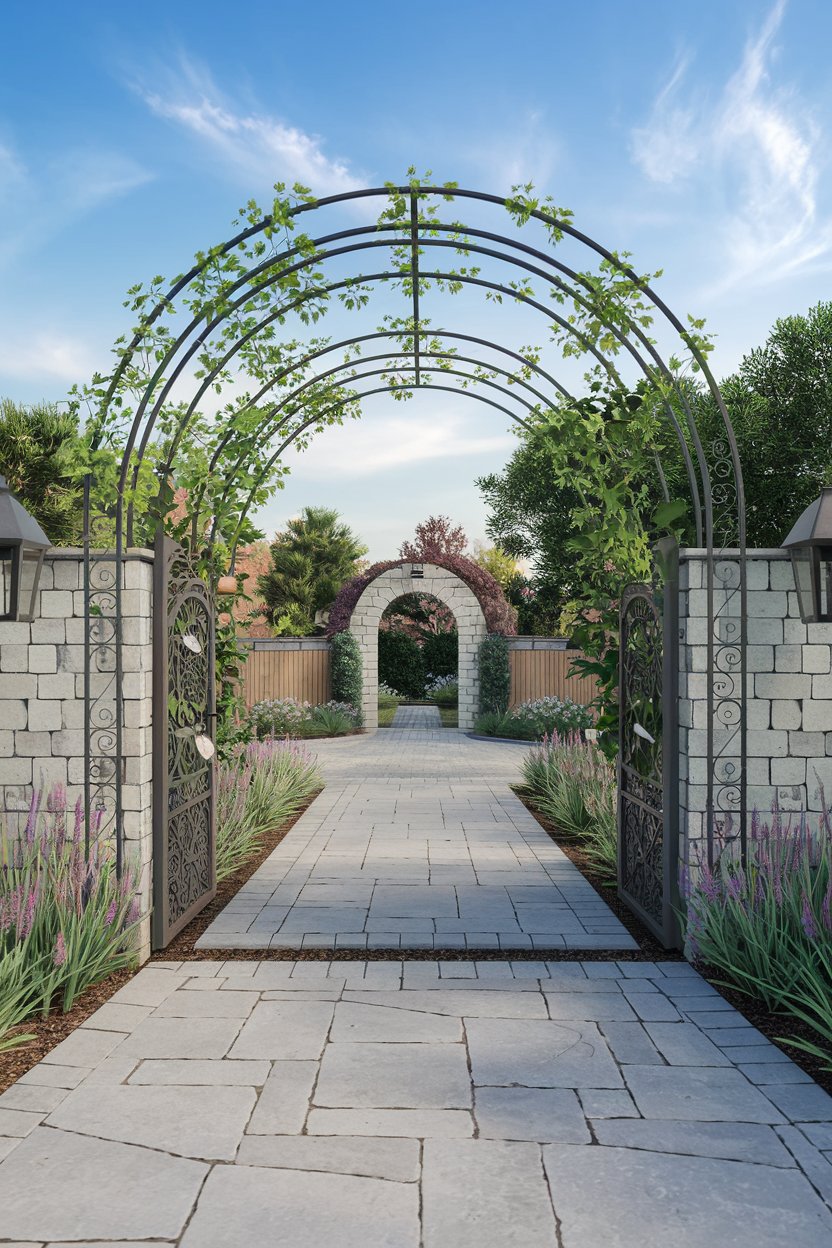
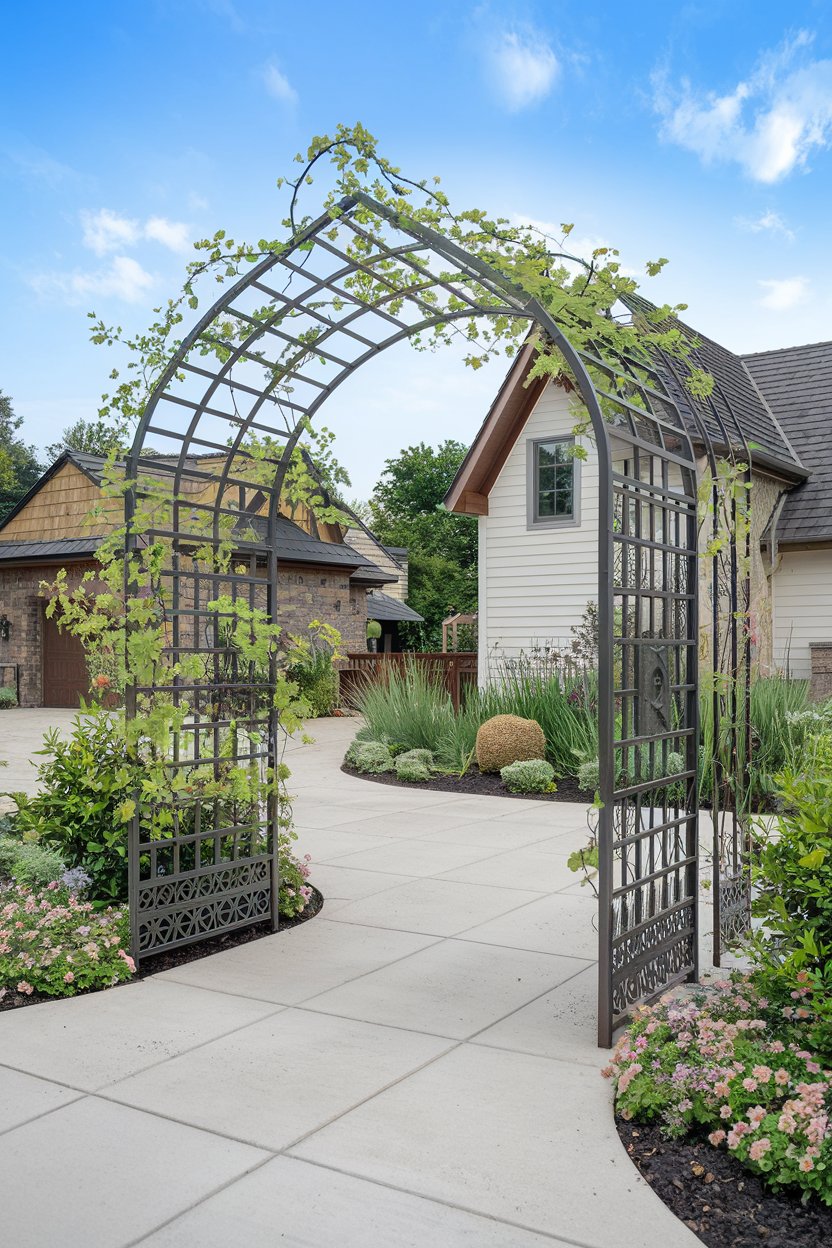
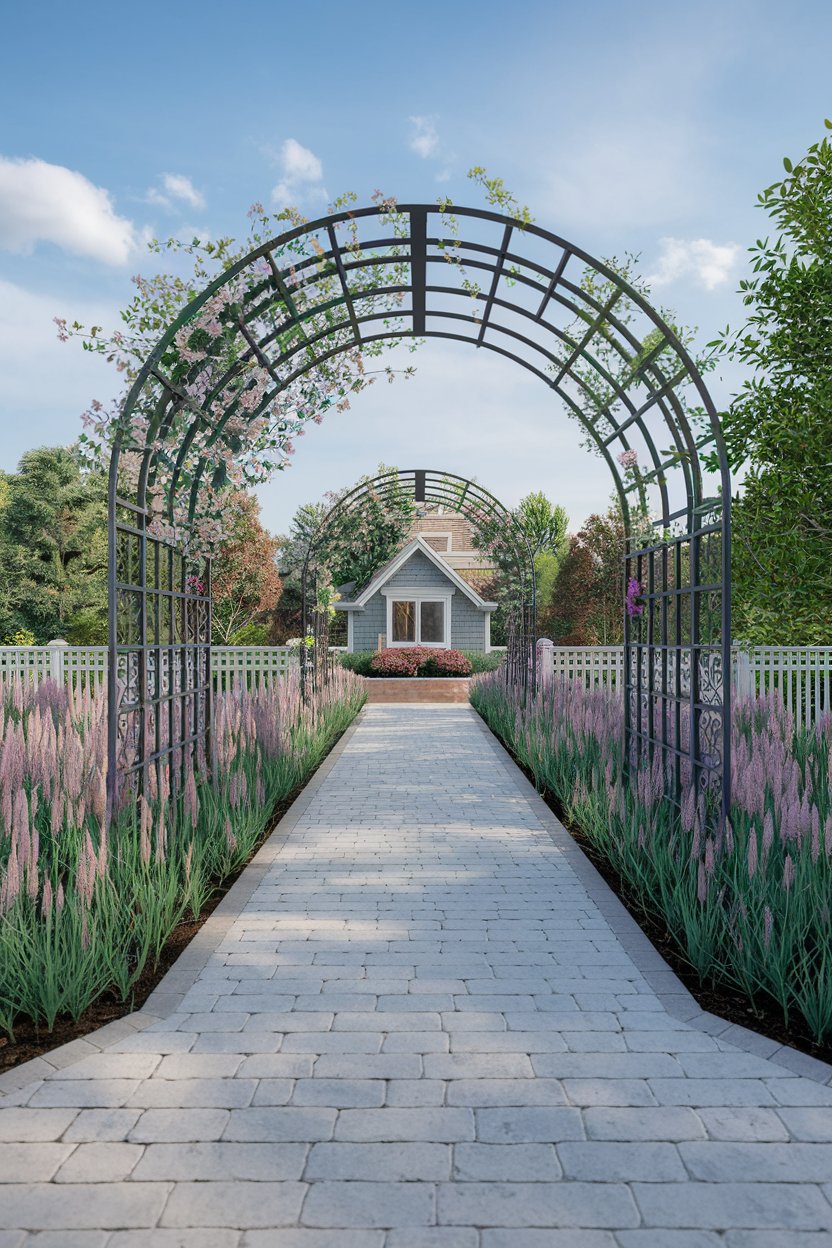
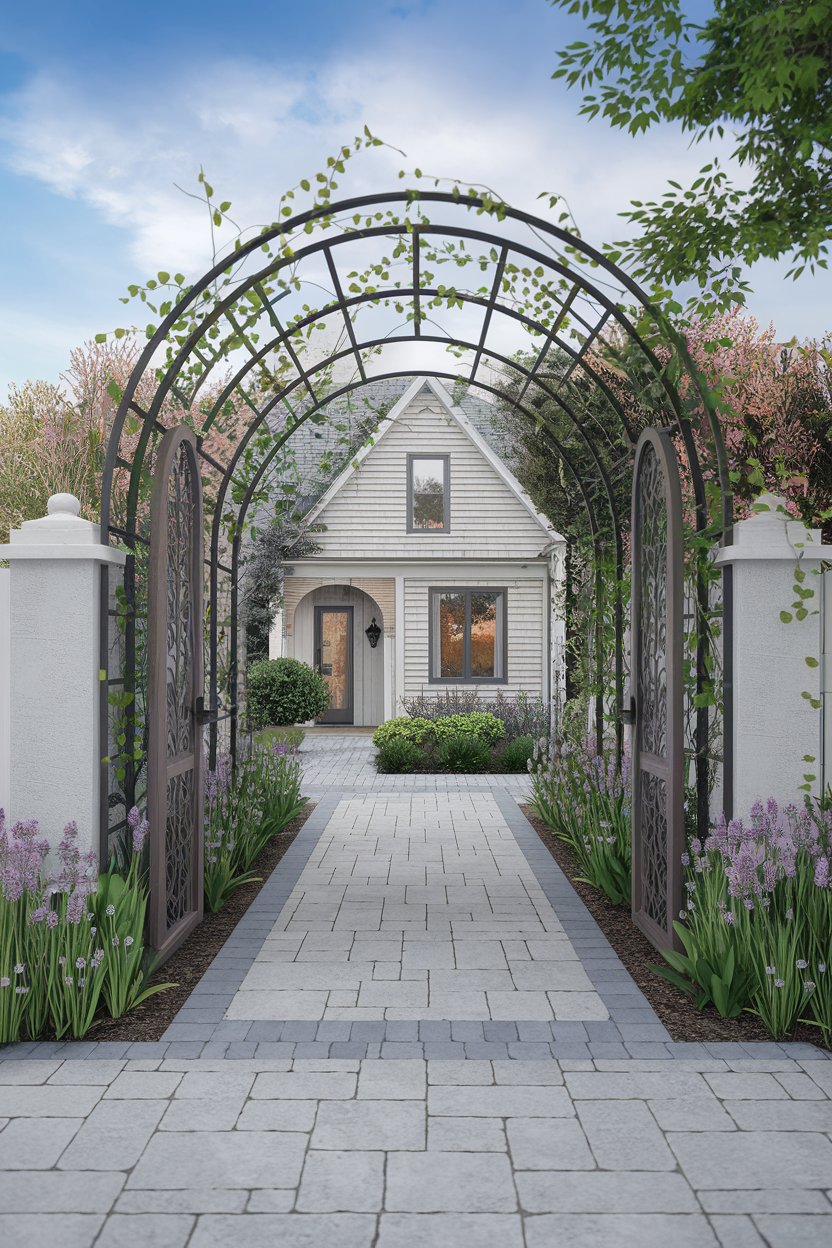
Integrating whimsical garden arches at the entrance or along your driveway can add a touch of fantasy and elegance to your landscape. These arches, adorned with climbing plants, create a natural and inviting gateway that draws the eye and enhances curb appeal. By using a variety of plants and materials, you can customize the arches to reflect the unique style of your home, turning an ordinary driveway into a picturesque path.
How to Achieve Whimsical Garden Arches
Choose the Arch Structure
:
– Select sturdy materials like wrought iron, wood, or metal that can support climbing plants.
– Consider prefabricated arches or custom designs that match your aesthetic.
Determine Placement
:
– Position the arches at the driveway entrance or at intervals along the driveway for a continuous theme.
– Ensure sufficient space for plants to grow and for vehicle clearance beneath the arches.
Select Climbing Plants
:
– Choose plants that thrive in your climate, such as roses, clematis, or wisteria.
– Opt for a mix of flowering and evergreen varieties for year-round interest.
Install and Secure the Arches
:
– Anchor the arches firmly in the ground to withstand weather conditions and plant weight.
– Ensure stability to maintain the structure’s integrity as plants mature.
Plant and Train Climbers
:
– Plant climbing varieties at the base of each arch, spacing them to allow for full coverage.
– Gently guide and secure stems to the structure using plant ties or clips as they grow.
Maintain the Arches
:
– Regularly prune plants to encourage new growth and prevent overgrowth.
– Monitor arches for structural integrity and make necessary adjustments or repairs.
Color Scheme
:
– Utilize soft, romantic hues like pastels and whites for a fairy-tale look.
– Incorporate vibrant blooms such as climbing roses to add striking color contrasts.
– Coordinate with surrounding landscape elements to maintain a cohesive aesthetic.
