Transforming your living space into a haven of style and functionality doesn’t have to break the bank. Enter the world of IKEA Besta hacks, where creativity meets affordability. With its sleek modular design, the Besta series offers endless possibilities for customization, allowing you to tailor each piece to suit your aesthetic and organizational needs. From chic media centers to sophisticated storage solutions, these hacks elevate your interior decor while maximizing space efficiency. In this article, we’ll explore some of the most innovative and gorgeous IKEA Besta hacks that promise to refresh and refine your home.
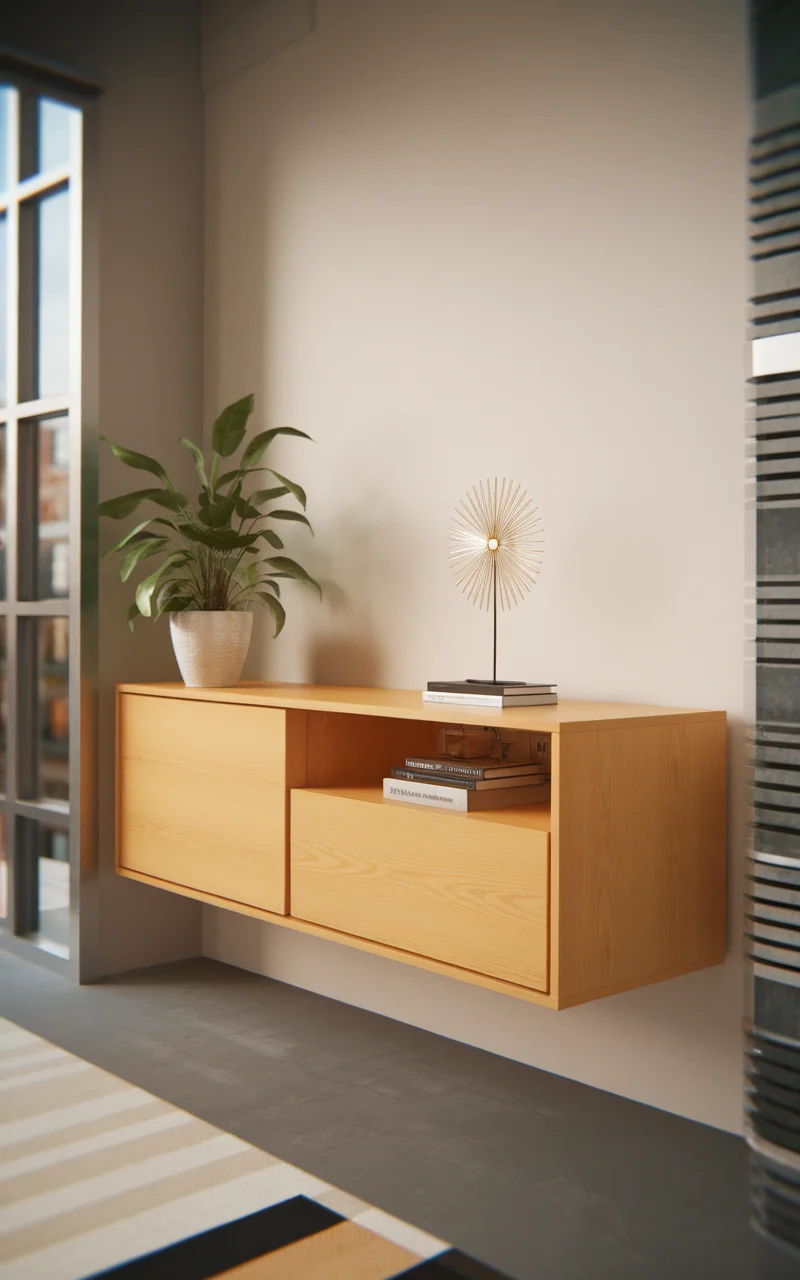
Floating Credenza for a Sleek and Modern Look
Transform your IKEA Besta unit into a stylish floating credenza that will add a touch of elegance and modernity to your living room or dining area. This hack not only elevates the unit off the ground, creating an airy feel, but also offers a sleek surface to display decor items, house plants, or even a flat-screen TV. The floating credenza enhances the sense of space in a room, making it an excellent solution for smaller spaces or those looking to embrace a minimalist aesthetic.
How to Achieve It
Materials Needed:
– IKEA Besta unit
– Wall mounting hardware kit (often sold separately)
– Level
– Drill and appropriate drill bits for your wall type
– Measuring tape
– Stud finder
– Wall anchors (if not securing to studs)
– Optional: Paint or adhesive vinyl for customization
Steps to Create a Floating Credenza:
1.
Select the Location:
– Choose the ideal wall where you want to place your floating credenza. Ensure it is clear of obstructions and can safely support the weight.
2.
Prepare the Wall:
– Use a stud finder to locate the wall studs. Mark these areas with a pencil, as securing the unit to studs will provide the best support.
– If studs are not available at your desired location, use appropriate wall anchors that can support the weight of the Besta unit.
3.
Mount the Besta Unit:
– With the help of a level, mark the desired height for your floating credenza. Ensure it’s level to avoid any imbalance issues.
– Drill pilot holes into the marked studs or insert wall anchors as needed.
– Securely attach the wall mounting hardware to both the Besta unit and the wall, following the instructions provided with the hardware kit.
4.
Customize (Optional):
– For a unique look, paint the doors of the Besta in a modern color scheme like matte black, navy blue, or taupe.
– Alternatively, apply adhesive vinyl in patterns or textures that match your home decor.
5.
Final Touches:
– Once the unit is securely mounted, add your choice of decor items. Consider balancing functional storage with aesthetic pieces to maintain a clutter-free appearance.
Color Scheme Suggestion:
– Opt for a neutral base color for the Besta unit, and accentuate with metallic handles or natural wood tones. Add a pop of color with decorative items or wall art above the credenza, complementing a contemporary or Scandinavian-inspired space.
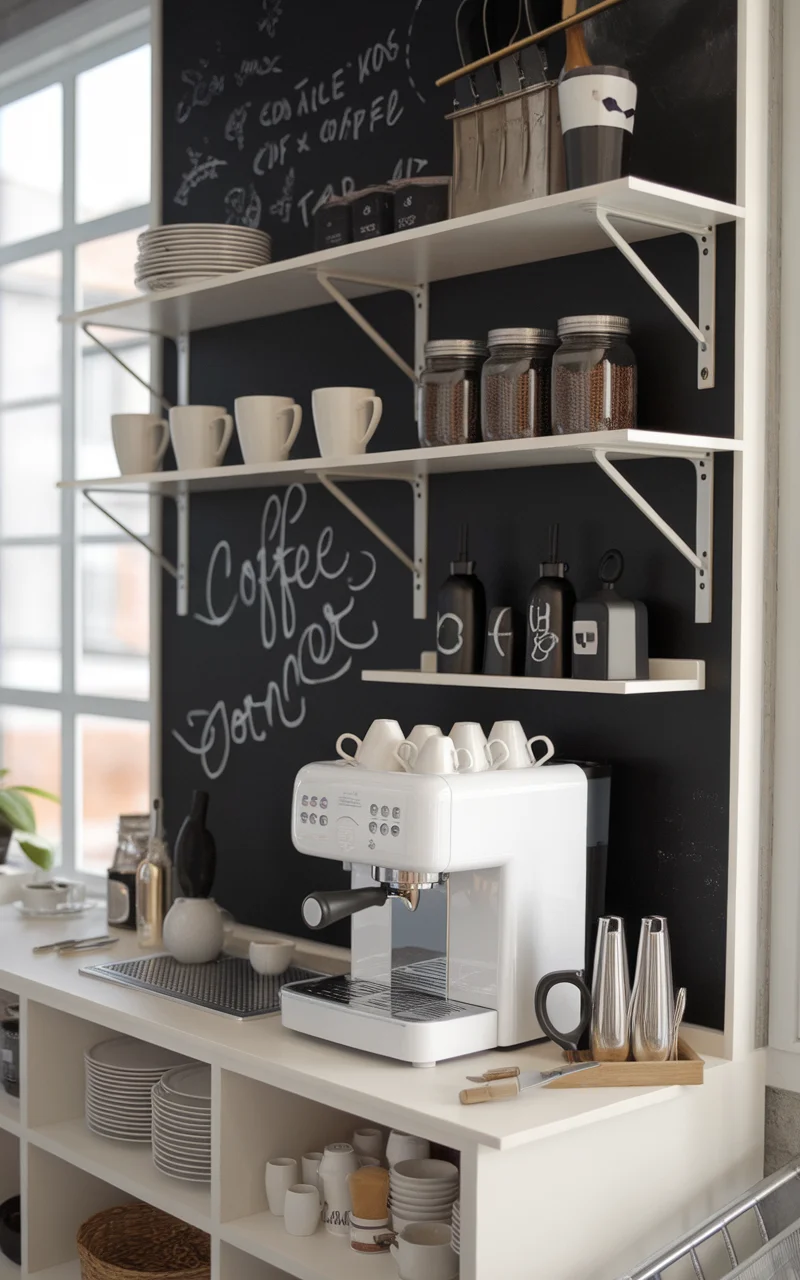
Chic Besta Coffee Bar Transformation
Turn your IKEA Besta unit into a chic and functional coffee bar that is perfect for entertaining guests or simply enjoying your morning routine. This hack helps you organize your coffee essentials while adding a dash of style to your kitchen or dining area. With some creative touches, your Besta unit will become the centerpiece of your coffee corner, offering both functionality and aesthetic appeal.
How to Achieve It
Materials Needed:
– IKEA Besta unit
– Chalkboard paint or chalkboard adhesive
– Floating shelves
– Cup hooks
– Drill and screwdriver
– Measuring tape
– Coffee accessories (espresso machine, mugs, jars for coffee beans)
– Optional: Bar tool set or tray
Steps to Create a Chic Coffee Bar:
1.
Select the Location:
– Select a convenient spot in your kitchen or dining area where the coffee bar can be easily accessed and does not disrupt the flow of the space.
2.
Install Floating Shelves:
– Using your measuring tape and level, mark the positions for installing the floating shelves above the Besta unit. These will hold coffee mugs, jars, and other coffee accessories.
– Drill holes and securely mount the shelves with appropriate wall anchors or screws.
3.
Add Cup Hooks:
– Attach cup hooks beneath the floating shelves. These provide a place to hang cups or small kitchen tools, adding functionality and a touch of whimsy.
4.
Customize with Chalkboard Paint:
– Paint a section of the Besta doors or a nearby wall area with chalkboard paint to create a space for writing coffee notes, schedules, or artistic doodles.
– Alternatively, apply chalkboard adhesive for an easy, removable option.
5.
Organize Coffee Essentials:
– Inside the Besta unit, organize your coffee machine, beans, and coffee tools. Use containers or baskets to keep everything tidy and accessible.
– Consider adding a small tray or bar set on top of the unit for cocktail supplies if you wish to expand its function beyond coffee.
Color Scheme Suggestion:
– Choose a sleek black or deep espresso stain for the Besta unit door fronts to complement metal finishes or wooden elements in the space. Opt for vibrant accent colors in your mug or accessories, such as turquoise or mustard yellow, to bring the coffee bar to life.
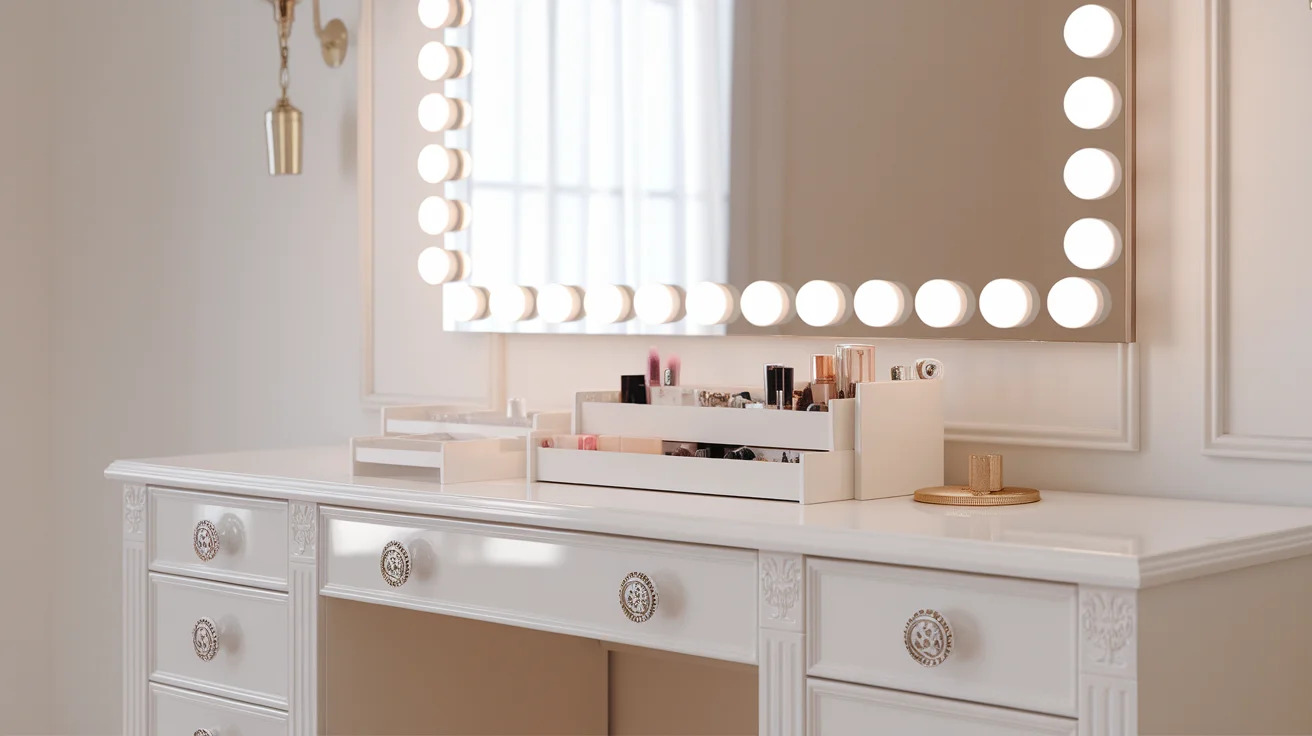
Luxurious Besta Vanity with a Hollywood Glam Twist
Turn your IKEA Besta unit into a luxurious vanity that exudes Hollywood glamour, perfect for primping and storing your beauty essentials. This hack transforms the Besta into an elegant piece with a touch of vintage luxe, making your bedroom or dressing area feel like a celebrity’s dressing room. With the addition of some striking hardware and creative finishing touches, you can enjoy a stunning, functional vanity that invites stylish organization.
How to Achieve It
Materials Needed:
– IKEA Besta unit
– Large mirror or mirror panels
– Vanity light strip or Hollywood-style bulb set
– Decorative knobs or handles
– Paint or adhesive in a glamorous finish (such as metallic or high-gloss lacquer)
– Makeup organizer trays
– Optional: Velvet or textured fabric for lining drawers
Steps to Create a Luxurious Vanity:
1.
Select the Location:
– Pick a spot in a well-lit area of your room, ideally near a window or good overhead lighting, for natural illumination.
2.
Customize the Besta Exterior:
– Apply paint or adhesive in your desired finish to elevate the Besta’s look. Consider options like high-gloss white, rich metallics, or even a mirrored finish for a glamorous touch.
3.
Install the Mirror:
– Secure a large mirror above the Besta or cover its doors with mirror panels. This addition creates the classic vanity look and enhances light reflection.
4.
Attach Vanity Lighting:
– Mount a strip of Hollywood-style lights around the mirror, providing ample lighting for beauty tasks. Ensure the lights are evenly distributed for optimal illumination.
5.
Add Decorative Hardware:
– Swap out the standard knobs or handles on your Besta unit with more opulent options like crystal or gold-finished hardware. This small change adds a personalized touch of luxury.
6.
Organize Beauty Essentials:
– Use organizer trays inside the Besta to keep makeup and beauty tools neat and accessible. Consider lining the drawers with velvet or textured fabric for a softer finish.
Color Scheme Suggestion:
– Opt for a monochrome or neutral base such as white, champagne, or blush and accentuate with gold or rose gold details to enhance the glam factor. Adding pops of color through makeup holders, flowers, or a statement chair can offer a vivid contrast for a sophisticated, inviting vanity space.
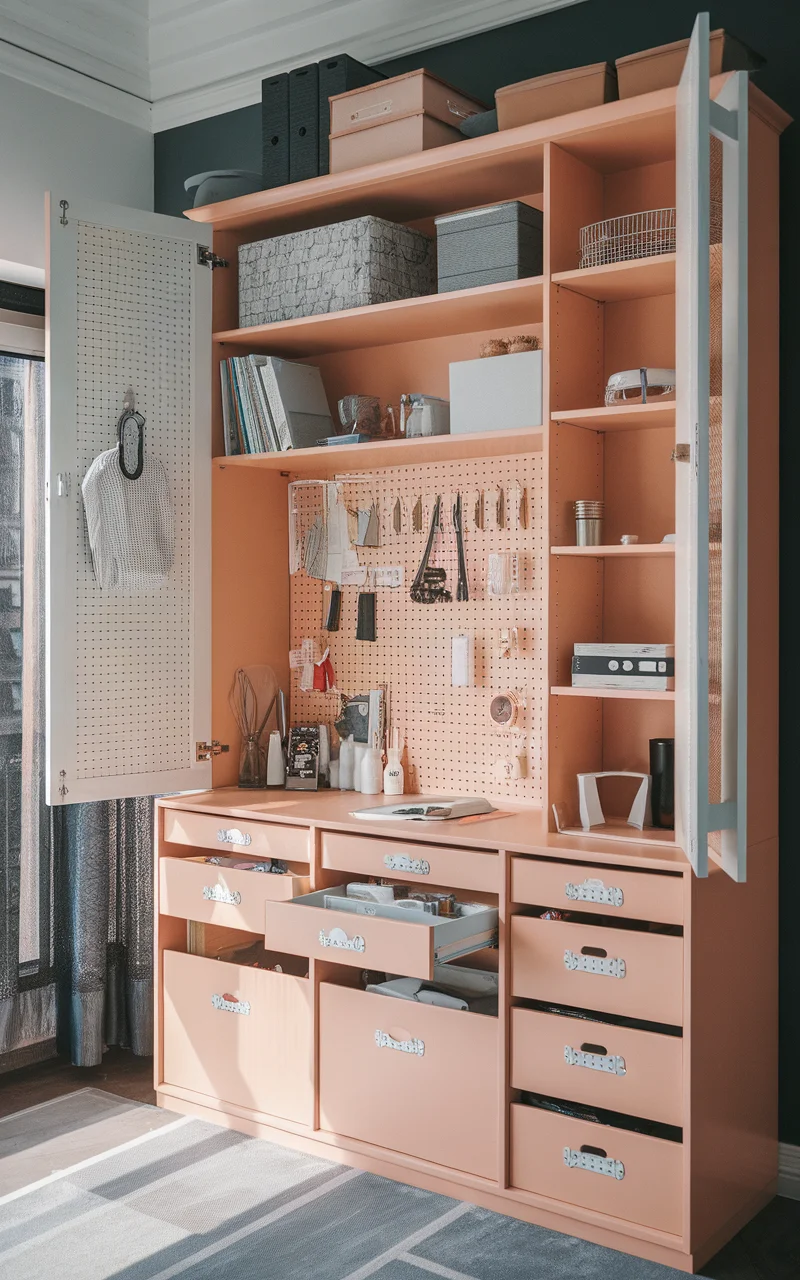
Stylish Besta Home Office Storage Solution
Revamp your IKEA Besta unit into a sleek home office storage solution that combines functionality with aesthetics. This hack will help you organize your workspace, offering an ideal setup for working from home. The modified Besta will provide ample storage for office supplies, books, and documents, while also serving as a chic backdrop for video calls or an inspiring area to power through your tasks.
How to Achieve It
Materials Needed:
– IKEA Besta unit
– Pegboard or wire grid panel with hooks
– Modular storage baskets or boxes
– Shelf inserts or adjustable shelves
– Drawer organizers
– Paint or contact paper for customization
– Optional: Decorative handles or labels
Steps to Create a Home Office Storage Solution:
1.
Select the Location:
– Choose a convenient spot in your home office or designated work area. Ensure you have enough space for the unit to store all your essentials.
2.
Customize and Assemble the Besta Unit:
– Assemble the Besta unit according to the instructions. Consider painting or applying contact paper to the doors or sides to match your office decor.
3.
Add Shelving and Organization:
– Install shelf inserts or adjustable shelves within the Besta to create different compartments for books, binders, and office equipment.
– Use drawer organizers for stationery, small electronics, or other necessities.
4.
Install a Pegboard or Wire Grid Panel:
– Attach a pegboard or wire grid to the interior of the Besta doors or above the unit. Use hooks, baskets, and clips to easily display and access your frequently used items.
5.
Incorporate Storage Boxes and Baskets:
– Organize loose items such as cables, chargers, or paper in modular storage baskets or boxes. Label them for easy identification and retrieval.
6.
Add Decorative Elements (Optional):
– Swap out the standard door handles with decorative ones that suit your office’s style.
– Consider labeling shelves or baskets with stylish tags for a personalized touch.
Color Scheme Suggestion:
– Opt for a neutral color palette such as white or grey for a calming work environment. Add touches of color through accessories like bookends, a desk lamp, or a statement piece of wall art. Incorporate natural elements like potted plants to bring a fresh and inviting feel to your home office setup.
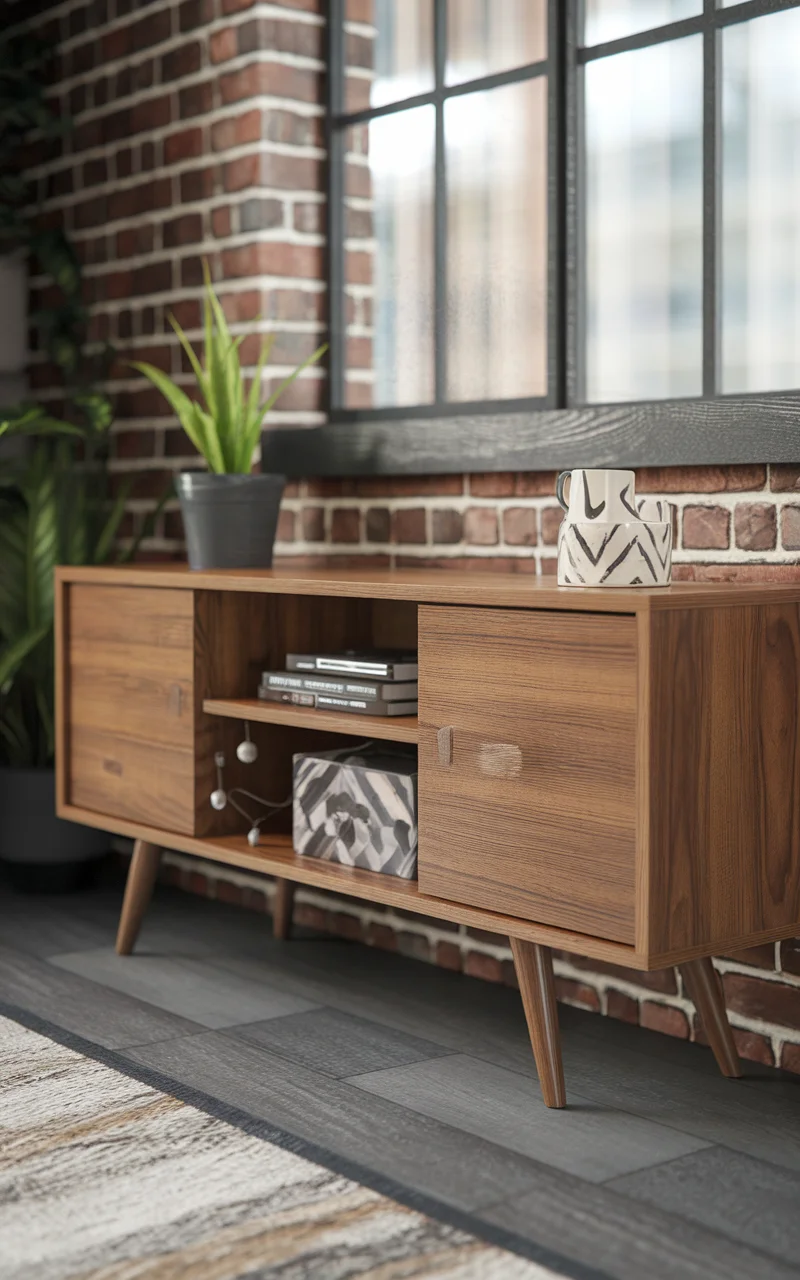
Mid-Century Modern Besta Media Console
Transform your IKEA Besta unit into a stylish mid-century modern media console that brings a timeless charm to your living space. This hack will allow you to create a functional and aesthetically pleasing centerpiece for your living room. By incorporating vintage-inspired elements like tapered legs and woodgrain finishes, this reimagined Besta unit will seamlessly blend into your entertainment area, offering both storage and display options for your media devices, books, and decorative items.
How to Achieve It
Materials Needed:
– IKEA Besta unit
– Set of four tapered wooden legs with mounting plates
– Mid-century style handles or knobs
– Wood stain or contact paper in a woodgrain finish
– Drill and screwdriver
– Measuring tape
– Optional: Furniture leg pads or sliders
Steps to Create a Mid-Century Modern Media Console:
1.
Select the Location:
– Choose a location in your living room or entertainment area where the media console will be prominently featured.
2.
Assemble the Besta Unit:
– Assemble the Besta unit according to the instructions, ensuring it’s secure and stable.
3.
Customize the Exterior:
– Apply wood stain or contact paper with a woodgrain finish to the front doors of the Besta unit to achieve a mid-century look.
– Allow the stain to dry completely before proceeding if you are using it.
4.
Install Tapered Legs:
– Turn the assembled Besta unit upside down on a soft surface.
– Attach tapered wooden legs to each corner using the mounting plates and screws, ensuring they are evenly spaced and aligned.
– For added protection and easy repositioning, consider attaching furniture leg pads or sliders to the bottom of each leg.
5.
Add Mid-Century Style Handles:
– Replace the standard handles or knobs with mid-century style options for a cohesive look. Align and install the new hardware using a drill or screwdriver.
6.
Organize Your Media Essentials:
– Inside the Besta, arrange your media devices, books, or decorative items. Use cable management solutions to keep cords tidy and out of sight.
Color Scheme Suggestion:
– Opt for warm wood tones like walnut or teak for a classic mid-century aesthetic, and pair them with neutral colors such as white or cream for a balanced look. Accent with brass or matte black hardware to enhance the vintage vibe. Adding accessories like retro-inspired art or geometric patterns can further elevate the style of your space.
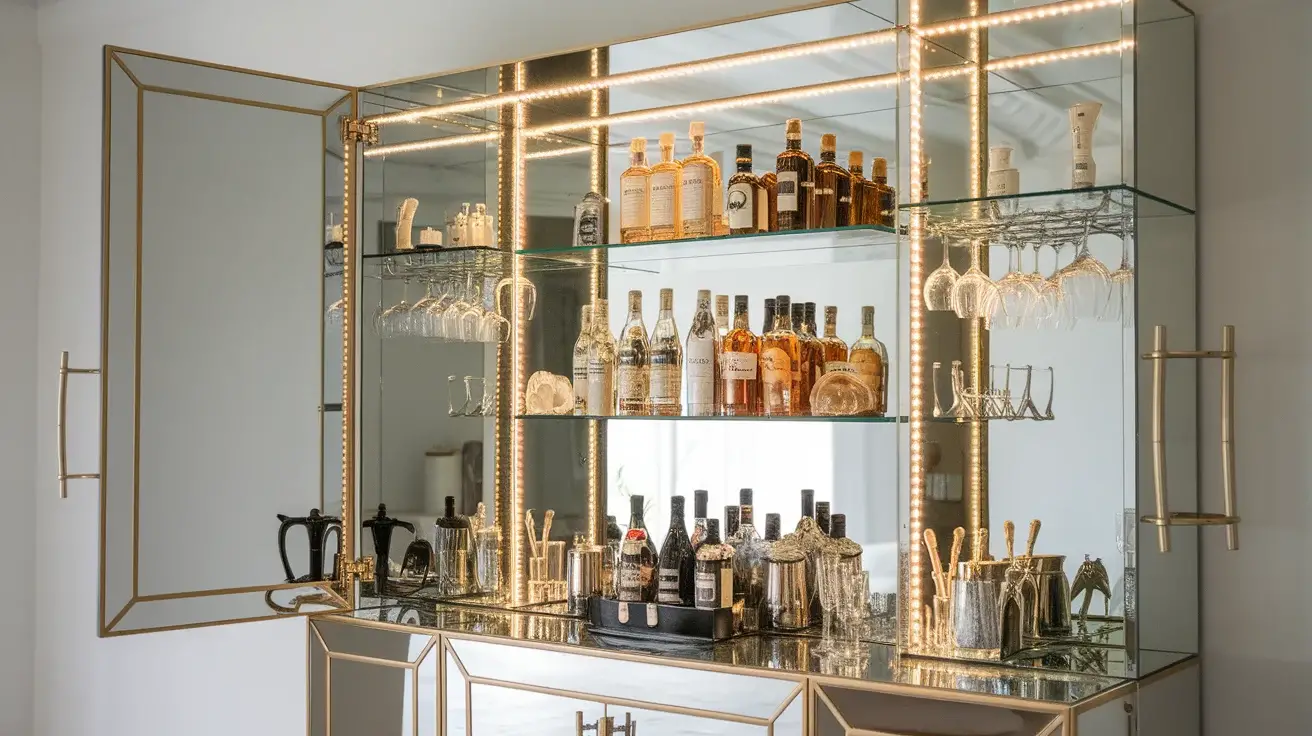
Glamorous Besta Bar Cabinet Upgrade
Enhance your IKEA Besta unit by converting it into a glamorous bar cabinet that exudes sophistication and style. This hack will create a chic focal point in your living room or dining area, perfect for entertaining guests or simply enjoying your favorite beverages in a luxurious setting. With the addition of mirror panels, elegant hardware, and thoughtful organization, your Besta will serve as both a functional and beautiful home bar.
How to Achieve It
Materials Needed:
– IKEA Besta unit
– Mirror panels or mirrored contact paper
– Gold or brass handles or knobs
– Glass shelves (custom cut to fit inside the unit)
– LED strip lights
– Wine glass racks
– Drinkware and bar accessories
– Drill and screwdriver
– Adhesive suitable for mirrors
Steps to Create a Glamorous Bar Cabinet:
1.
Select the Location:
– Choose a stylish and accessible location in your living or dining space where the bar cabinet will stand out.
2.
Install Mirror Panels:
– Apply mirror panels or mirrored contact paper to the front doors of the Besta to add a reflective and luxurious touch.
– Use adhesive that is appropriate for mirrors, ensuring they are securely attached and aligned.
3.
Add Glass Shelves:
– Measure and custom cut glass shelves to fit the interior of the Besta unit. These will elegantly display your drinkware and spirits.
– Use appropriate shelf supports to safely install the glass shelves within the unit.
4.
Add LED Strip Lights:
– Install LED strip lights along the interior edges of the Besta to elegantly illuminate your bar display. Consider using color-changing options for added ambiance.
5.
Attach Wine Glass Racks:
– Secure wine glass racks to the underside of a shelf to optimize space and keep glassware neatly stored and easily accessible.
6.
Customize with Elegant Hardware:
– Replace the standard Besta handles or knobs with luxurious options made of gold or brass, adding a touch of elegance and cohesiveness to the design.
7.
Organize Bar Essentials:
– Strategically arrange your favorite spirits, glassware, and bar tools within the unit, using trays or decorative storage options to keep everything tidy and stylish.
Color Scheme Suggestion:
– Opt for a sophisticated color palette with metallics such as gold or brass, combined with deep hues like royal blue or rich emerald for a striking contrast. Enhance the opulent feel with crystal decanters, chic glassware, and luxurious bar tools to complete the look.
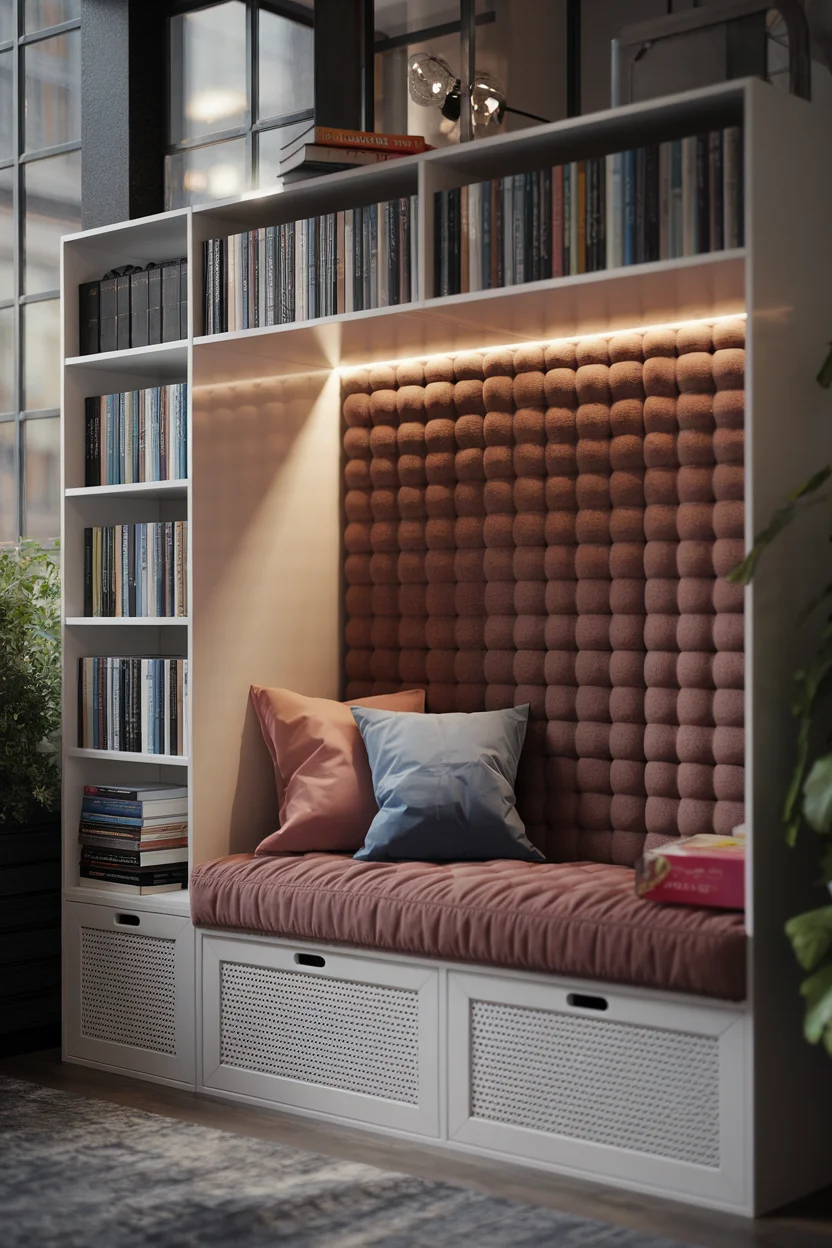
Cozy Besta Reading Nook with Built-in Bookshelf
Create a cozy reading nook by transforming your IKEA Besta unit into a built-in bookshelf complete with a comfortable seating area. This hack transforms an unused corner of your living room or a bedroom into a dedicated space for relaxation and escape with a good book. The Besta unit serves as a functional bookshelf, while incorporating a plush seating area and ambient lighting to create a serene and inviting atmosphere.
How to Achieve It
Materials Needed:
– IKEA Besta unit
– Thick cushion or foam seating pad
– Upholstery fabric of your choice
– Bookshelf inserts or additional Besta shelves
– Brackets and screws
– LED strip lights or sconce lights
– Throw pillows
– Measuring tape
– Staple gun or needle and thread
Steps to Create a Cozy Reading Nook:
1.
Select the Location:
– Choose a quiet corner in your living room or bedroom with enough space for both the Besta unit and a seating area.
2.
Assemble the Besta Unit:
– Follow assembly instructions for the Besta unit, ensuring it is secure and stable. Position it against the selected wall to form the base of your reading nook.
3.
Create the Seating Area:
– Measure the top of the Besta unit to determine the size of the seating cushion needed. Cut foam to fit the surface, if necessary.
– Cover the foam with your chosen upholstery fabric, using a staple gun or needle and thread to secure it neatly.
4.
Install Shelving:
– Add bookshelf inserts or additional shelves inside the Besta unit to accommodate your book collection.
– Secure with brackets and screws as needed to support the weight of books.
5.
Add Lighting:
– Install LED strip lights along the top interior edges of the Besta unit for ambient light, or mount sconce lights on the wall above the nook for focused reading light.
6.
Add Accents and Personal Touches:
– Arrange throw pillows on the seating pad for comfort and style. Consider matching or complementary colors to the cushion fabric.
– Organize books and add decorative items like plants or bookends for personalization.
Color Scheme Suggestion:
– Opt for soft, neutral tones like ivory, beige, or grey for the seating fabric to create a calming environment. Use warm accent colors like rust or mustard in the throw pillows and accessories to provide visual interest and coziness. Incorporate wood accents or greenery to enhance the natural, relaxing feel of the nook.
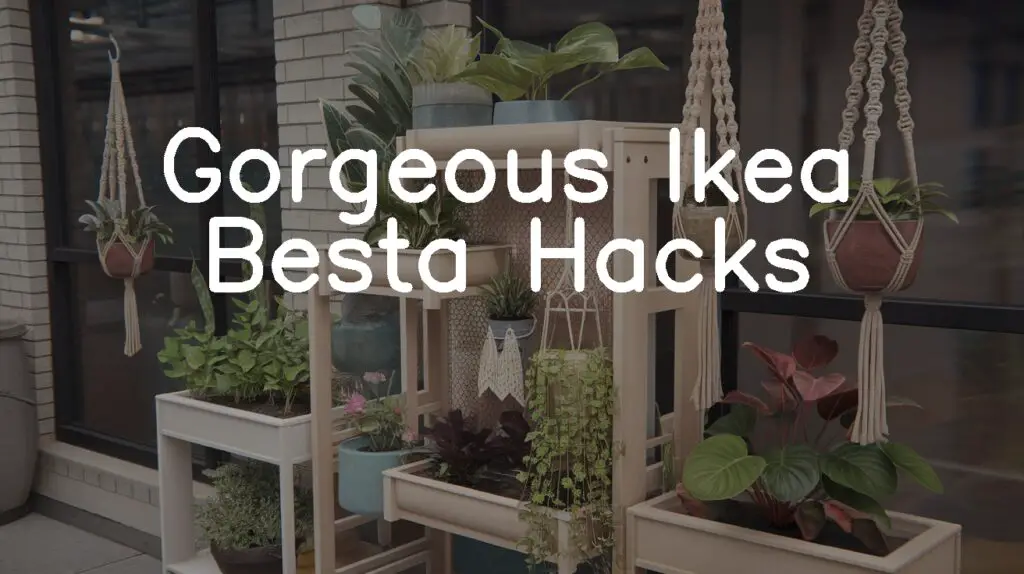
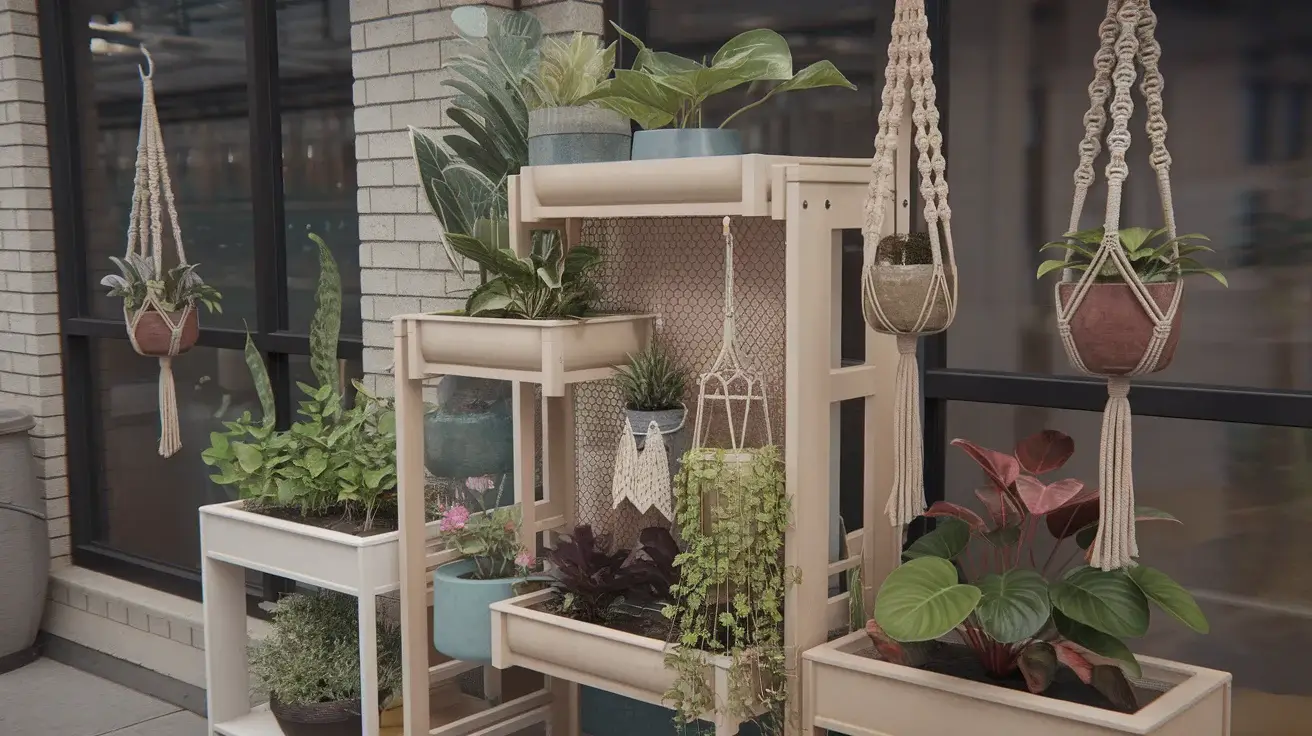
Boho Chic Besta Planter Stand
Give your IKEA Besta unit a bohemian makeover by transforming it into a stylish planter stand that brings nature indoors. This hack will not only provide a unique way to showcase your favorite plants but also add texture and warmth to your living space, echoing the relaxed and eclectic vibes of boho decor. By incorporating natural elements and earthy tones, this Besta transformation will offer a refreshing and vibrant focal point for any room.
How to Achieve It
Materials Needed:
– IKEA Besta unit
– Tapered wooden legs (optional for extra height)
– Rope or jute for decorative wrapping
– Macrame plant hangers
– Indoor planters and pots
– Drill and screwdriver
– Sandpaper (optional)
– Wood stain or natural sealant (optional)
– Optional: Woven baskets or decorative trays
Steps to Create a Boho Chic Planter Stand:
1.
Select the Location:
– Choose a well-lit area in your living space, such as near a window, to ensure your plants receive ample sunlight. Ensure there is enough room for both the Besta unit and the hanging plants.
2.
Customize the Exterior:
– If desired, enhance the natural look by sanding and applying a wood stain or sealant to the Besta doors for a rustic finish.
– Wrap sections of the Besta with rope or jute for an added boho touch. Secure the ends with a staple gun or strong adhesive.
3.
Assemble the Besta Unit:
– Assemble the unit as per instructions, ensuring it’s stable. Consider adding tapered wooden legs for added height and style.
4.
Install Macrame Plant Hangers:
– Hang macrame plant hangers from the ceiling or wall above the Besta to create vertical interest and a lush canopy effect.
5.
Arrange Planters:
– Place indoor planters on the Besta and within its shelves. Use different sizes and heights for an eclectic look. Arrange to create layers of greenery that cascade down and around the unit.
6.
Add Woven Accents:
– Incorporate woven baskets or trays to hold smaller pots or garden tools. This adds texture and complements the boho theme.
Color Scheme Suggestion:
– Use warm earth tones like terracotta, ochre, and deep greens to enhance the bohemian vibe. Incorporate natural textures through rattan, jute, and wood elements, and add pops of color with vibrant ceramic planters or patterned textiles for a cohesive look.
Scandinavian-Inspired Besta Entryway Bench
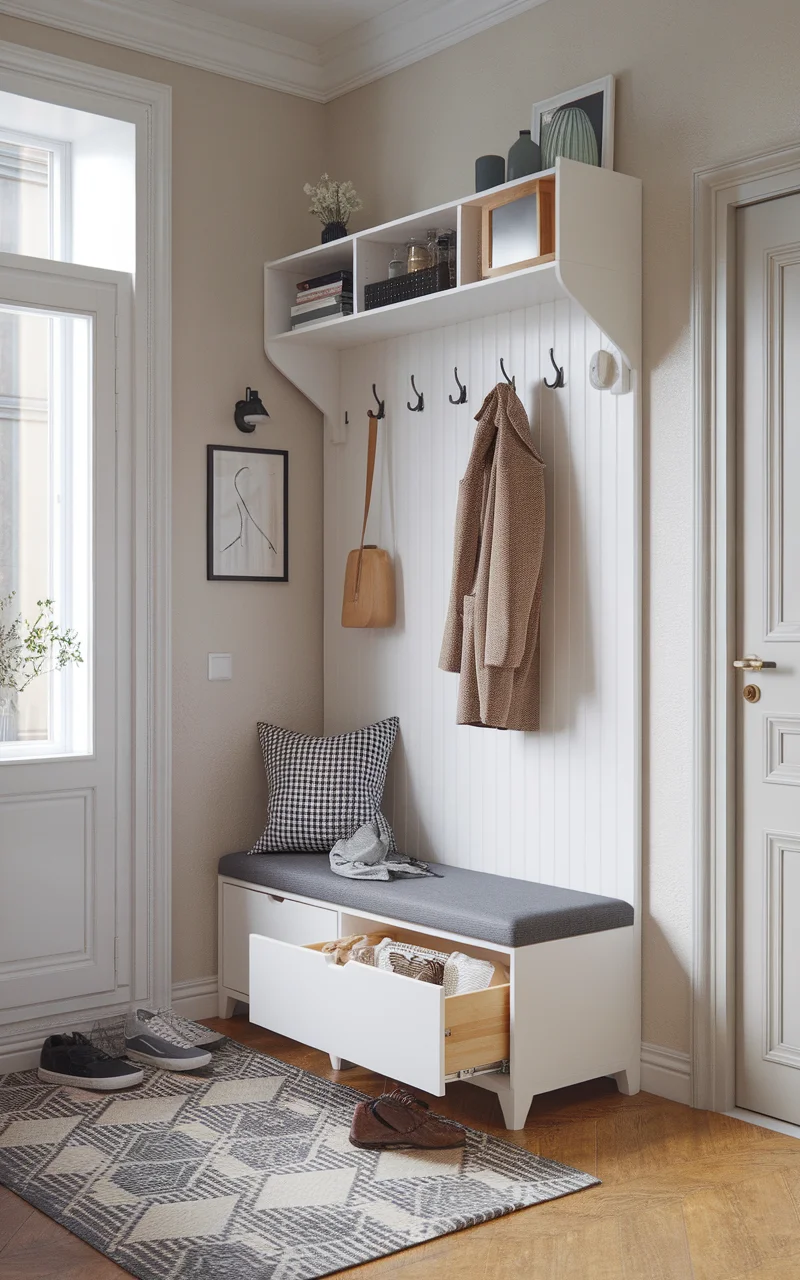
Transform your IKEA Besta unit into a Scandinavian-inspired entryway bench that combines functionality with minimalist elegance. This hack will provide a comfortable spot to sit while putting on shoes, as well as ample storage for shoes, bags, and other entryway essentials. By incorporating clean lines, neutral colors, and natural materials, the reimagined Besta unit will create a welcoming and organized entrance to your home.
How to Achieve It
Materials Needed:
– IKEA Besta unit with soft-close drawer or door
– Cushion or bench pad
– Upholstery fabric in a neutral tone
– Wooden or metal legs
– Shoe storage inserts
– Coat hooks or a modular coat rack
– Drill and screwdriver
– Measuring tape
– Staple gun or upholstery needle and thread
– Optional: Scandinavian-style decorative items (e.g., small rug, vase, or frame)
Steps to Create a Scandinavian Entryway Bench:
1.
Select the Location:
– Choose an appropriate spot in your entryway where the bench will fit comfortably and be easily accessible.
2.
Assemble the Besta Unit:
– Assemble the Besta unit according to the instructions, ensuring it is sturdy and stable.
– Attach wooden or metal legs that match your desired height for seating, using screws and a drill.
3.
Create the Seating Cushion:
– Measure the top of the Besta unit to determine the size of your cushion.
– Cut foam to fit and cover it with neutral-toned upholstery fabric. Secure the fabric using a staple gun or by sewing the edges.
4.
Install Shoe Storage:
– Inside the Besta unit, use shoe storage inserts to organize and store footwear neatly.
5.
Mount Coat Hooks or Rack:
– Install coat hooks or a modular coat rack on the wall above the bench to provide additional storage for coats, hats, and bags.
6.
Add Final Touches:
– Decorate with Scandinavian-inspired items such as a small area rug, a vase of fresh greenery, or a framed piece of artwork.
Color Scheme Suggestion:
– Use calming tones like soft white, dove grey, or light beige for the upholstery to maintain the minimalist Scandinavian aesthetic. Pair with natural wood elements and subtle metallic accents for a cohesive look. Accent with simple, clean-lined decor pieces to enhance the simplicity and warmth of the entrance space.
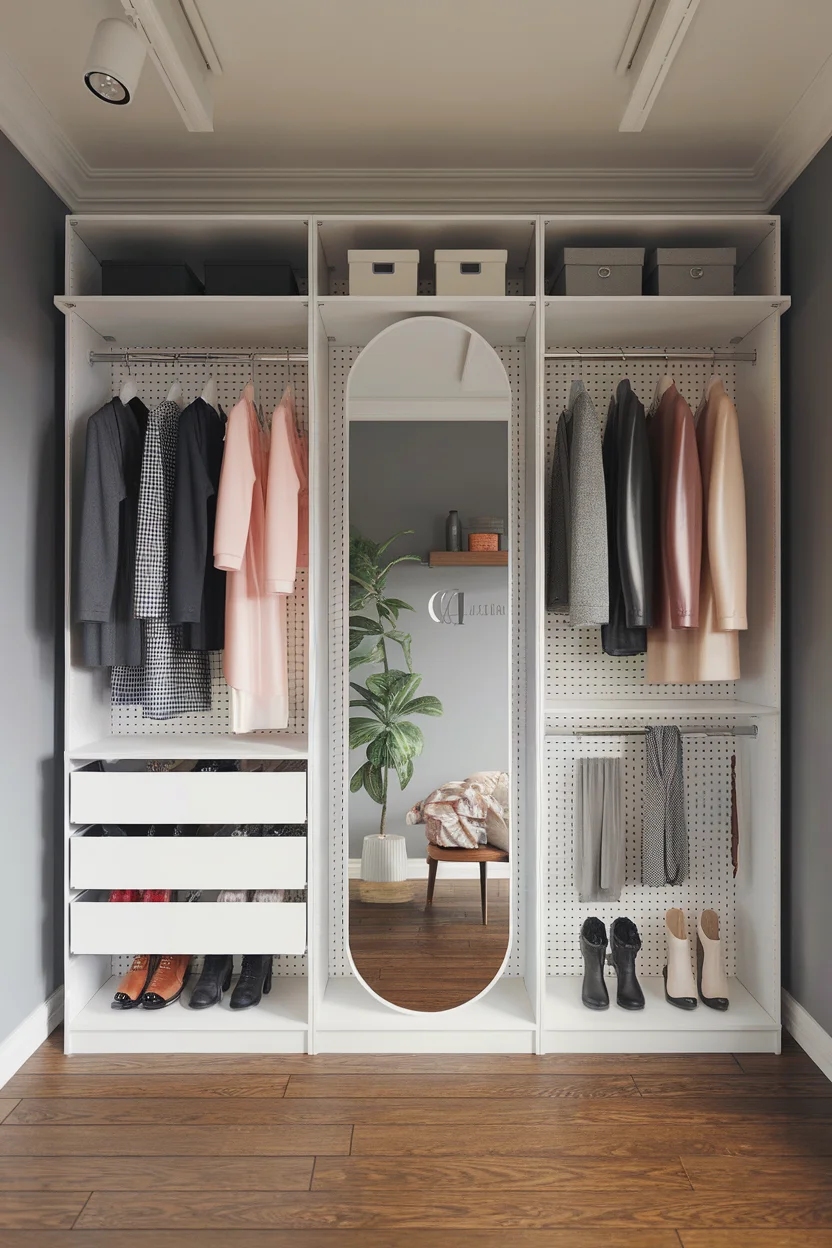
Trendy Besta Closet Organizer for Small Spaces
Maximize the space in your small apartment or bedroom by transforming an IKEA Besta unit into a trendy closet organizer. This hack is perfect for those looking to optimize storage without sacrificing style, offering an organized and visually appealing solution for your clothing and accessories. By customizing the Besta with stylish finishes and thoughtful additions, you can create a personal wardrobe station that fits neatly into any corner or wall.
How to Achieve It
Materials Needed:
– IKEA Besta unit
– Tension rods or clothing rails
– Pegboard or cork board for accessories
– Hanging organizers or bins
– Hooks and brackets
– Paint or stick-on wallpaper for customization
– Full-length mirror (optional)
– Drill and screwdriver
Steps to Create a Trendy Closet Organizer:
1.
Select the Location:
– Choose a spot in your bedroom or closet area where the Besta unit can be easily accessed and integrated into the space layout.
2.
Customize the Besta Exterior:
– Enhance the unit’s appearance by painting it in a chic color or applying stick-on wallpaper for texture. This adds a stylish touch and can help it blend with your room’s decor.
3.
Install Clothing Rails:
– Attach tension rods or clothing rails inside the Besta to hang clothes. Secure them with brackets for strength and adjust the height according to your needs.
4.
Attach Accessory Board:
– Install a pegboard or cork board on an inner door of the Besta to hang accessories like hats, jewelry, and scarves. Use hooks and pegs for easy arrangement.
5.
Organize with Hanging Bins:
– Use hanging organizers or bins within the Besta for folded clothes or shoes. These will keep your items tidy and maximize vertical storage.
6.
Add a Mirror (Optional):
– Attach a full-length mirror to the exterior door of the Besta to create a convenient dressing station. Ensure it is securely fastened to prevent accidents.
Color Scheme Suggestion:
– Opt for neutral tones like ivory or grey for the exterior paint to keep the look clean and modern. Add pops of color through hanging organizers or bins in complementary shades like soft teal or blush to liven up the space without overwhelming it.
