As the leaves turn golden and the air becomes crisp, the enchantment of Halloween beckons with its whimsical and eerie charm. For those with a passion for crafting, this season offers a delightful opportunity to explore the world of crochet, transforming simple yarn into spine-tingling decorations and playful accessories. Crochet Halloween patterns provide both novice and seasoned crafters a chance to infuse their homes with festive spirit and creativity, from ghoulish garlands and haunting amigurumi to cozy, themed attire. Embrace the season’s magic by diving into an array of imaginative designs that promise to enhance the spooky festivities with handmade warmth and flair.
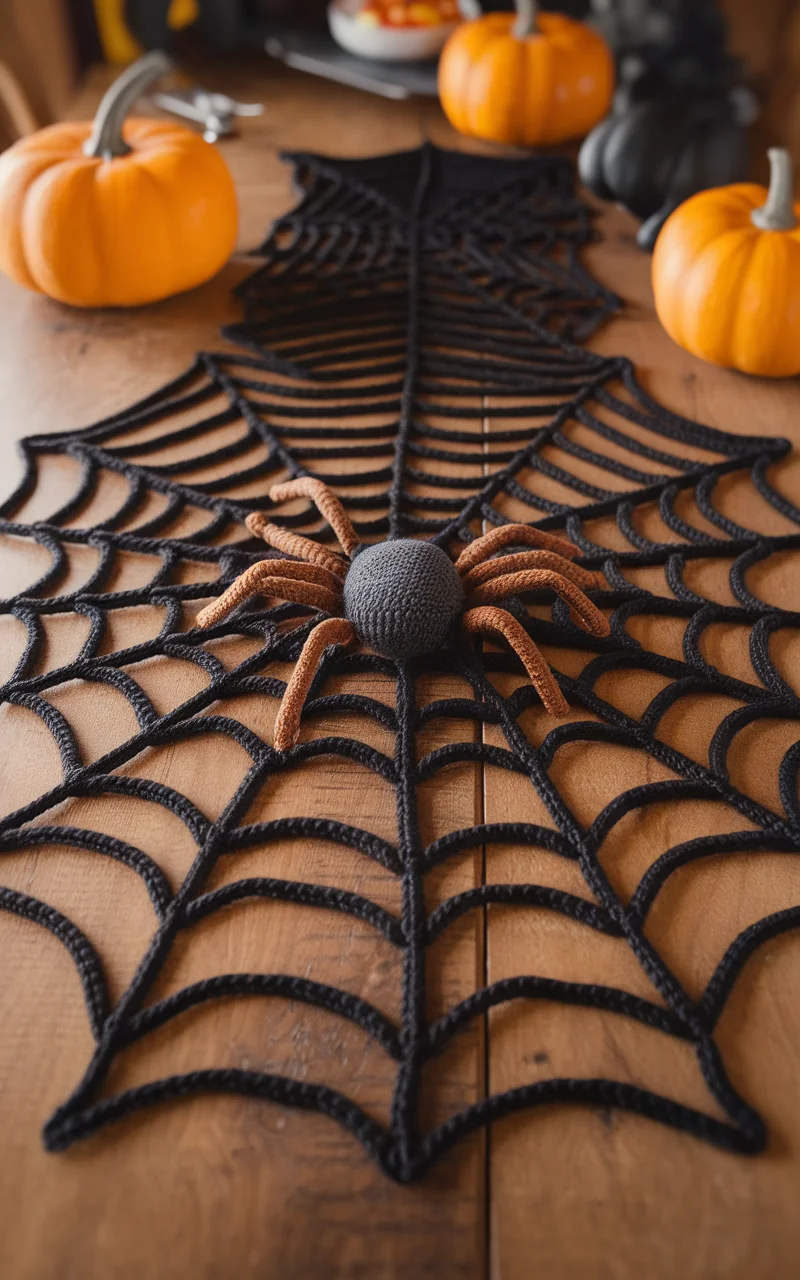
Spooky Spider Web Table Runner
Crochet a captivating Spider Web Table Runner to spookify your Halloween gatherings! This intricate piece can enthrall guests as a centerpiece for your dining table or mantle. With delicate webbing spanning across your table, it gives a spooky and elegant touch to your Halloween decor. Opt for a monochromatic color scheme with classic black yarn against a white or pale background, or add a pop of color with deep purples and oranges to further enhance the Halloween theme.
How to Achieve It
Materials Needed:
– Black crochet thread or yarn (size according to the desired thickness)
– Crochet hook (suitable for your selected yarn/thread)
– Scissors
– Tapestry needle for weaving in ends
Steps:
Create the Centerpiece:
– Begin by crocheting a magic ring and secure it with basic single crochet to form a small circle.
– Continue to build this circle larger by adding wider sections with double crochets as you go around.
– Ensure your stitches get progressively larger every couple of rounds to give an open “net” effect.
Establish the Web Pattern:
– Shift to a chain-stitch-heavy approach to create open spaces.
– Alternate between chains and double crochets, creating peak points of the web with multiple chains anchored down.
Expand Outwards:
– Gradually expand your pattern outward using chain stitches connected by double crochets, resembling a natural spider web’s sparseness and intricacy.
– Add in strategic increases in the number of chain spaces to widen the web’s areas.
Finish the Edges:
– Add a finishing touch by crocheting an edge around the perimeter to prevent unraveling. A scalloped or picot edge can add a nice, completed look.
Blocking & Styling:
– Gently block the table runner to stretch and secure your stitches, ensuring it lies flat.
– Position on your chosen surface; optionally add a small crocheted spider as an embellishment for extra spook factor.
Color Scheme:
– For a classic look, stick with black. Alternatively, incorporate purples, oranges, and even metallic threads for a unique twist on the Halloween theme.
This project, though time-consuming, will reward your guests’ delight and add a unique flair to your Halloween decor.
Haunted Pumpkin Patch Coasters
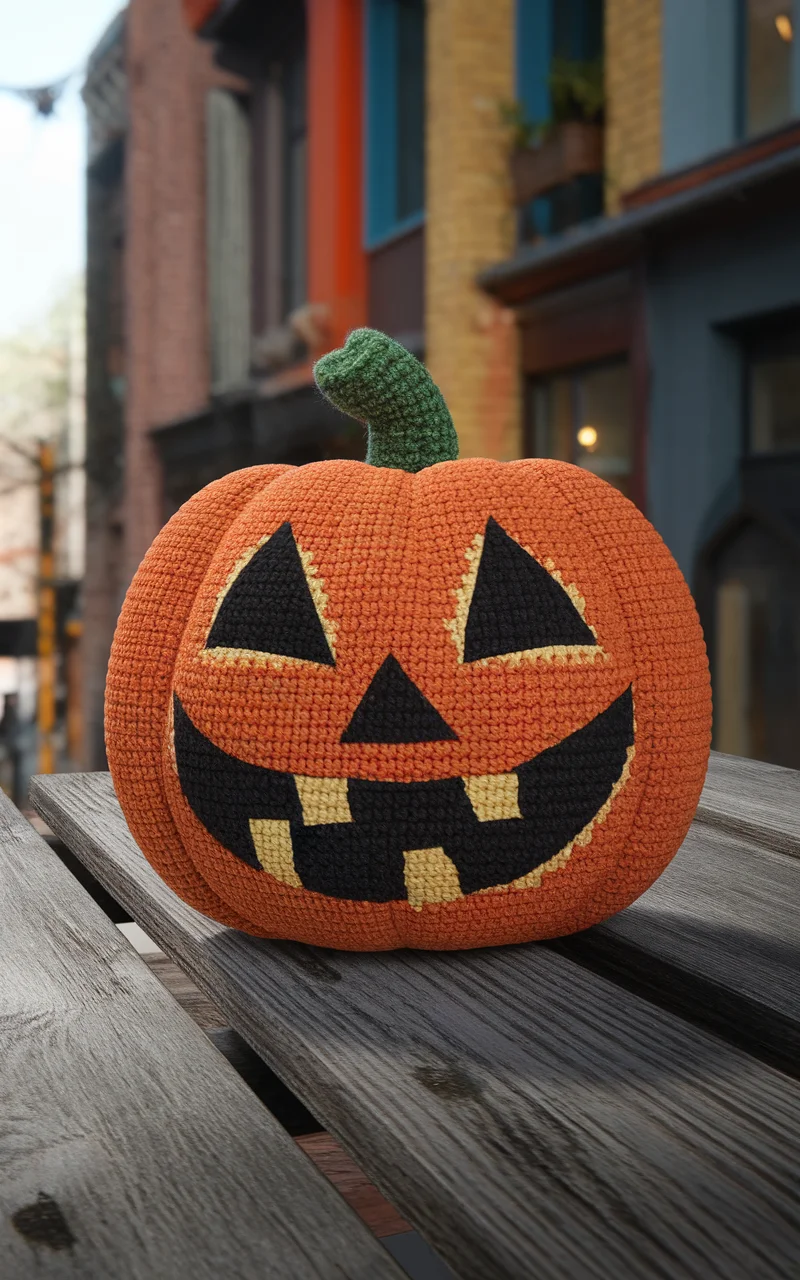
Create a set of delightful Haunted Pumpkin Patch Coasters that are perfect for adding a festive touch to your Halloween gatherings. These charming coasters can be used to protect your tables while also serving as a conversation starter among your guests. Each coaster features a unique pumpkin design, complete with whimsical jack-o’-lantern faces that bring a playful yet spooky atmosphere to your party decor. Experiment with various shades of orange, green, and black for a classic look, or mix in glowing neon yarn for a more modern twist.
How to Achieve It
Materials Needed:
– Orange, green, and black yarn (cotton or acrylic work best for durability)
– Crochet hook suitable for your chosen yarn
– Scissors
– Tapestry needle for weaving in ends
– Starch spray for shaping (optional)
Steps:
Create the Pumpkin Base:
– Start with an adjustable magic ring using orange yarn.
– Crochet in rounds, using single crochet stitches to gradually increase the size of the circle to your desired coaster size.
– Ensure the base is flat by evenly spacing your increases each round.
Design the Jack-o’-Lantern Face:
– With black yarn, chain a small number of stitches to create eyes and a mouth, sewing each feature onto the orange base.
– Alternatively, use a tapestry needle and black yarn to embroider the facial features directly onto the pumpkin base.
Finish with a Stem and Leaves:
– Attach green yarn to the top edge of the pumpkin and crochet a short, simple chain to form the pumpkin’s stem.
– For leaves, use a small amount of green yarn to crochet leaf shapes, then sew them next to the stem.
Block and Style Your Coasters:
– Gently block each coaster if necessary to ensure they lie flat.
– Optionally, use starch spray to give your coasters a longer-lasting shape.
– Display them on your table setting for a touch of Halloween charm.
Color Scheme:
– Stick to classic Halloween colors with shades of orange and green, but don’t hesitate to incorporate unique shades like bright lime green or even white for ghostly pumpkins.
These coasters are quick to make and will add a handcrafted charm to your Halloween festivities!
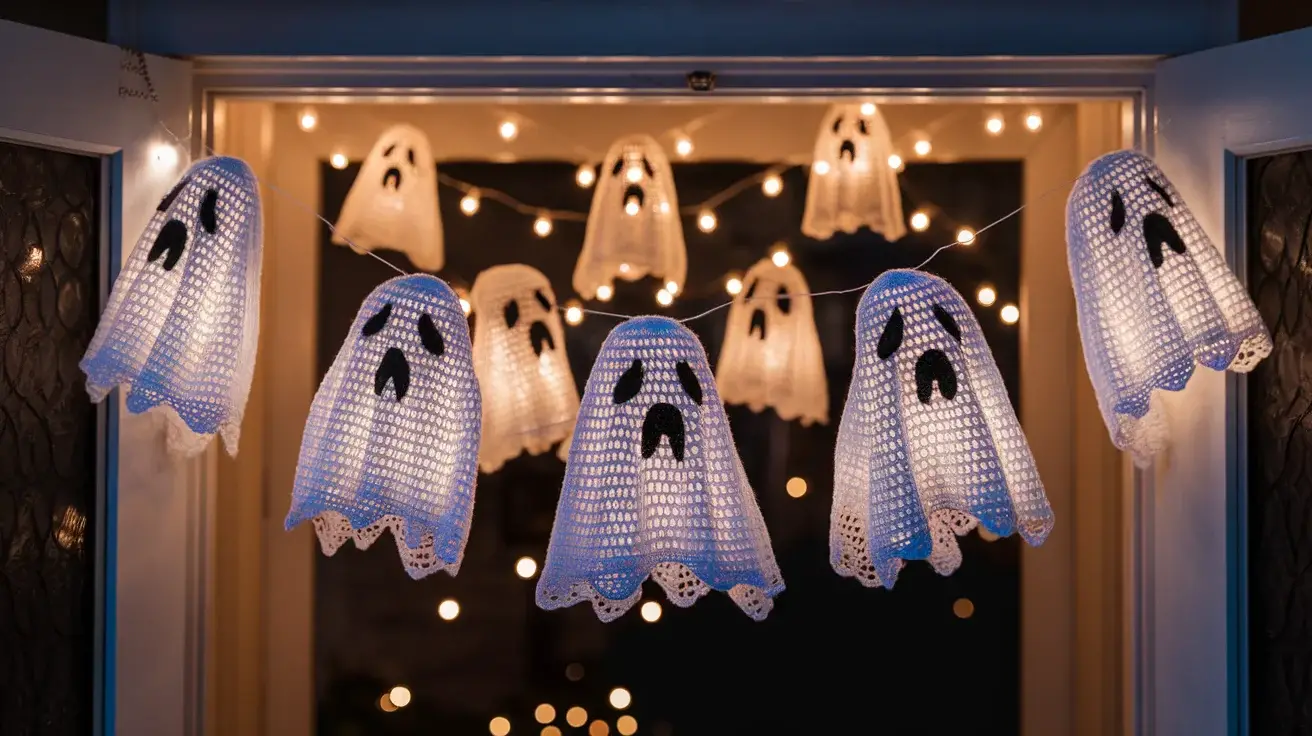
Ghostly Glow-in-the-Dark Garland
Illuminate your Halloween with a bewitching Ghostly Glow-in-the-Dark Garland. This crochet project features a series of charming, spectral figures that glow eerily in the dark, creating an enchanting ambiance for any spooky celebration. Hang them across your mantle, doorway, or window to create a haunting display that captivates visitors both day and night. Choose glow-in-the-dark yarn to make the ghostly figures come alive, and consider incorporating small LED lights for an extra spectral effect.
How to Achieve It
Materials Needed:
– Glow-in-the-dark yarn (white or pale colors for optimal glow)
– Standard weight yarn (black or dark contrasting color)
– Crochet hook suitable for your yarn
– Scissors
– Tapestry needle for weaving in ends
– Optional: Small LED fairy lights
Steps:
Create the Ghosts:
– Start with the glow-in-the-dark yarn, and create a magic ring.
– Crochet a small sphere for the head using single and half-double crochet, increasing evenly to form a round shape.
– Transition to a simple body shape by chaining and creating a more elongated form with gentle increases and decreases.
Sculpt the Ghost Details:
– Use the dark contrasting yarn to embroider simple eyes and mouth onto the face of each ghost.
– Create a faint wavy edge at the bottom of the ghost by incorporating shell stitches, which mimic ghostly trails.
Assemble the Garland:
– Create several ghosts to your desired length for the garland.
– Chain a long strand using the glow-in-the-dark or dark contrasting yarn to which you’ll attach each ghost at equal intervals.
Optional Design Enhancements:
– Thread small LED fairy lights through or around the garland for a more pronounced glow at night.
Color Scheme:
– Use white glow-in-the-dark yarn as the primary color for the ghosts to enhance the eerie glowing effect.
– Incorporate black or deep purples for detailing to create a strong contrast with the glowing elements.
– Add metallic or reflective yarns intermittently to catch light and add depth to your night-time decor.
This garland makes for a perfect Halloween decoration, adding an ethereal touch that is sure to evoke delight and wonder during your festivities.
Witch’s Hat Candy Holder
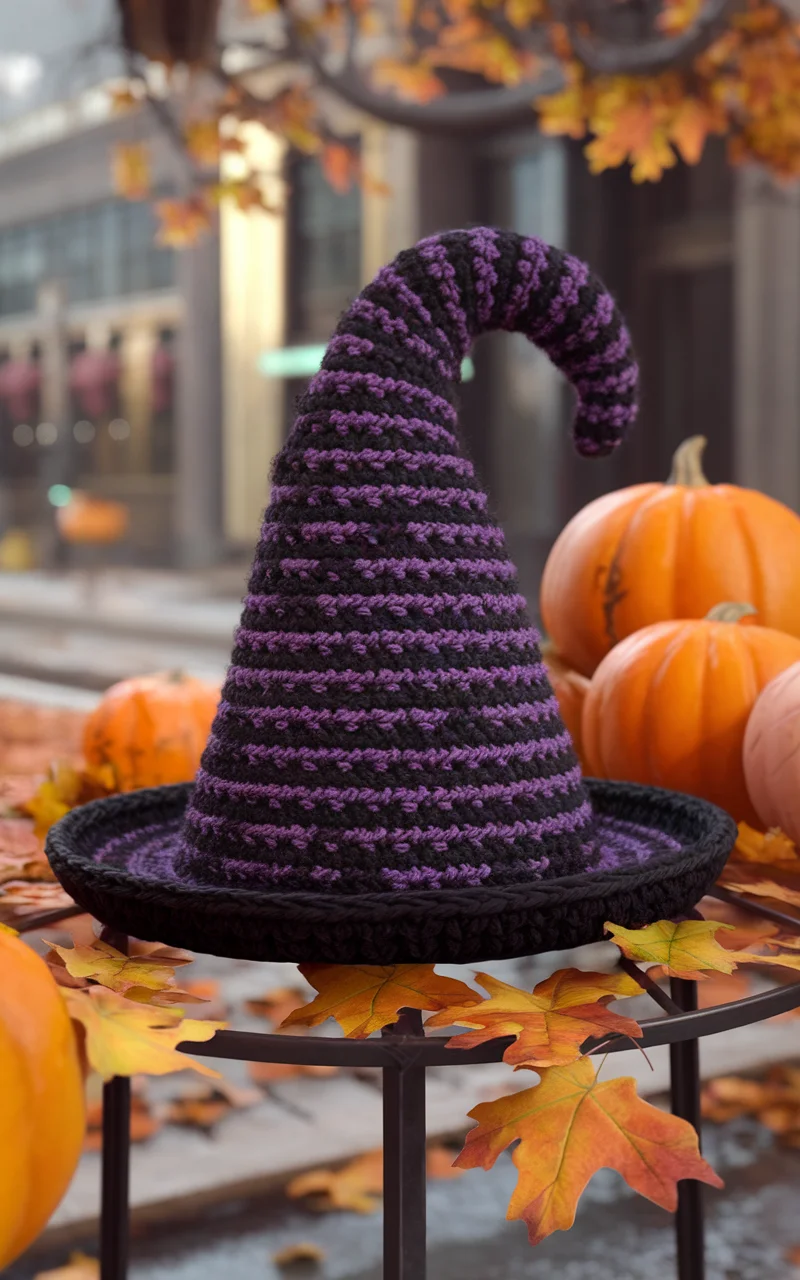
Craft a whimsical Witch’s Hat Candy Holder to add a functional yet festive touch to your Halloween decor! This charming witch’s hat, made entirely from crochet, can double as a delightful centerpiece and a handy container for candies, treats, or small toys. Its inviting allure will captivate guests as they help themselves to goodies, making it an instant favorite at your Halloween party. Opt for traditional witchy colors like deep purples and midnight blacks, or add a burst of personality with vibrant greens and oranges to match your party’s theme.
How to Achieve It
Materials Needed:
– Yarn in black, purple, and optional accent colors (ensure it is sturdy for structure)
– Crochet hook suitable for your chosen yarn
– Scissors
– Tapestry needle for weaving in ends
– Stiffening spray or diluted fabric stiffener for shape (optional)
Steps:
Create the Hat Base:
– Begin with the brim using black yarn. Crochet in rounds starting with a magic ring or an adjustable loop.
– Use single crochets, gradually increasing as you go around to form a solid and even brim for your hat.
Build the Hat’s Cone:
– Once the brim is complete, switch to purple yarn for the hat’s conical portion.
– Start at the center of the brim and crochet in a spiral, decreasing evenly as you work upwards to form the towering witch’s hat shape.
– Maintain a consistent tension to ensure the cone stands upright.
Add Details and Embellishments:
– With a contrasting color, like orange or green, crochet a band to wrap around the base of the cone and sew it in place.
– Consider adding embellishments such as small crocheted buckles, stars, or mini spiders for extra flair.
Structural Enhancements:
– If needed, spray the hat with a stiffening spray or lightly coat with fabric stiffener to maintain its shape especially if the yarn lacks natural stiffness.
– Allow to dry fully before use.
Color Scheme:
– Classic Halloween colors like deep black for the hat body with a rich purple for the cone can create a traditional witchy aesthetic.
– Utilize greens, oranges, or even metallics for accents to inject life and match your specific Halloween theme.
This Witch’s Hat Candy Holder not only serves a functional purpose by storing your treats but also acts as a delightful conversation piece that guests will remember long after your Halloween event has ended.
Creepy Cheshire Cat Pillow
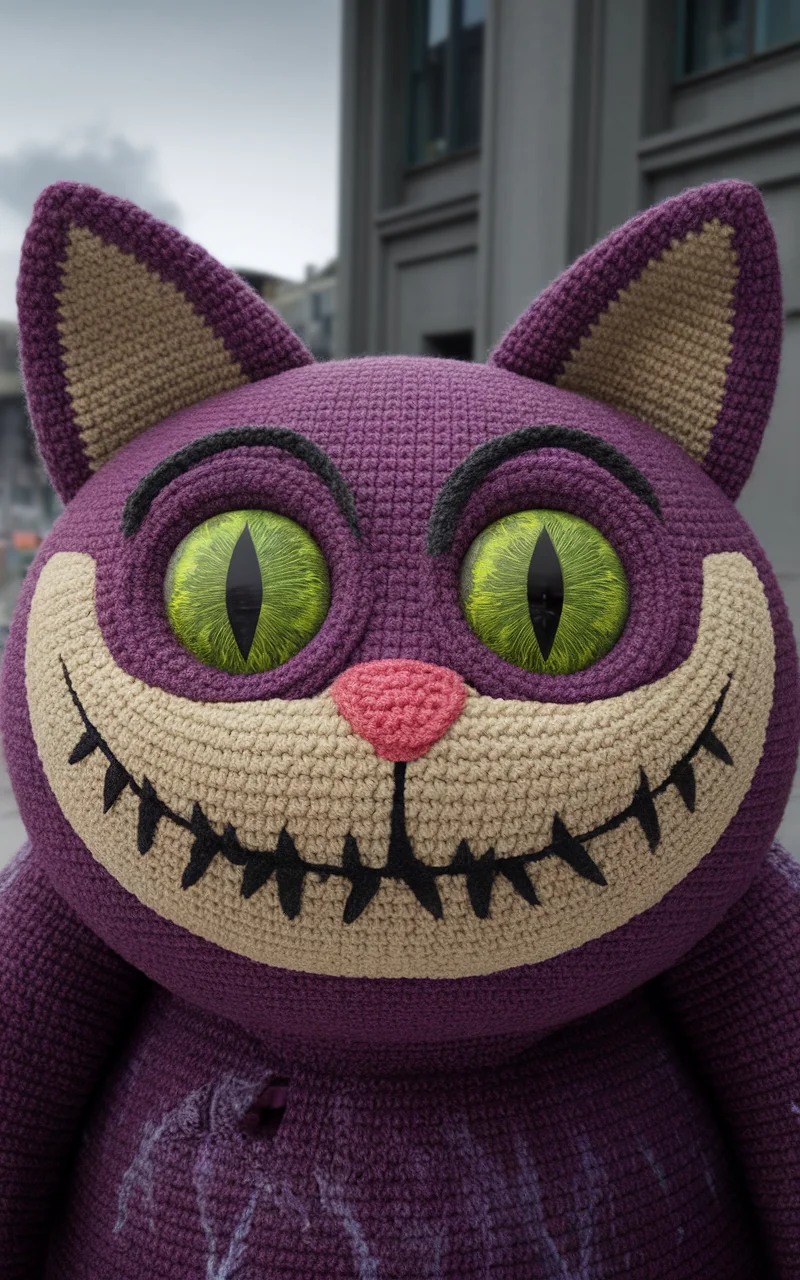
Bring an air of enchanted mystery to your Halloween decor with a Creepy Cheshire Cat Pillow. This whimsical crochet piece inspired by the elusive feline of Lewis Carroll’s tales offers both functionality and flair. With its eerie grin and hypnotic eyes, it can transform any nook into a spellbinding retreat. Use vibrant purples, blues, and eerie greens to capture the fantastical nature of this character, adding a bewitching touch to your room.
How to Achieve It
Materials Needed:
– Variegated yarn in shades of purple, blue, and green (bouncy acrylic or cotton for durability)
– Crochet hook suitable for your yarn
– Scissors
– Tapestry needle for weaving in ends
– Fiberfill stuffing for the pillow
– Black and white yarn for eyes and smile detail
Steps:
Construct the Cat Face Base:
– Begin by crocheting two circles using the variegated yarn, starting with a magic ring and working in rounds to create the front and back panels of the pillow.
– Alternate yarn colors to capture the whimsical and enchanting appearance.
– Ensure that both panels are equal in size by maintaining consistent tension and stitch count.
Design the Face Features:
– With white yarn, crochet small ovals for the eyes and a wider crescent shape for the classic Cheshire grin.
– Use black yarn to crochet or embroider pupils and sharp, elongated lines extending from the corner of the grin for the iconic smile.
– Carefully sew each facial feature onto the front panel of the face base.
Assemble the Pillow:
– Once the face details are complete, align the front and back panels together with the right sides facing out.
– Single crochet around the perimeter of the two panels to join them, leaving a small opening for stuffing.
– Firmly stuff with fiberfill to a desired plushness, then close the opening with additional single crochet stitches.
Color Scheme:
– Capture the eerie, mysterious essence of the Cheshire Cat with purples, blues, and greens.
– Use stark black and white for the eyes and grin, ensuring these features stand out vividly against the colorful backdrop.
This Creepy Cheshire Cat Pillow will charm your guests, weaving a bit of magical whimsy into your Halloween festivities.
Bewitched Broomstick Wall Hanging
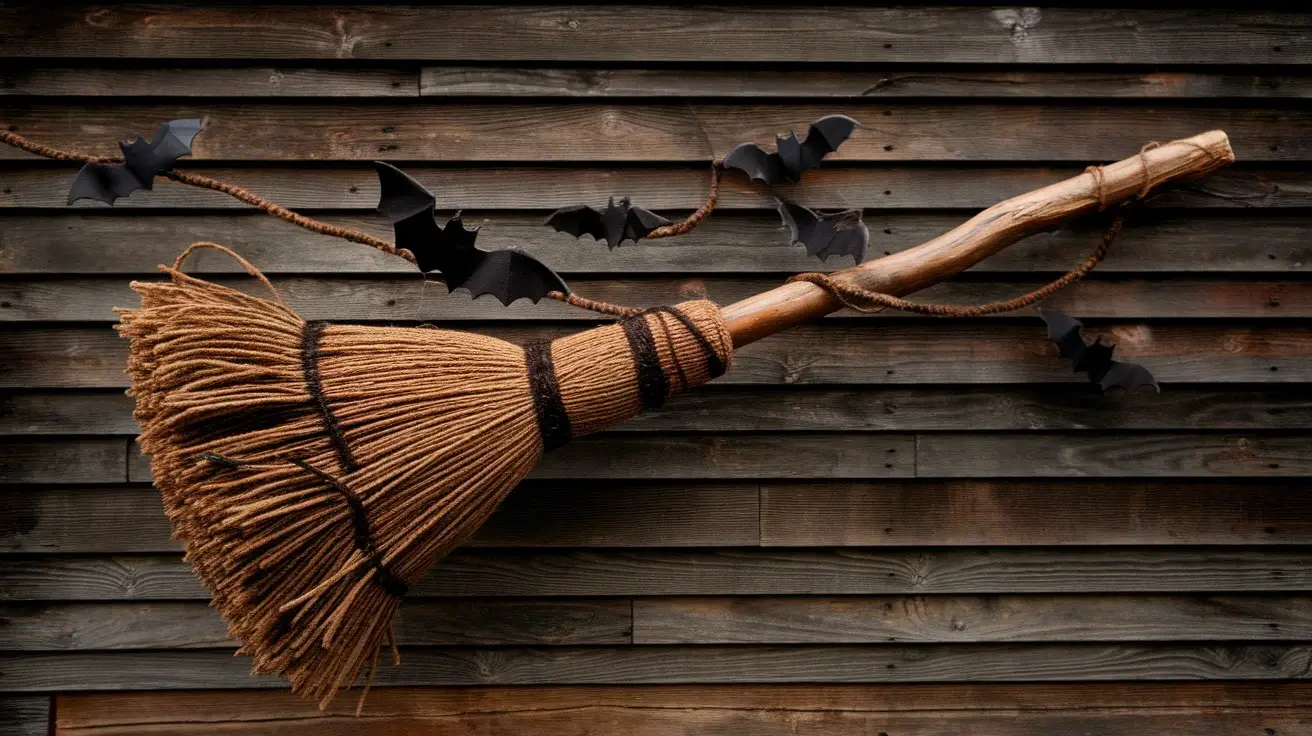
Elevate your Halloween decor with a Bewitched Broomstick Wall Hanging, a crochet project that combines whimsy and spookiness. This wall hanging captures the classic symbol of witches in flight, featuring a detailed broomstick adorned with flying bats and eerie accents. Hang it on your door, wall, or mantel to welcome visitors with an enchanting vibe. Experiment with natural fibers like jute for the broom bristles, and incorporate color pops with mystical purples and midnight blacks to embody the magic of Halloween.
How to Achieve It
Materials Needed:
– Jute or raffia yarn for broom bristles
– Dark brown yarn for the broomstick handle
– Black, purple, and metallic yarns for embellishments
– Crochet hook suitable for your yarn
– Scissors
– Tapestry needle for weaving in ends
– Small twig or a wooden dowel for structure
– Optional: Clear adhesive or decorative string to attach embellishments
Steps:
Create the Broomstick:
– Start with the dark brown yarn to crochet around the twig or dowel, forming the broomstick handle.
– Use a combination of single and half-double crochets, ensuring you cover the length of the twig smoothly.
Crochet the Bristles:
– Use jute or raffia yarn to create the broom bristles. Crochet a series of long chains, attaching them to one end of the stick by tying or using clear adhesive.
– Fluff and straighten the bristles to create a realistic effect.
Attach Embellishments:
– Crochet tiny bats or magical symbols using black and metallic yarns to decorate the broom.
– Sew or attach them with decorative string to hang around and from the broomstick, giving an animated look.
Hanging Assembly:
– Use a robust string or crochet a hanging loop from the handle’s top, ensuring it supports the piece’s weight.
– Secure all ends and loose strings with the tapestry needle for a tidy finish.
Color Scheme:
– Opt for earthy tones for the broomstick, contrasting with purples, blacks, and metallics to add a hypnotic and festive Halloween ambience.
– Metallic threads can highlight the decorations, providing a subtle shimmer.
This Bewitched Broomstick Wall Hanging will add a splash of magical allure to your Halloween decor, enticing guests with its mysterious and enchanting design.
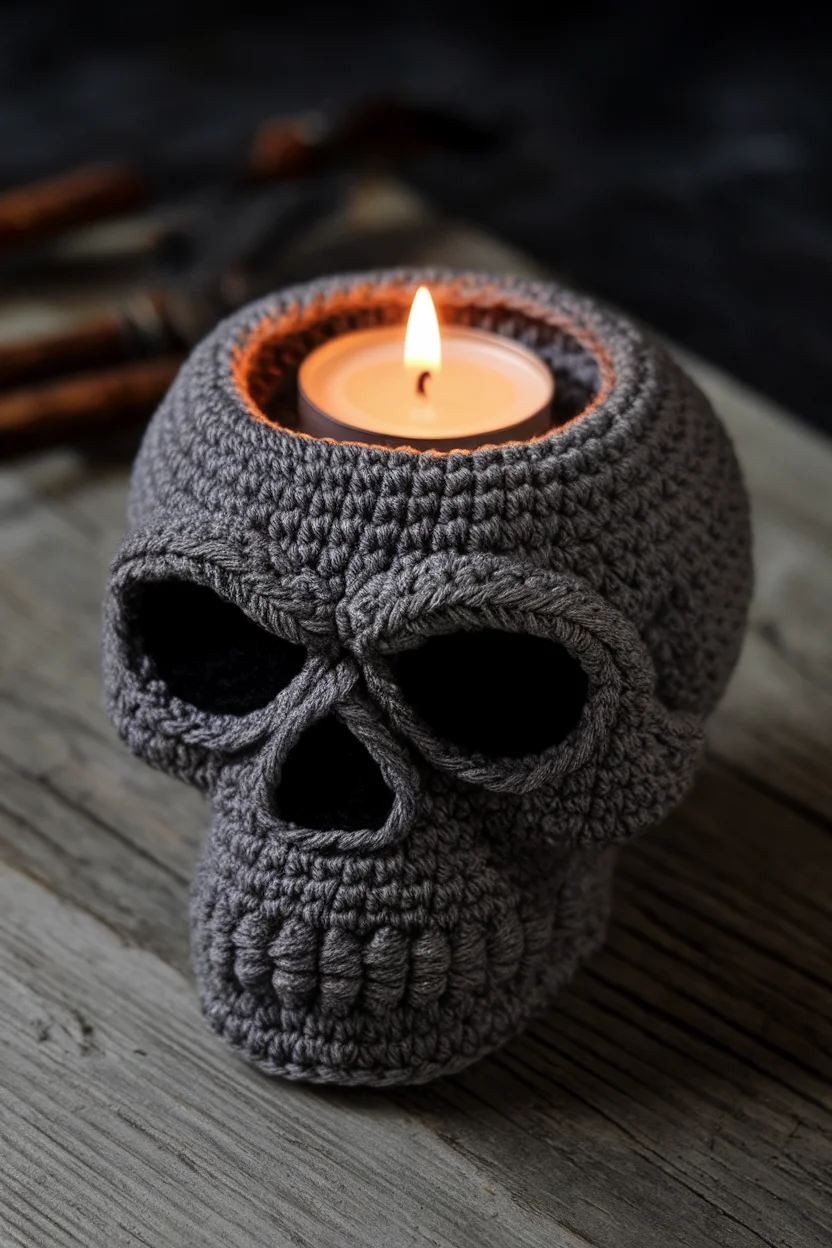
Sinister Skull Candle Holders
Create a set of Sinister Skull Candle Holders to add a spooktacular glow to your Halloween festivities. These crochet creations can serve as charming yet eerie accents on your dinner table, mantle, or windowsill. They’ll cast flickering shadows that play upon the walls, enhancing the haunted atmosphere of your gatherings. Choose an off-white or bone color for a classic skull look, or delve into more vibrant palettes like metallic silver or deep reds to suit your haunting theme.
How to Achieve It
Materials Needed:
– Off-white or bone-colored yarn
– Crochet hook suitable for your yarn
– Scissors
– Tapestry needle for weaving in ends
– LED tealight candles (ensuring safety if displaying around flammable items)
Steps:
Create the Skull Base:
– Begin with an adjustable magic ring to form the top of the skull.
– Crochet in the round using single and double crochet stitches to create a hollow sphere shape that can fit over an LED tealight.
– Ensure to leave open bottom edges for the candle placement.
Form the Skull Features:
– Use increases and decreases in your stitches to outline the skull’s eye sockets and nose cavity.
– Use contrasting yarn if desired to crochet or embroider teeth and other facial details directly onto the skull.
Finish and Style:
– Test the fit over an LED tealight to ensure your skull sits securely.
– Thread a tapestry needle to weave in any loose ends.
Color Scheme:
– Stick to bone or ivory shades for a traditional skull appearance.
– To create a more dramatic effect, consider using metallic silver, eerie reds, or even black yarn for gothic flair.
Tips:
– Use LED tealight candles for safety, avoiding real flames.
– Adjust the size of your crochet pattern according to the size of the candles you choose to use.
This Sinister Skull Candle Holder will captivate guests with its macabre charm, perfect for creating a chillingly delightful Halloween atmosphere.
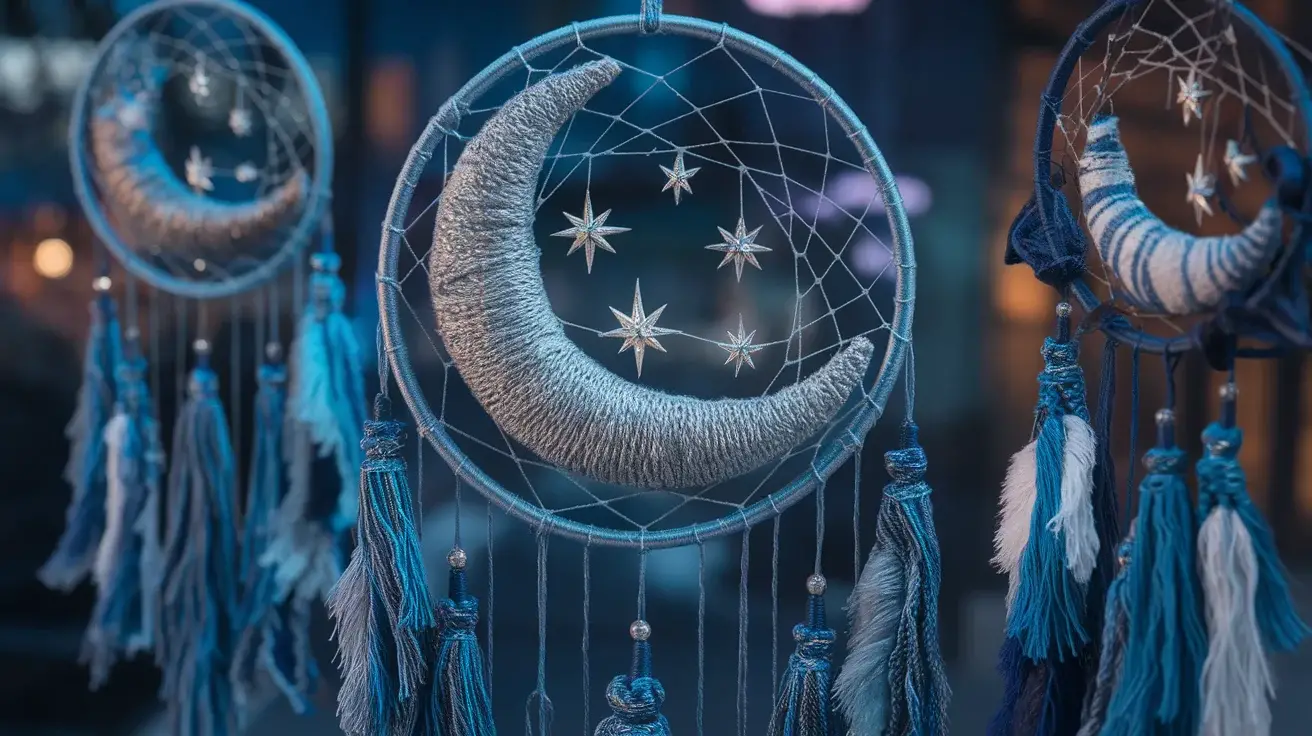
Mystical Moonlight Dream Catcher
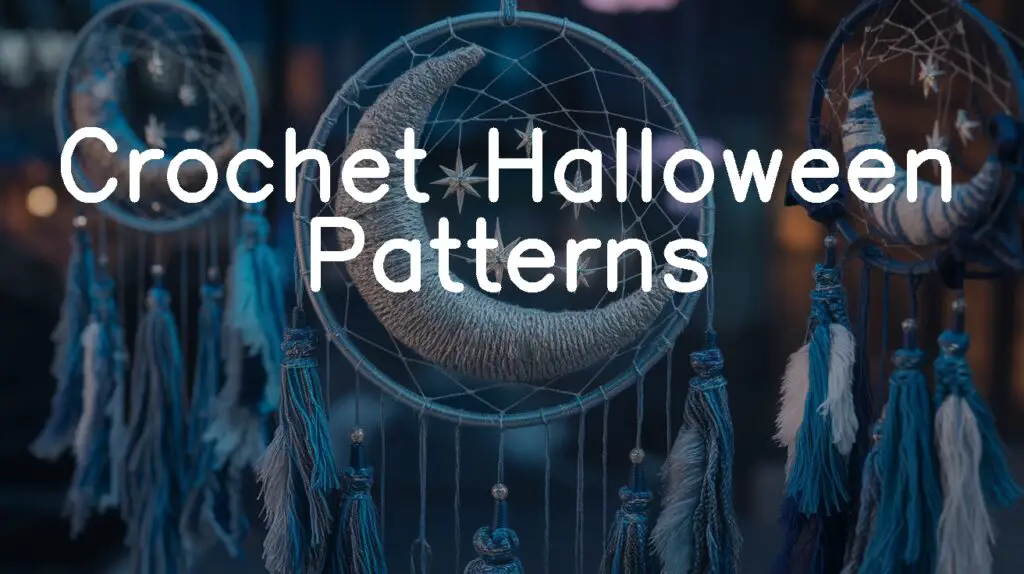
Capture the enchantment of Halloween nights with a Mystical Moonlight Dream Catcher. Inspired by the mystical allure of the moon, this crochet piece will add an ethereal touch to your Halloween decor. Hang it in doorways or windows to catch the moonlit breezes, featuring a crescent moon adorned with sparkling stars and cascading tassels. Opt for a color palette that embodies the magic of night-time ghouls with shades of silver, midnight blue, and glimmering whites.
How to Achieve It
Materials Needed:
– Metallic silver yarn for the moon
– Midnight blue and white yarn for stars and tassels
– Crochet hook suitable for your yarn
– Embroidery hoop or wire frame for structure
– Scissors
– Tapestry needle for weaving in ends
– Optional: Beads and sequins for added sparkle
Steps:
Create the Crescent Moon:
– Use the metallic silver yarn to form a semicircular base using a crochet hoop or wire frame.
– Crochet in rows, starting skinny and gradually increasing toward the middle, and then decreasing to form a crescent shape.
– Secure your work around the hoop or frame with single crochet stitches.
Add Star Details:
– Crochet small stars using midnight blue and white yarn.
– Use basic stitches like single crochet or half-double crochet, combined with slip stitches for star points.
– Attach stars to the crescent moon with invisible thread or sew them directly onto the frame.
Attach Cascading Tassels:
– Cut equal lengths of midnight blue and white yarn for tassels.
– Fold tassels in half and loop them across the bottom edge of the dream catcher using a lark’s head knot.
– Incorporate beads or sequins into the tassels for extra whimsy and shine.
Finish with Hanging Loop:
– Crochet a small loop at the top of your frame to easily hang your dream catcher.
– Secure all yarn ends with a tapestry needle, ensuring a polished appearance.
Color Scheme:
– Embrace the magical ambiance of Halloween with metallic silver for the moon and deep, cosmic midnight blues with touches of white for stars and tassels.
– Consider adding iridescent or metallic elements to capture the light and enhance the dreamlike qualities of the piece.
This Mystical Moonlight Dream Catcher serves as a captivating addition to your Halloween decorations, embodying the mystery and charm of Halloween nightfall.
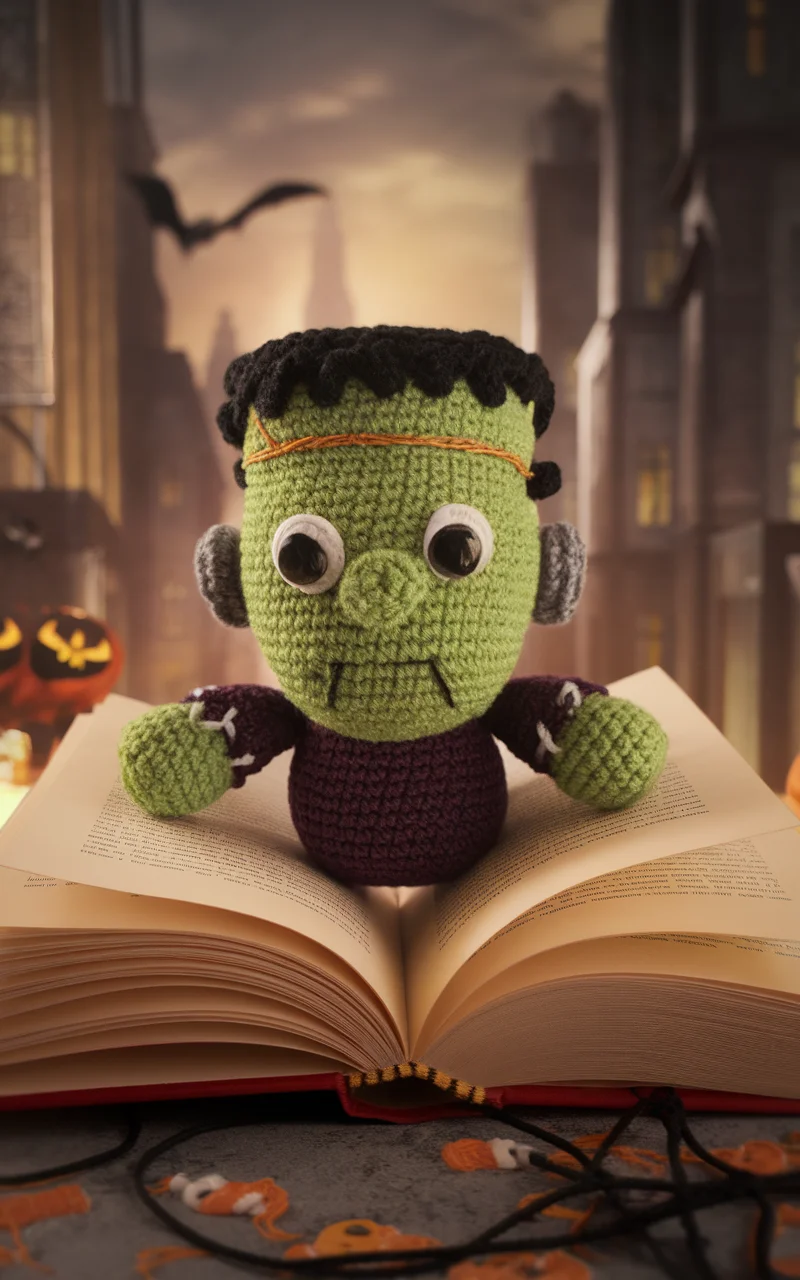
Frankenstein’s Monster Bookmark
Create a quirky and spooky Frankenstein’s Monster Bookmark to keep track of your spine-chilling reads this Halloween. This crochet project offers a fun way to incorporate the classic monster into your literary adventures. Adorned with iconic green skin, black hair, and signature bolt details, this bookmark serves as both a functional tool and festive accessory for your books. Experiment with bold greens, blacks, and grays for an authentic look, or add a dash of humor with vibrant colors and playful expressions.
How to Achieve It
Materials Needed:
– Bright green, black, and gray yarn (choose cotton or acrylic for a sturdy structure)
– Crochet hook suitable for selected yarn
– Scissors
– Tapestry needle for weaving in ends
– Small amount of stuffing or cotton balls for a slight 3D effect (optional)
Steps:
Create the Head:
– Start with a magic ring using green yarn and crochet in rounds to form a flat rectangle for Frankenstein’s forehead.
– Continue to build the piece downwards, shaping the rectangle as you go for the full facial shape.
– Incorporate small increases as needed to ensure a flat, sturdy shape.
Add Facial Details:
– Use black yarn to crochet small circles or embroider features like hair, eyes, and a stitched mouth onto the green base.
– With gray yarn, attach small rectangles on either side of the head to represent bolts by sewing or crocheting them directly on.
Finish with Bookmark Tail:
– Extend the base of the head by crocheting a series of chains and securing at the desired length to serve as the bookmark tail.
– Optionally, add slip stitches over the chain for added durability and thickness.
Optional 3D Effect:
– Lightly stuff the top portion of the head with small amounts of fiberfill or cotton balls before sealing, creating a slightly padded look.
Color Scheme:
– Stick with classic greens for the skin, black for the hair, and gray for bolts for a familiar Frankenstein themed design.
– For a unique twist, experiment with brighter colors or even glow-in-the-dark threads for the eyes.
This Frankenstein’s Monster Bookmark adds both a functional twist and a piece of amusing Halloween spirit to your reading, allowing you to keep the monsterly fun alive while diving into all your favorite books.
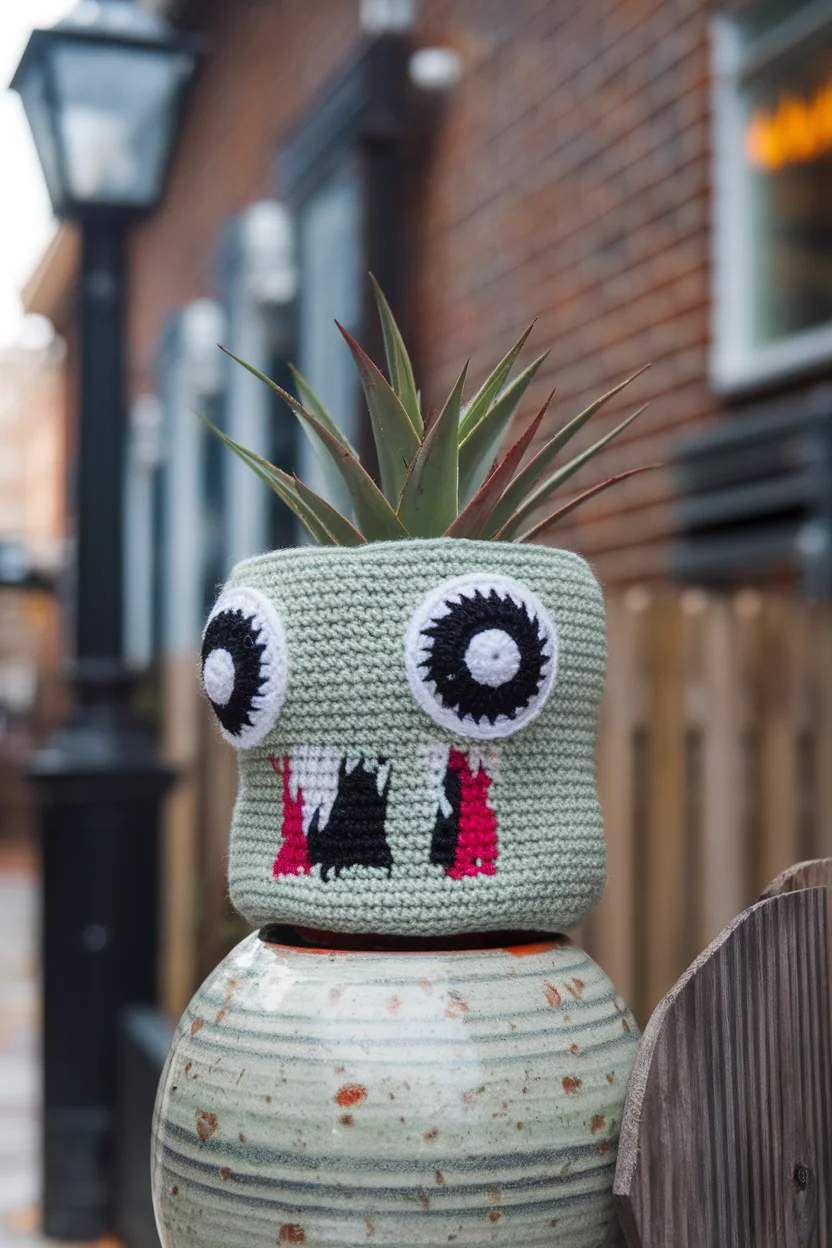
Zany Zombie Plant Pot Cozy
Transform your ordinary plant pots into spooky, hilarious Halloween decor with a Zany Zombie Plant Pot Cozy. This crochet project will give life and personality to your plants, as each pot sports a quirky zombie face complete with ghoulish expressions and wacky eyes. Perfect for indoor plants or small outdoor pots, this cozy will not only add a touch of Halloween spirit but also double-up as an insulating layer to protect your plants from cooler autumn breezes. Play with pale greens and grays to create classic zombie tones, or inject humor with vibrant colors and fun, exaggerated features.
How to Achieve It
Materials Needed:
– Pale green or gray yarn for the base of the zombie
– Black, white, and a few bright colors for details
– Crochet hook suitable for your yarn
– Scissors
– Tapestry needle for weaving in ends
Steps:
Crochet the Base Cozy:
– Measure the diameter and height of your pot to determine sizing.
– Using pale green or gray yarn, start with a magic ring and crochet in rounds to form a flat circle covering the base of the pot.
– Continue crocheting upward in single crochet to create a tube that fits snugly around the pot.
Add Zombie Features:
– Use black yarn to crochet small circles for eyes and sew them onto the cozy.
– Create other facial features like a scarred mouth or stitches with black yarn, using embroidery techniques or crocheting small pieces.
– Use bright yarns to add comedic features like a wacky tongue or oversized ears for a playful touch.
Finish and Fit:
– Secure the top edge of the cozy by crocheting a neat slip stitch round or adding a decorative edge, ensuring the cozy fits securely while remaining easy to remove.
– Weave in any loose ends and adjust your zombie features to sit at the front of the pot.
Color Scheme:
– Opt for traditional zombie colors like pale greens and grays for the base, with touches of black and white for facial features.
– Bright colors can be used for exaggerated features, adding a playful and humorous element to the design.
This Zany Zombie Plant Pot Cozy will not only provide a laugh but also bring a unique, handcrafted essence to your Halloween decor, delighting guests and adding character to any plant collection.
