Transforming your outdoor space into a whimsical haven doesn’t require an extravagant budget or professional skills. With a sprinkle of creativity and a dash of resourcefulness, you can embark on a delightful DIY journey to craft yard art that reflects your personal style. From upcycled planters to playful sculptures, DIY yard art offers a unique way to infuse personality and charm into your garden, creating an inviting, picturesque retreat tailored entirely by you. Discover endless possibilities that will not only enhance your landscape but also inspire joy and conversation every time you step outside.
### Rustic Pallet Planter
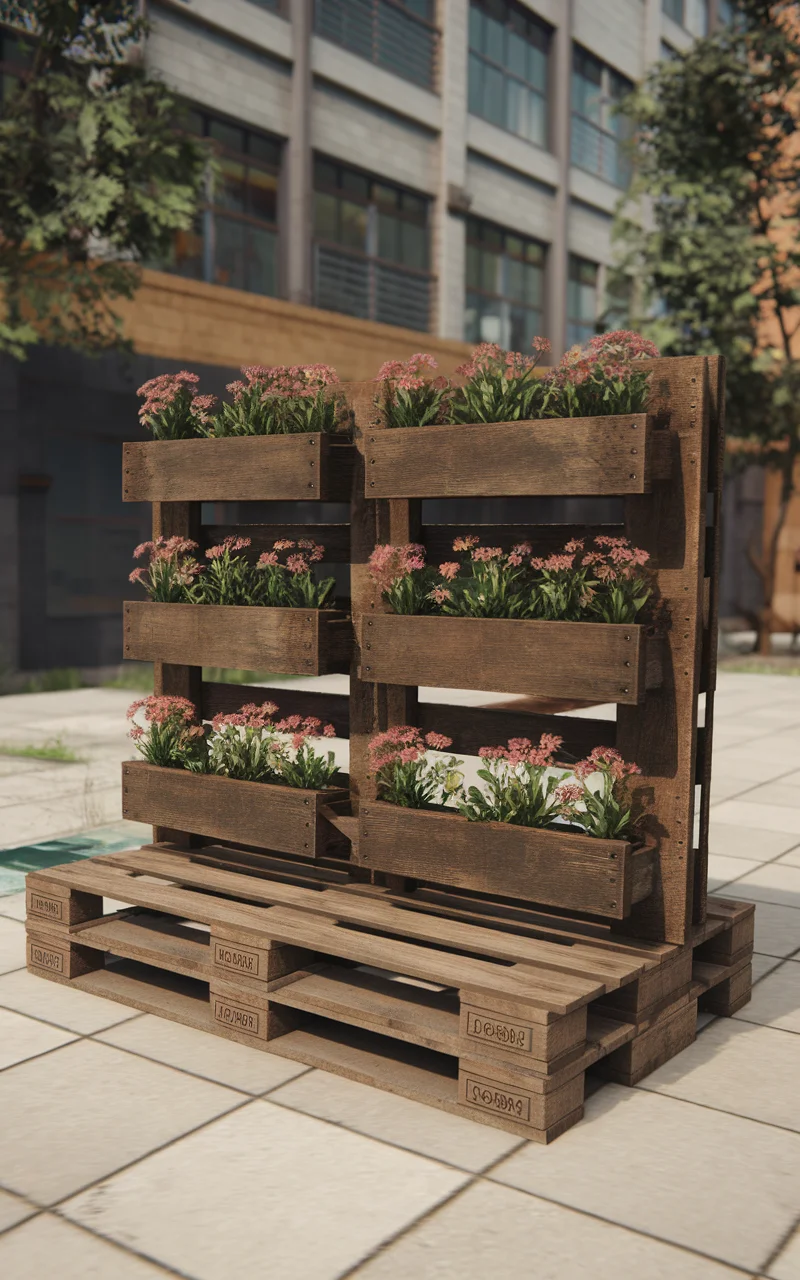
Transform an old wooden pallet into a rustic planter for your garden or yard. This DIY yard art idea not only provides an eco-friendly use for discarded pallets but also adds a charming touch to your outdoor space. You can customize the color scheme to match your garden’s aesthetic, choosing natural wood tones or painting it in vibrant hues to complement your flowers and plants.
How to Achieve a Rustic Pallet Planter
Materials Needed:
– One wooden pallet
– Sandpaper or a power sander
– Paint or wood stain (optional)
– Paintbrush or roller (if painting)
– Polyurethane sealant
– Landscape fabric
– Staple gun and staples
– Potting soil
– Selection of small plants or flowers
Step-by-Step Instructions:
Prepare the Pallet:
– Inspect the pallet for any damages or protruding nails and remove them if necessary.
– Sand the pallet thoroughly to smooth out any rough edges and splinters.
Paint or Stain (Optional):
– If desired, paint or stain the pallet to your chosen color scheme.
– Allow the paint or stain to dry completely.
Seal the Pallet:
– Apply a coat of polyurethane sealant to protect the wood from moisture.
– Let the sealant dry according to the manufacturer’s instructions.
Attach the Landscape Fabric:
– Cut sections of landscape fabric to fit inside each shelf space of the pallet.
– Use a staple gun to secure the fabric, ensuring that it forms a pocket to hold soil and plants.
Fill with Soil and Plants:
– Fill each pocket with potting soil, leaving enough room for the plants.
– Plant your chosen selection of flowers or small plants in the soil.
Finishing Touches:
– Water your plants thoroughly and ensure they are securely planted.
– Position the pallet planter upright, leaning against a stable surface or wall in your yard.
With these steps, your rustic pallet planter will be a delightful addition to your outdoor space, showcasing a blend of creativity and nature.
Recycled Wine Bottle Torch
Create an enchanting DIY yard art piece using recycled wine bottles to make torches for your outdoor space. This eco-friendly idea not only adds a touch of elegance to your garden but also serves as functional lighting for evening gatherings. You can customize the bottles with frosted glass spray or paint to suit your yard’s theme or color scheme, bringing warmth and charm to your exterior design.
How to Achieve a Recycled Wine Bottle Torch
Materials Needed:
– Empty wine bottle
– Tiki torch fuel
– Lamp wick (3/8 inch works well)
– Brass coupling (1/2 inch with 3/8 inch reducer)
– Teflon tape
– Funnel
– Sand or pebbles (optional for stability)
Step-by-Step Instructions:
Prepare the Wine Bottle:
– Thoroughly clean the wine bottle and remove any labels and remnants using warm water and soap.
– If desired, apply frosted glass spray or paint to the bottle for a unique look. Allow it to dry completely.
Prepare the Wick Holder:
– Wrap Teflon tape around the narrower end (3/8 inch) of the brass coupling until it fits snugly into the bottle neck.
– Insert the lamp wick through the coupling, leaving enough wick to stand about 1 to 1.5 inches above the top.
Assemble the Torch:
– Use the funnel to fill the wine bottle with tiki torch fuel, leaving a small space at the top.
– If using, add sand or pebbles at the bottom to help stabilize the bottle.
– Insert the wick holder into the neck of the bottle carefully.
Install and Light the Torch:
– Find a suitable flat and stable surface in your yard to place the torch.
– Allow the wick to soak up the fuel for a few minutes before lighting it.
– Light the wick with a match or lighter and enjoy the ambient light.
With these steps, a recycled wine bottle torch can illuminate your garden, providing both aesthetic appeal and functional value while promoting sustainability.

Mirrored Garden Gazing Ball
Add a touch of magic and whimsy to your yard with a DIY mirrored garden gazing ball. This captivating art piece reflects the beauty of your garden, creating an illusion of extra depth and vibrant color throughout your outdoor space. By using recycled materials and a splash of paint, you can craft a unique centerpiece that catches the light and draws attention, regardless of the season. Customize the colors to match the existing palette of your garden or introduce new hues for a fresh, playful look.
How to Achieve a Mirrored Garden Gazing Ball
Materials Needed:
– Old bowling ball or round garden globe
– Small mirrored tiles or mosaic pieces
– Outdoor adhesive or mosaic glue
– Grout in your choice of color
– Protective gloves
– Soft cloth or sponge
– Optional: Spray paint (for base color, if desired)
Step-by-Step Instructions:
Prepare the Base:
– If using a bowling ball, clean it thoroughly and let it dry. Remove the sticker and sand lightly if necessary to ensure proper adhesion.
– Paint the ball with spray paint if you wish to change its base color, and let it dry completely.
Apply the Mosaic Tiles:
– Wearing protective gloves, start attaching mirrored tiles or mosaic pieces to the ball using outdoor adhesive.
– Work in sections, allowing the adhesive to dry slightly before moving on, arranging tiles in your desired pattern.
Grout the Gazing Ball:
– Once all tiles are secured and glue has dried, apply grout over the entire surface of the ball, ensuring it fills the gaps between tiles.
– Use a soft cloth or sponge to gently wipe away excess grout from the tile surfaces.
Finishing Touches:
– Allow the grout to set as per the manufacturer’s instructions, then lightly polish the tiles with a clean, damp cloth to reveal their shine.
– Place your mirrored gazing ball on a stand or pedestal in your garden, positioned to catch sunlight or reflect colorful flowers.
With these steps, your mirrored garden gazing ball will become a dazzling focal point in your yard, harmonizing with the sprawling greenery while injecting an enchanting visual element.

Colorful Tire Planters
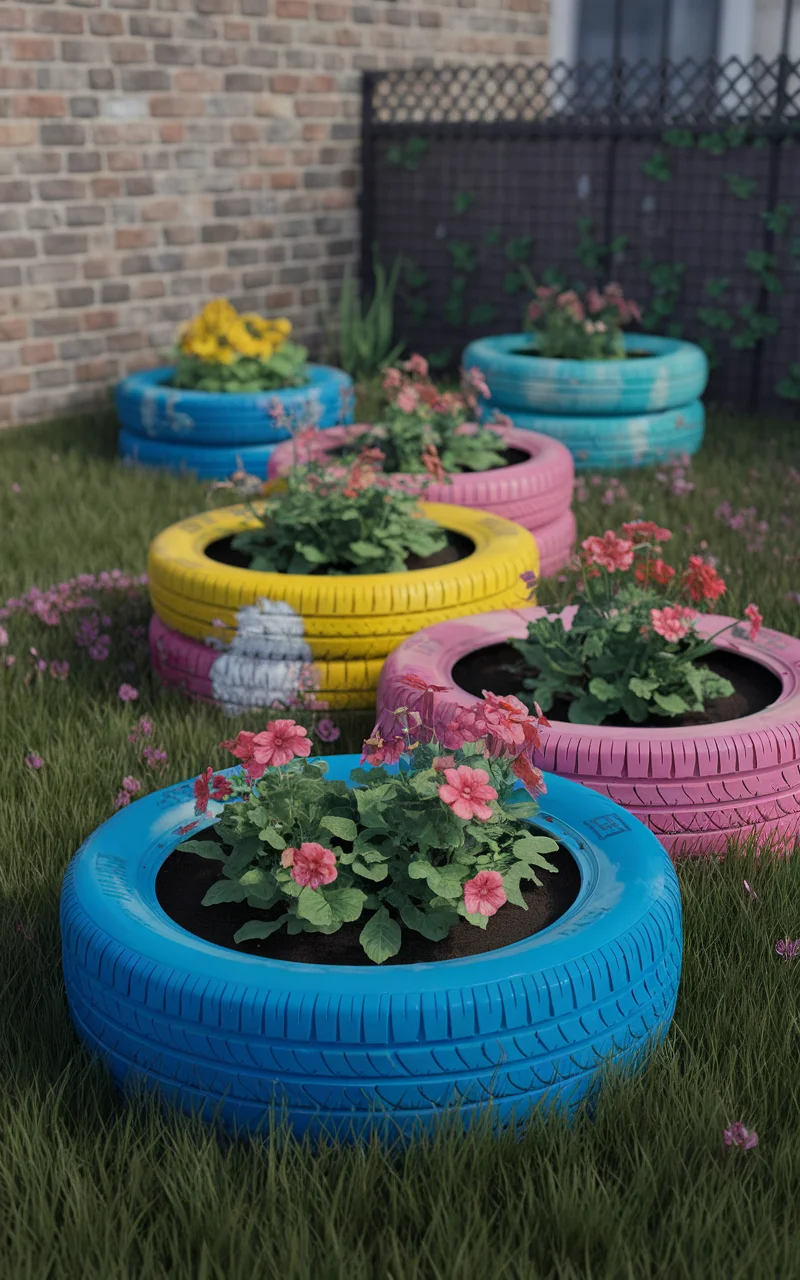
Transform old, unused tires into vibrant, eye-catching planters for your yard. This DIY project is an excellent way to recycle materials, adding a splash of color and creativity to your garden. By stacking and painting the tires in various hues, you can create cheerful planters that suit your outdoor space’s theme or color palette. These planters are perfect for showcasing bright flowers or lush greenery, offering an innovative approach to garden design.
How to Achieve Colorful Tire Planters
Materials Needed:
– Old tires (any size, depending on preference)
– Outdoor spray paint or acrylic paint in various colors
– Paintbrushes or roller (if using acrylic paint)
– Drill (with a drill bit suitable for rubber)
– Potting soil
– Plants or flowers of your choice
– Optional: Sandpaper (for prepping tires)
Step-by-Step Instructions:
Prepare the Tires:
– Clean the tires thoroughly to remove dirt and grime; let them dry completely.
– Optionally, lightly sand the tires to ensure better paint adhesion.
Paint the Tires:
– Choose a color scheme that complements your yard or garden spaces.
– Spray or paint the tires in your selected bright colors, covering them evenly.
– Allow the paint to dry completely. Apply additional coats if necessary for a more vibrant finish.
Drill Drainage Holes:
– Use a drill to create several holes at the bottom for excess water drainage.
Assemble the Planters:
– Arrange the painted tires in your desired configuration, stacking or aligning them as needed.
– Fill the bottom tire with potting soil up to just below its rim.
Plant Your Selections:
– Plant your chosen flowers or greenery into the soil, filling any visible gaps with additional potting soil.
– Water the plants thoroughly to settle them into the soil.
Finishing Touches:
– Position your colorful tire planters in a sunny spot in your yard, making sure they are stable.
– Regularly water and tend to the plants to ensure they thrive.
With these steps, your vibrant tire planters will become a playful addition to your outdoor decor, combining sustainability with a splash of creativity and color.
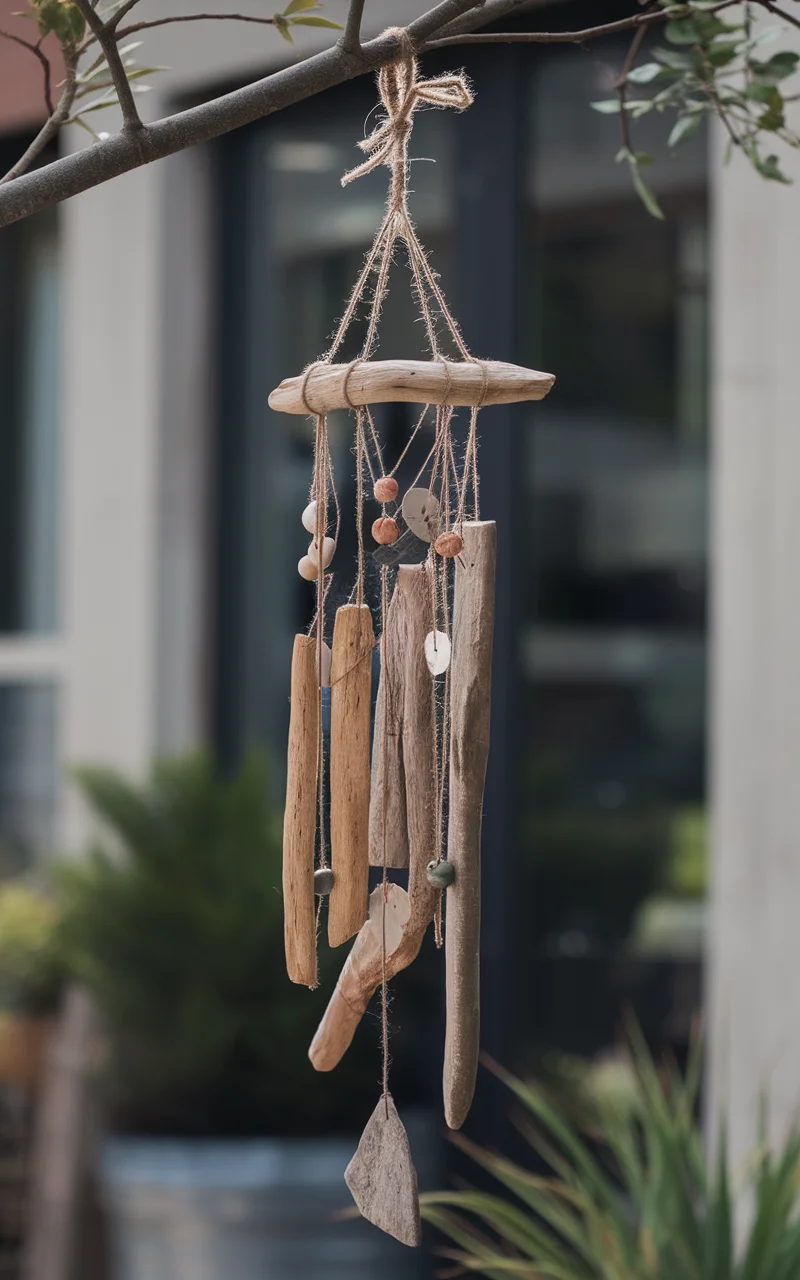
DIY Driftwood Wind Chimes
Create a soothing and artistic addition to your yard with DIY driftwood wind chimes. This natural yard art piece elegantly combines the organic form of driftwood with harmonious sounds. Perfect for adding a touch of rustic charm, the wind chimes are customizable to fit your yard’s color scheme and style, adding both visual and auditory appeal.
How to Achieve DIY Driftwood Wind Chimes
Materials Needed:
– Assorted pieces of driftwood
– Strong twine or fishing line
– Variety of beads (natural stone, wooden, or glass)
– Metal washers or bells for sound (optional)
– Drill with a small drill bit
– Scissors
Step-by-Step Instructions:
Prepare the Driftwood:
– Clean the driftwood pieces to remove sand, salt, and debris.
– Allow the driftwood to dry completely before proceeding.
Design the Wind Chime Layout:
– Arrange the driftwood pieces in descending order of size, with the largest piece at the top.
– Consider adding beads and washers or bells between driftwood pieces for enhanced sound and aesthetics.
Drill Holes:
– Drill small holes through the center of each piece of driftwood, ensuring they’re large enough for your chosen twine or fishing line.
Assemble the Wind Chimes:
– Starting from the bottom, thread twine through the holes, tying knots above each piece to keep them in place.
– Add beads and washers or bells between driftwood pieces for decoration and additional sound.
– Continue threading and knotting until all pieces are connected.
Create a Hanging Loop:
– Once assembled, cut a length of twine to create a loop at the top for hanging.
– Secure the loop with a double knot to ensure it holds the weight of the chimes.
Finishing Touches:
– Hang the assembled wind chime in a breezy location in your yard where the driftwood can sway freely.
– Regularly check the knots and twine for wear and tear, replacing them as needed to extend the life of your wind chime.
With these steps, your DIY driftwood wind chimes will become a serene focal point in your yard, bringing a sense of tranquility with their gentle melodies and enhancing the natural beauty of your outdoor space.
Painted Rock Garden Markers
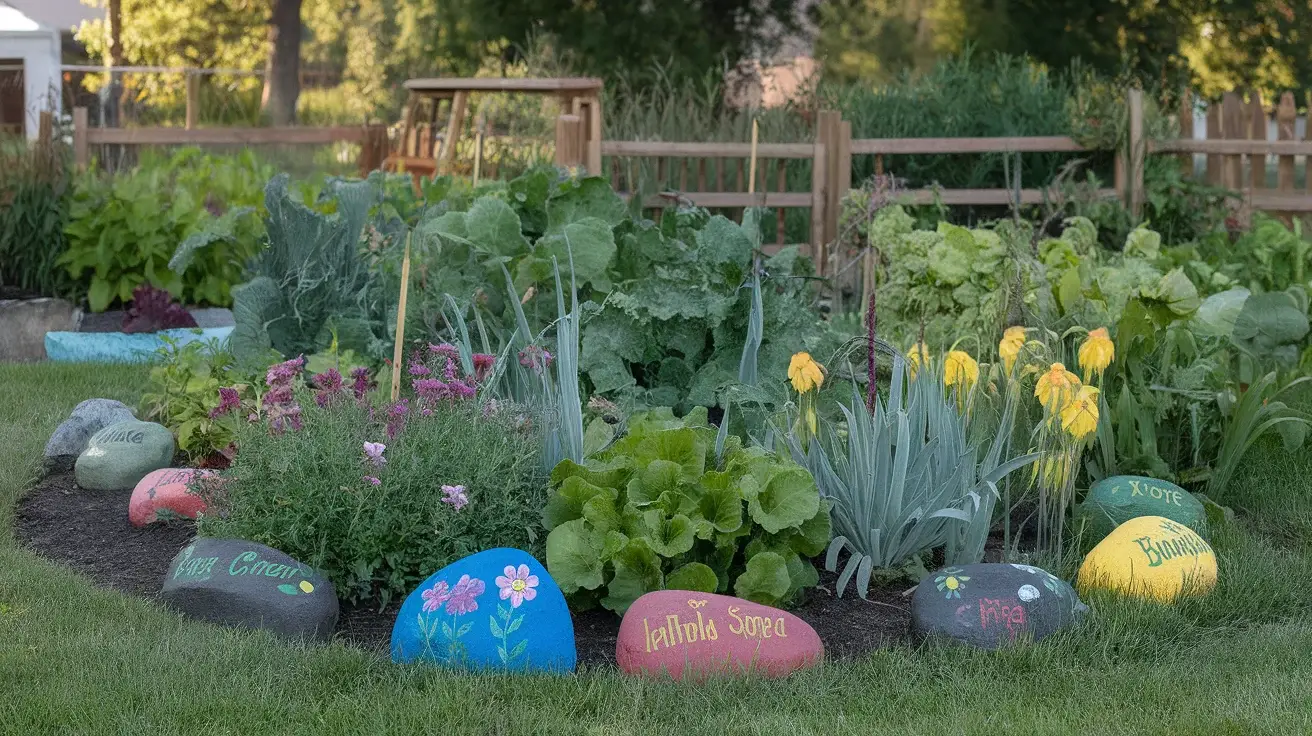
Transform ordinary rocks into colorful garden markers to add a whimsical and practical touch to your yard. This DIY project is perfect for showcasing your creativity while also helping to label your vegetable or flower garden. Personalize each rock with decorative designs or simply inscribe the plant’s name, using a bright color palette that complements your garden.
How to Achieve Painted Rock Garden Markers
Materials Needed:
– Smooth, flat stones or rocks
– Acrylic paint in assorted colors
– Paintbrushes of various sizes
– Clear outdoor sealant spray
– Permanent markers (optional)
– Pencil for sketching (optional)
Step-by-Step Instructions:
Clean and Prepare the Rocks:
– Gather smooth, flat rocks that will be easy to paint on.
– Clean the rocks thoroughly by scrubbing them with soap and water to remove any dirt or debris.
– Allow the rocks to dry completely before proceeding.
Plan Your Designs:
– Decide on the design or label for each rock. You can sketch ideas using a pencil first if desired.
– Consider using bright colors and playful patterns to stand out in your garden.
Paint the Rocks:
– Use acrylic paint to apply your chosen designs to the rocks. Start with a base color if needed, followed by detailed designs once dry.
– For added vibrancy, apply multiple coats of paint, allowing each to dry before adding the next.
– Let the painted rocks dry completely.
Seal the Rocks:
– Once the paint is thoroughly dry, spray each rock with a clear outdoor sealant to protect the paint from the elements.
– Allow the sealant to dry as per the manufacturer’s instructions.
Finishing Touches:
– If desired, use a permanent marker to write plant names or add small details to your designs.
– Position the finished garden markers next to their corresponding plants in your garden.
With these steps, your painted rock garden markers will serve both as a decorative and functional addition to your outdoor space, making gardening more enjoyable and visually appealing.
Tree Branch Candle Holders
Enhance the natural charm of your yard by crafting unique tree branch candle holders. This DIY yard art idea utilizes fallen branches and twigs to create elegant holders for tea lights or small candles, perfect for creating ambient lighting during outdoor gatherings. By incorporating natural materials, you seamlessly blend your decorations with the landscape, providing both functionality and a rustic aesthetic that speaks to the outdoors.
How to Achieve Tree Branch Candle Holders
Materials Needed:
– Fallen branches or thick twigs (minimum 2-3 inches in diameter)
– Hand saw or a power saw
– Sandpaper or a power sander
– Drill with a spade bit (size that matches your candles)
– Tea lights or small candles
– Wood stain or clear varnish (optional)
– Paintbrush (if staining)
Step-by-Step Instructions:
Select and Prepare the Branches:
– Choose fallen branches or twigs that are thick and sturdy. Ensure they are dry and free from rot.
– Use a hand saw or power saw to cut the branches into sections, each approximately 3-6 inches tall, depending on your preference.
Drill Candle Holes:
– Sand the cut ends of each branch section to smooth any rough edges.
– Use a drill with a spade bit to carefully bore a hole in the center of each section. The hole should be deep enough to securely hold a tea light or small candle, without going all the way through.
Stain or Seal (Optional):
– If desired, apply wood stain to change or enhance the color of the branches, or use clear varnish to protect the wood.
– Allow to dry completely before proceeding.
Insert the Candles:
– Place a tea light or small candle into each drilled hole, ensuring it fits snugly and safely.
Finishing Touches:
– Position your tree branch candle holders around your yard, on tables, or along pathways, making sure they are stable and secure.
– Light the candles for an enchanting evening atmosphere, taking care to monitor them when in use.
With these steps, your tree branch candle holders will provide warm, natural lighting that enhances the rustic beauty of your outdoor space, creating a cozy and inviting environment for your garden or yard.

Repurposed Ladder Herb Garden
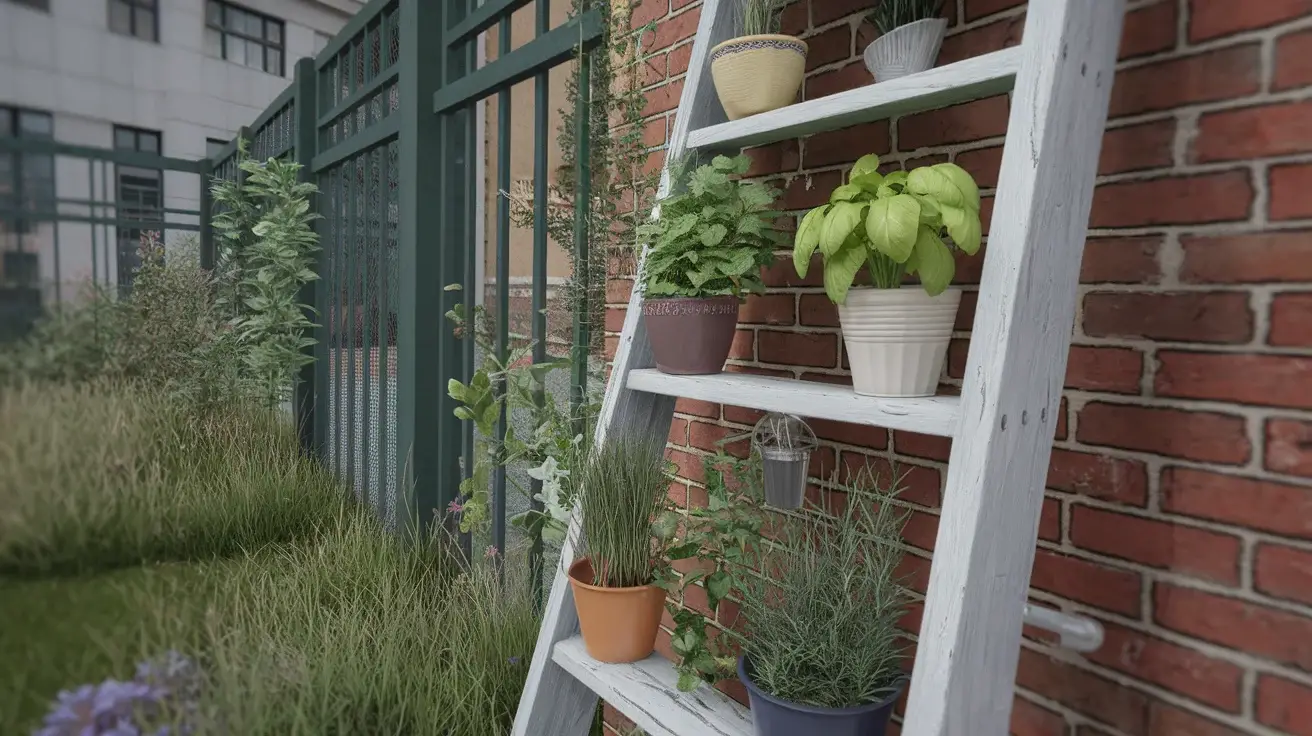
Turn an old, wooden ladder into a charming herb garden that not only serves as a vertical planter but also adds an element of rustic elegance to your yard. This creative yard art idea reuses an old item that might otherwise be discarded, giving it new life as a functional and decorative feature for your outdoor space. Paint the ladder in a complementary color to your garden’s theme or maintain its natural wood finish for a more earthy look.
How to Achieve a Repurposed Ladder Herb Garden
Materials Needed:
– An old wooden ladder
– Sandpaper or a power sander
– Outdoor paint or wood stain (optional)
– Paintbrush or roller (if painting)
– Polyurethane sealant
– Small pots or planting containers
– Potting soil
– Selection of herb plants
– Hooks or S-hooks (for hanging pots, if needed)
Step-by-Step Instructions:
Prepare the Ladder:
– Inspect the ladder for any damages, loose rungs, or splinters and repair or sand where necessary.
– Sand the entire surface for smoothness and paint or stain the ladder to your desired color. Allow it to dry completely.
– Apply a polyurethane sealant to protect the ladder from weather elements and extend its durability.
Organize the Plant Layout:
– Decide on the arrangement of your herb pots on the ladder. Consider placing larger pots on the bottom rungs for stability.
– Use hooks or S-hooks to hang additional pots if you want a cascading effect on the upper rungs.
Plant the Herbs:
– Fill each pot with potting soil and plant your herb selections. Some great herbs to consider include basil, mint, thyme, and rosemary.
– Make sure each plant is appropriately placed to receive enough sunlight and ventilation.
Assemble the Herb Garden:
– Position the ladder against a sturdy surface in your yard where it receives ample sunlight.
– Secure the pots on the rungs and hang additional pots with hooks if using.
Finishing Touches:
– Regularly water and trim your herbs to ensure healthy growth.
– Personalize your herb garden with decorative labels or small signs for each herb type.
With these steps, your repurposed ladder herb garden will become a practical and aesthetically pleasing addition to your garden, offering easy access to fresh herbs while enhancing the visual appeal of your outdoor space.
Upcycled Spoon Flower Sculpture
Add a delightful touch of whimsy to your yard by crafting a vibrant flower sculpture using old, discarded spoons. This playful yard art idea is a fantastic way to recycle cutlery that might otherwise be thrown away, providing both creativity and a splash of color to your garden. You can customize the sculpture’s colors to align with your garden’s color palette, creating a cohesive or contrasting artistic piece that stands out in your outdoor space.
How to Achieve an Upcycled Spoon Flower Sculpture
Materials Needed:
– Assorted old metal spoons
– Metal bonding adhesive or strong epoxy
– Outdoor spray paint in assorted colors
– Wire cutters or metal snips
– Metal rod or garden stake
– Protective gloves
– Optional: Clear outdoor sealant
Step-by-Step Instructions:
Prepare the Spoons:
– Clean the spoons thoroughly to remove any dirt or residue.
– Use wire cutters or metal snips to detach the spoon heads from the handles. Be cautious and wear protective gloves to prevent injury.
Form the Flower Petals:
– Arrange the spoon heads in a circular pattern, creating the “petals” of your flower.
– Use metal bonding adhesive or epoxy to secure the spoon heads together in the desired shape. Allow the adhesive to cure completely.
Paint the Flower:
– Apply outdoor spray paint to the spoon flower in your chosen color scheme. Bright or metallic colors can add a striking effect.
– Allow the paint to dry thoroughly between coats, applying additional coats for more vibrant coverage.
Assemble the Flower Sculpture:
– Once the paint is dry, attach the flower to a metal rod or garden stake using adhesive or by drilling a small hole and using screws for added stability.
– Optionally, apply a clear outdoor sealant over the finished sculpture to protect the paint from weather elements.
Install the Sculpture:
– Position the spoon flower sculpture in your garden or yard, inserting the rod or stake securely into the ground.
– Choose a location where sunlight can enhance its color and metallic shine.
With these steps, your upcycled spoon flower sculpture will become a unique and charming focal point in your outdoor space, celebrating the beauty of sustainability and creative artistry.

Garden Mosaic Stepping Stones
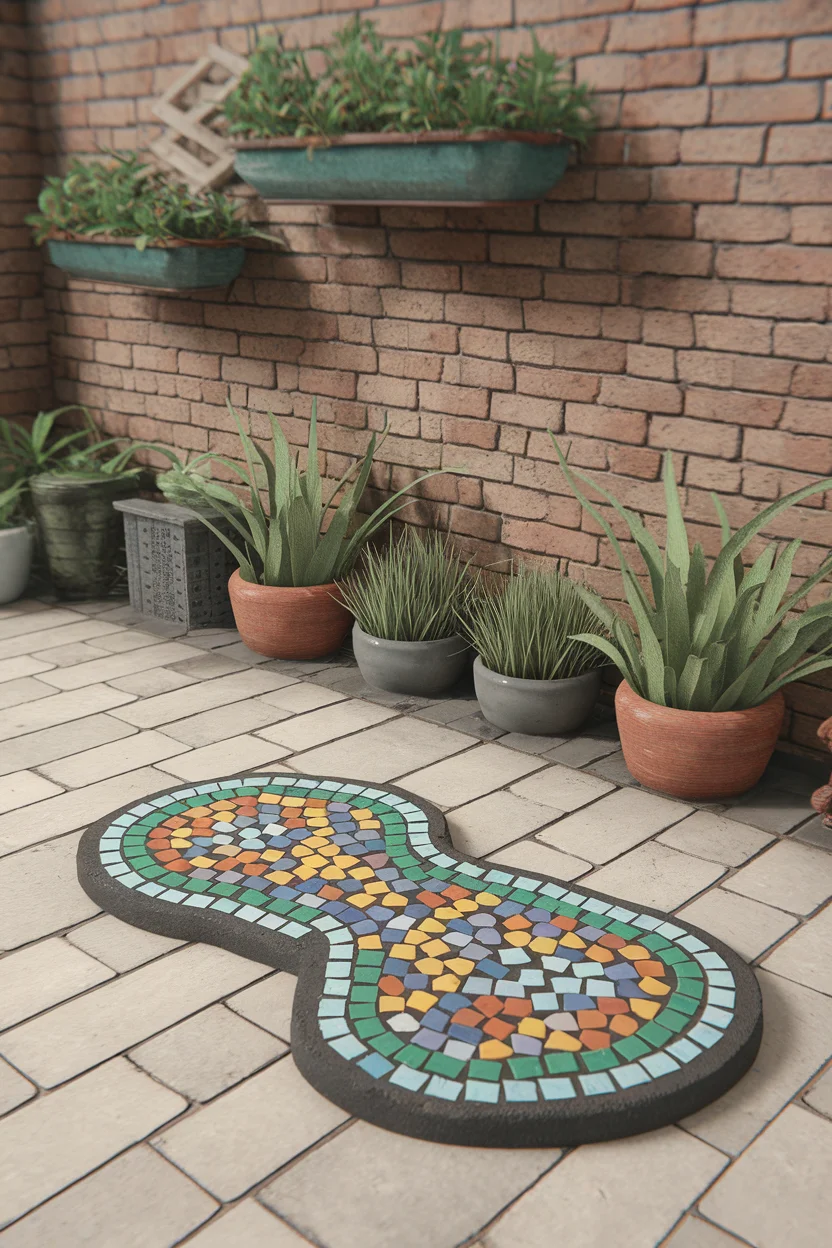
Add a creative and personal touch to your yard with DIY garden mosaic stepping stones. These eye-catching path pieces can transform any walkway into an artful journey through your garden. The stepping stones are not only practical, providing a stable surface to walk on, but also artistic, as they allow you to incorporate a variety of colors, patterns, and even personalized designs. Choose colors that match your garden’s theme or create contrasting designs for a bold visual effect.
How to Achieve Garden Mosaic Stepping Stones
Materials Needed:
– Concrete stepping stone molds (you can also use cake pans or trays)
– Cement mix
– Water
– Small mosaic tiles or broken pieces of colorful ceramics/glass
– Protective gloves
– A bucket or mixing tub
– A trowel or stirring stick
– Sponge or rag
– Tile adhesive (optional for pre-mixed designs)
– Clear outdoor sealant (optional)
Step-by-Step Instructions:
Prepare the Molds:
– Choose molds for your stepping stones. Cake pans, pie tins, or plastic trays work well for this purpose.
– If using reusable molds, line them with plastic wrap for easy removal of the stones once dry.
Mix the Cement:
– Put on your protective gloves and mix the cement according to the manufacturer’s instructions, achieving a pasty consistency.
– Pour the mixed cement into the prepared molds, filling them to your desired thickness.
Create the Mosaic Design:
– Before the cement starts to set, press mosaic tiles or broken ceramic pieces onto the surface.
– Arrange the pieces in a pattern or image of your choice, pressing gently to ensure they adhere. For intricate designs, you might pre-arrange them in tile adhesive and transfer them onto the wet cement as one piece.
Smooth and Set:
– Smooth the surface around the tiles using a wet sponge or rag, and remove any excess cement that might cover the tiles.
– Allow the stepping stones to set for at least 24-48 hours, depending on the weather and humidity.
Finishing Touches:
– Once the stones are fully cured, remove them from the molds.
– Optionally, apply a clear outdoor sealant to protect the mosaics and enhance their color.
Install the Stepping Stones:
– Place the stepping stones in your desired garden pathway, ensuring they are level and securely positioned in the earth.
– Walk on them once set to ensure stability.
With these steps, your garden mosaic stepping stones will not only provide a safe and decorative pathway but also reflect your personal aesthetic within your outdoor space.
