Transforming outdoor spaces into cozy retreats, fire pits have become a staple for both style and functionality in backyard design. They offer warmth during chilly evenings, a focal point for gatherings, and a sense of relaxation and ambience under the open sky. Whether you’re looking to install a permanent fixture or a portable option, exploring various fire pit ideas can ignite your imagination and help you create the perfect outdoor haven.
Rustic Stone Fire Pit with Seating
Transform your backyard into a cozy retreat with a rustic stone fire pit, surrounded by natural stone or log seating. This design not only blends seamlessly with any outdoor setting but also provides a warm, inviting space perfect for gatherings with family and friends. The natural textures and earthy tones of the stones add a timeless charm, while the seating encourages interaction and comfort around the fire.
How to Achieve It
Select a Location:
– Choose a flat, open area that is at least 10 feet away from any structures, trees, or flammable materials.
Materials Needed:
– Fire bricks or fire-rated pavers for the interior structure.
– Large, natural stones or rocks for the exterior.
– Gravel for the base.
– Logs or stone slabs for seating.
– Optional: fire pit ring for added safety.
Construction Steps:
Prepare the Base:
– Mark a circle with a desired diameter (usually 3-4 feet).
– Dig down around 6-12 inches to create a sturdy base.
– Fill the hole with gravel and tamp it down to level.
Build the Fire Pit:
– Place the fire bricks or pavers in a circle to form the interior wall.
– Stack the natural stones around the fire bricks, ensuring stability and uniformity.
– Use a masonry adhesive for added security between stones.
Create Seating Area:
– Arrange logs or stone slabs around the fire pit, leaving enough room for comfortable seating.
– Ensure seats are level and stabilized.
Color Scheme:
– Opt for earthy tones such as grays, browns, and tans for stones, enhancing the natural look.
– Use contrasting colors for seating, like deep greens or rustic reds, to add warmth.
Finishing Touches:
– Add cushions or throws to seating for added comfort.
– Install landscape lighting around the fire pit for additional ambiance.

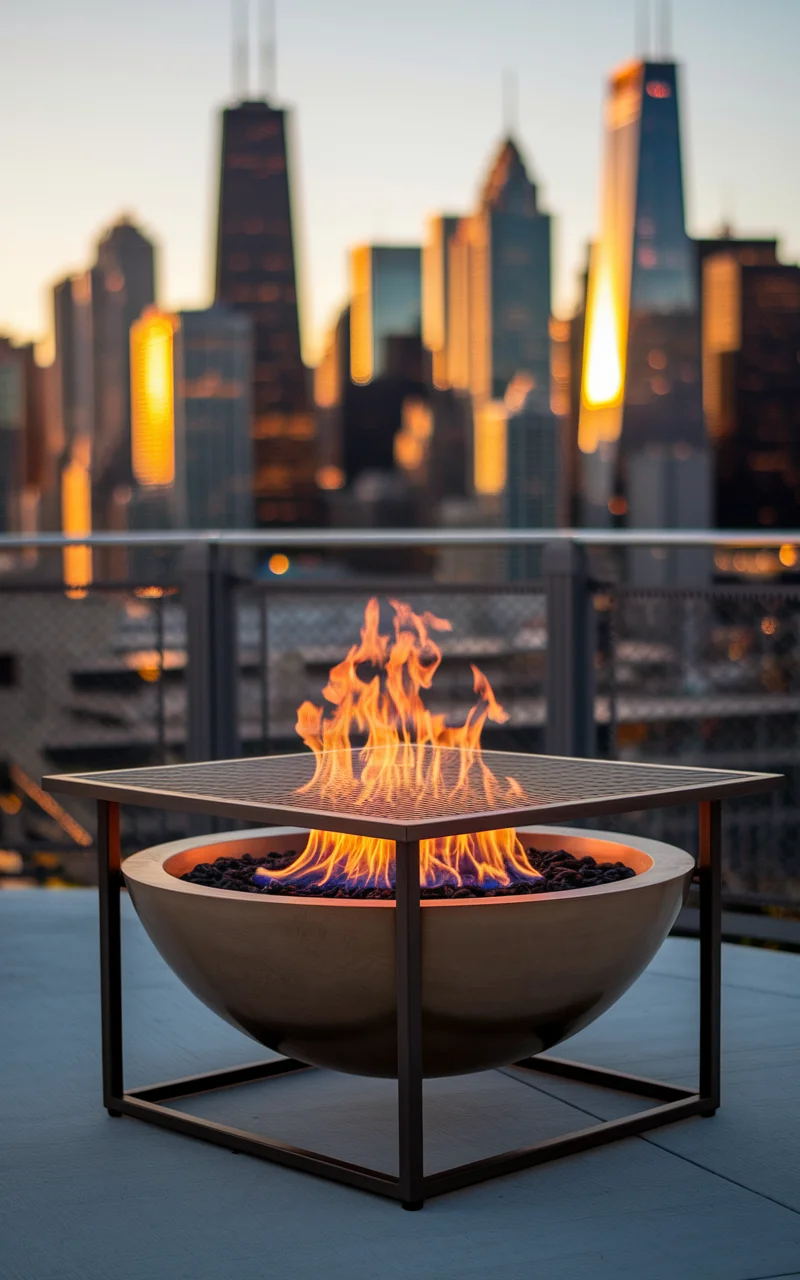
Modern Metal Fire Pit with a Built-In Table
Elevate your outdoor space with a sleek, modern metal fire pit that incorporates a built-in table. This dual-function design provides not only a warming fire but also a practical surface for drinks and snacks, making it an ideal centerpiece for entertaining guests. The clean lines and contemporary finish of the metal add a touch of sophistication, while the integrated table ensures convenience and functionality in your garden setting.
How to Achieve It
Select a Location:
– Choose a well-ventilated area with a level surface, ensuring it’s at least 10 feet away from any flammable structures or vegetation.
Materials Needed:
– Metal fire pit bowl or structure.
– Heat-resistant metal or composite materials for the table surface.
– High-temperature spray paint for finishing.
– Rust-proof screws and brackets for assembly.
– Optional: glass wind guard for added safety.
Construction Steps:
Design the Layout:
– Decide on the dimensions of your fire pit and table, ensuring there’s enough space for both functionalities.
– Sketch the layout to visualize how the table component will integrate with the fire pit.
Build the Structure:
– Securely attach the fire pit bowl to the metal structure, ensuring stability.
– Install the table surface around the perimeter of the fire pit, using brackets and screws for support.
– Ensure that all components are level and securely fastened.
Finish and Protect:
– Coat the entire structure with high-temperature spray paint to prevent rust and enhance durability.
– Add a glass wind guard for safety, if desired, to shield the flames from wind and protect guests.
Color Scheme:
– Opt for modern metallic hues like steel gray or black to emphasize the contemporary aesthetic.
– Use contrasting neutral tones for the table surface, such as matte white or beige, to create an elegant visual balance.
Finishing Touches:
– Incorporate weather-resistant cushions on surrounding seating for added comfort.
– Use LED string lights or solar lanterns to enhance the ambiance during evening gatherings.
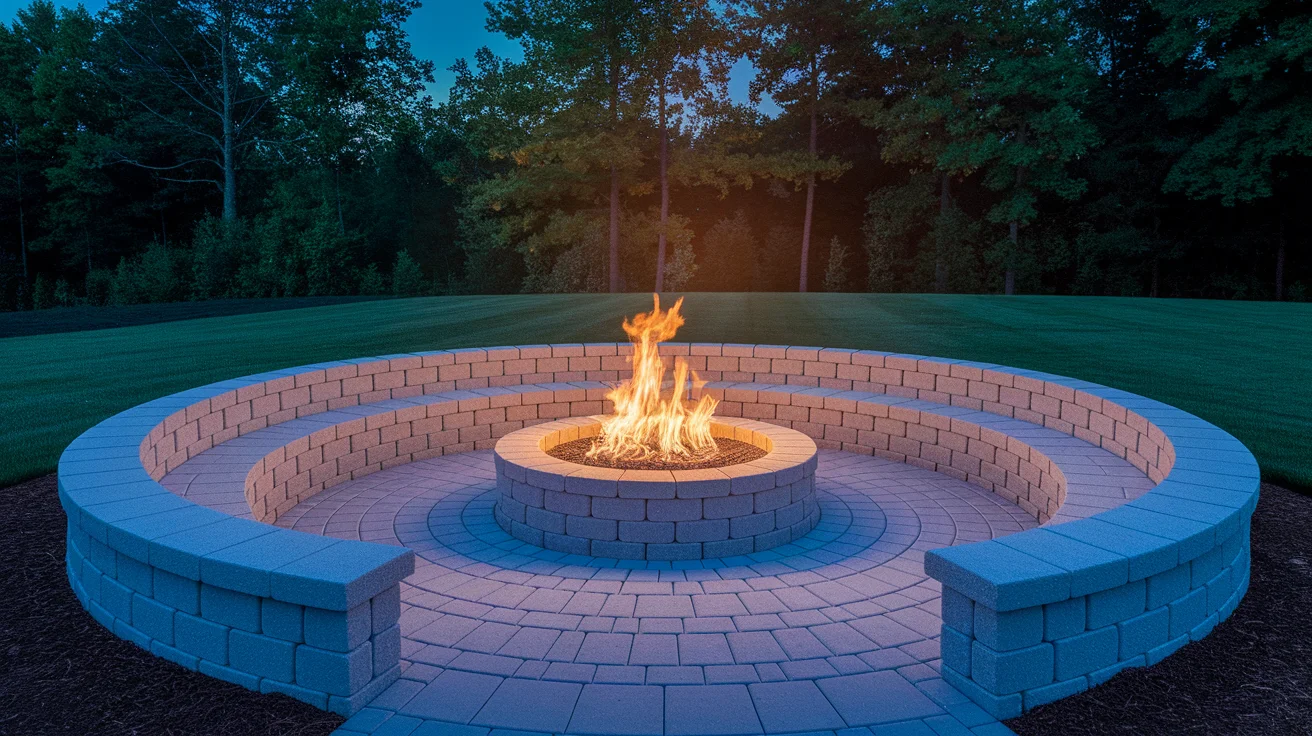
Sunken Patio Fire Pit with Surrounding Bench
Create a seamless and intimate gathering space in your backyard with a sunken patio fire pit surrounded by a built-in bench. This design invites a cozy campfire atmosphere, offering an integrated seating solution that maximizes space and comfort. The lowered construction of the fire pit ensures wind protection, while the surrounding bench provides continuous seating, making it perfect for long conversations under the stars.
How to Achieve It
Select a Location:
– Identify a space in your yard that can accommodate a slight excavation and is at least 10 feet away from any flammable structures or plants.
Materials Needed:
– Retaining wall blocks or sturdy bricks for the fire pit and bench structure.
– Fire-rated bricks for the interior of the fire pit.
– Pavers or tiles for the patio surface.
– Mortar or masonry adhesive.
– Optional: weather-resistant cushions for seating.
Construction Steps:
Excavate the Area:
– Mark the desired perimeter of the sunken patio.
– Dig down approximately 12-18 inches, ensuring level ground for the fire pit installation.
Build the Fire Pit:
– Center and construct the fire pit using fire-rated bricks for the interior.
– Use retaining wall blocks or bricks to form the exterior, ensuring the structure is stable and secure.
Create the Patio and Bench:
– Lay pavers or tiles around the fire pit area to create the patio surface.
– Construct the bench along the perimeter using retaining wall blocks or bricks, shaping it to contour the fire pit.
Secure and Finish:
– Use mortar or masonry adhesive to ensure all blocks and bricks are securely fixed.
– Consider adding cushions to the bench for extra comfort.
Color Scheme:
– Opt for neutral shades like soft grays and sandy whites to promote an inviting, natural look.
– Incorporate colorful cushions with shades like olive green or navy blue to add visual interest and comfort.
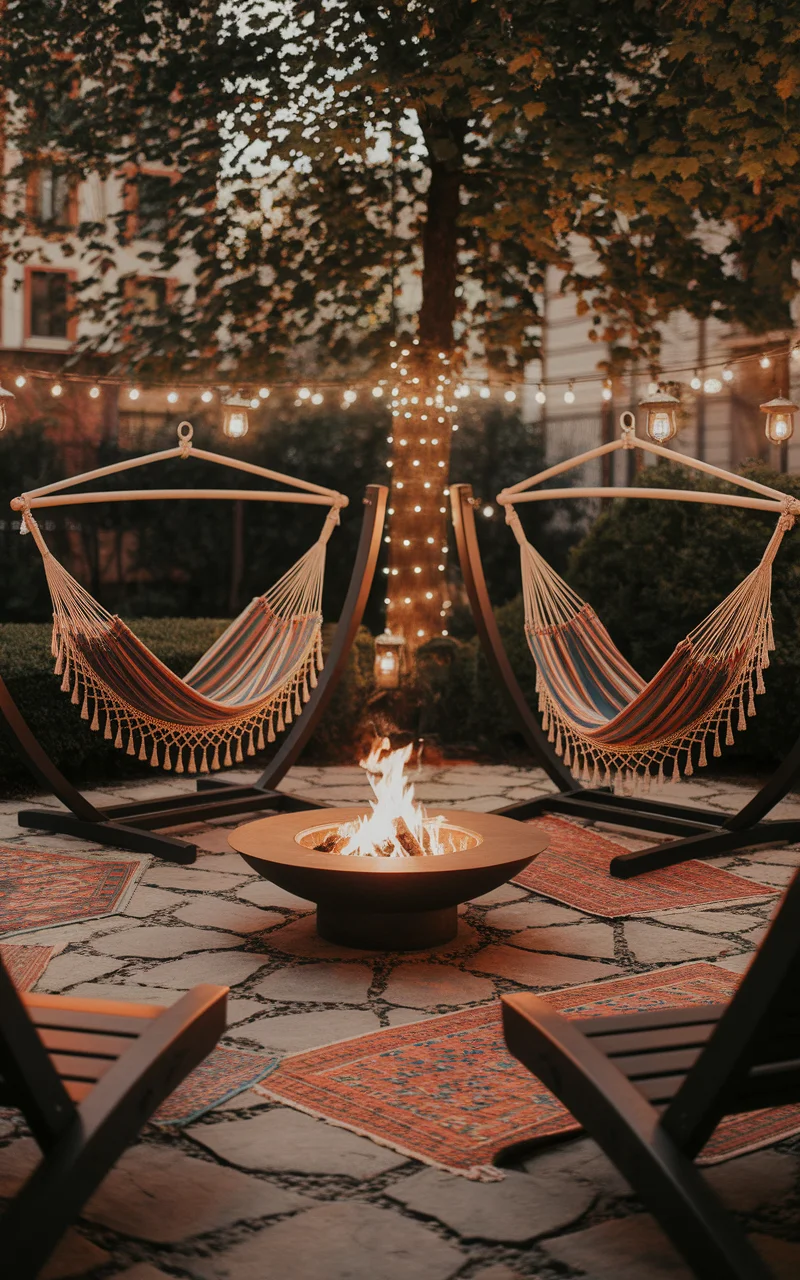
Boho-Inspired Fire Pit with Hammock Oasis
Create a dreamy, bohemian oasis in your backyard by combining a simple fire pit design with a surrounding hammock area. This concept mixes the relaxing vibe of swinging hammocks with the warmth and glow of a fire pit, perfect for leisurely evenings or laid-back social gatherings. The eclectic decor associated with boho style, like colorful textiles and hanging lanterns, enhances the inviting atmosphere.
How to Achieve It
Select a Location:
– Choose an open area that???s away from overhanging branches and structures, ensuring at least 10 feet of clearance.
Materials Needed:
– A metal or stone fire pit bowl or structure.
– Hammocks with sturdy stands or hammock chairs.
– Outdoor rugs and cushions in bohemian patterns.
– String lights or lanterns for ambiance.
– Optional: decorative stones or gravel for flooring.
Construction Steps:
Set Up the Fire Pit:
– Position the fire pit in the center of the designated area.
– Ensure it is stable and on a fire-proof surface.
Arrange Hammock Area:
– Place hammock stands around the fire pit, arranging them for optimal comfort and view of the fire.
– Ensure the hammocks are securely fixed and safely distanced from the fire.
Add Decorative Elements:
– Lay out outdoor rugs and add cushions around the seating for a soft, comfortable setting.
– Hang string lights or lanterns above the area to create a cozy, illuminated space.
Color Scheme:
– Use earthy tones like terracotta and warm brown hues for a natural foundation.
– Incorporate vibrant colors through textiles, like deep blues, reds, and golds, to capture the bohemian aesthetic.
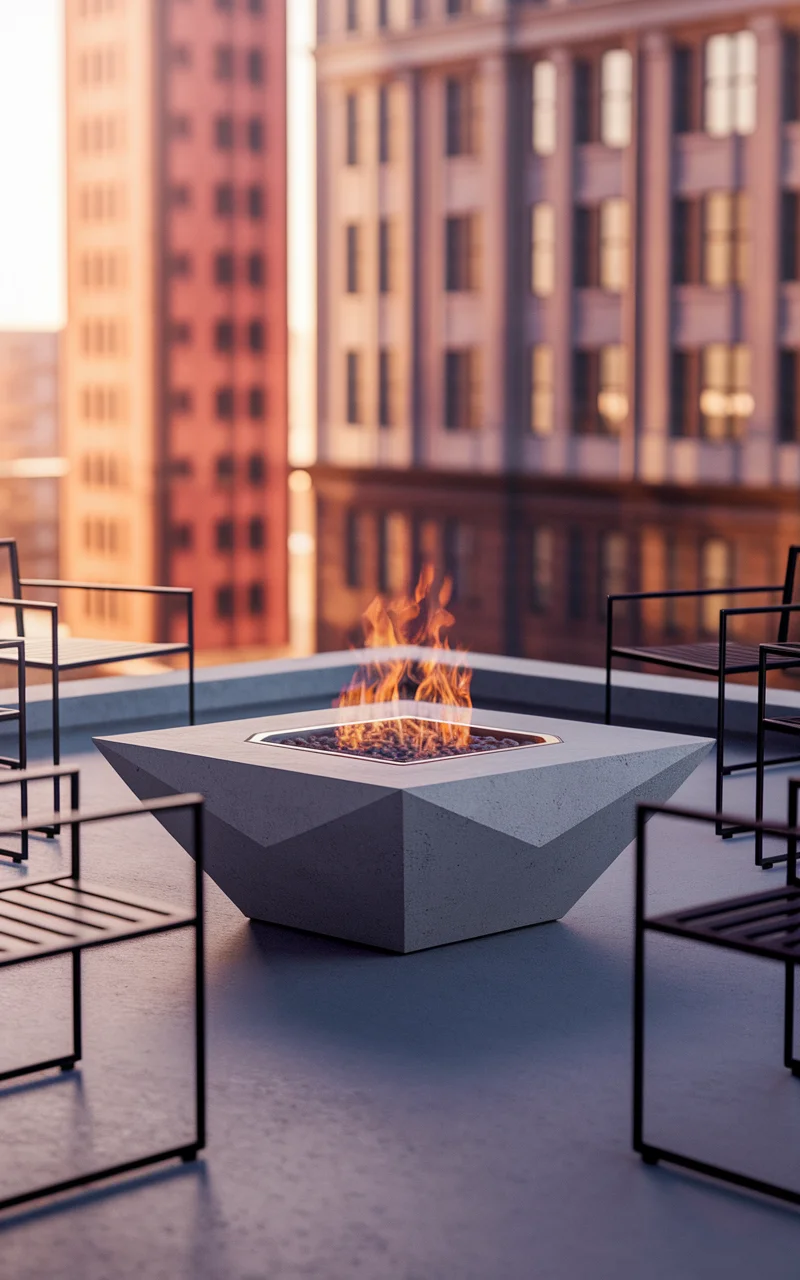
Geometric Concrete Fire Pit with Minimalist Seating
Introduce a sleek and modern touch to your outdoor space with a geometric concrete fire pit. This minimalist design emphasizes clean lines and a sturdy industrial aesthetic, ideal for those who appreciate contemporary style. The solid concrete structure provides durability and a striking visual centerpiece, while minimalist seating ensures the focus remains on the unique shape of the fire pit, making it a perfect spot for quiet reflection or stylish gatherings.
How to Achieve It
Select a Location:
– Choose a flat, spacious area that is free from overhanging plants and at least 10 feet away from flammable structures.
Materials Needed:
– Precast concrete blocks or a concrete fire pit kit.
– Fire-rated insert for safety.
– Concrete sealer to protect the surface.
– Minimalist chairs or benches made of metal or wood.
Construction Steps:
Design the Layout:
– Decide on the geometric shape, such as a square or hexagon, for your fire pit.
– Sketch the design to ensure the layout maximizes the outdoor space.
Construct the Fire Pit:
– Assemble the precast concrete blocks or use a concrete kit to form the structure.
– Install the fire-rated insert in the center for safety and protection.
– Apply a concrete sealer once the structure is dry to enhance durability.
Arrange Seating:
– Position minimalist seating around the fire pit, maintaining a uniform distance.
– Utilize simple, streamlined furniture to complement the geometric design.
Color Scheme:
– Select neutral tones like light grays or soft whites for the concrete to accentuate the modern look.
– Choose monochromatic or metallic finishes for seating to maintain a minimalist aesthetic.
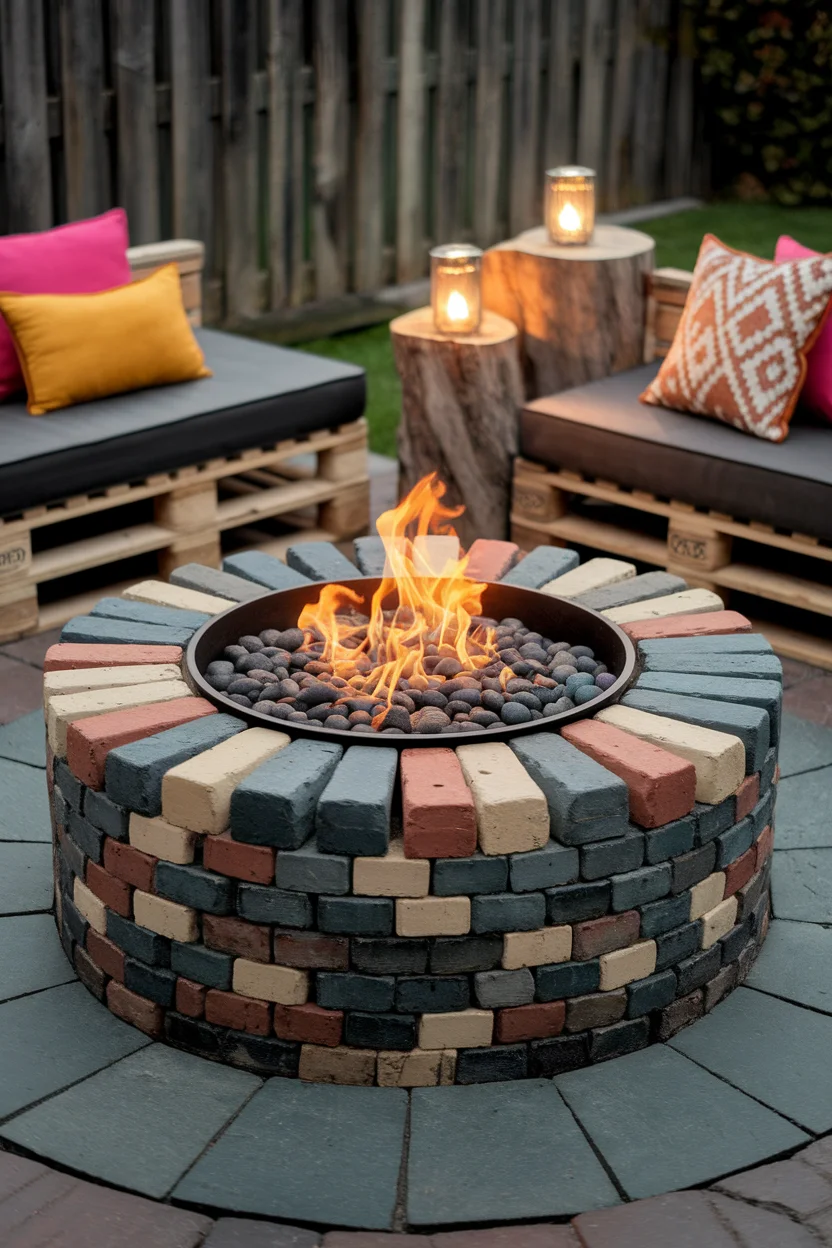
Eco-Friendly Fire Pit with Recycled Materials
Create an environmentally conscious fire pit using recycled materials that not only reduce waste but also add a unique charm to your backyard. This eco-friendly design emphasizes sustainability, utilizing repurposed bricks, stones, or metal pieces. The rustic appeal of recycled materials brings character to your outdoor space, providing a conversation starter as well as a warm gathering point.
How to Achieve It
Select a Location:
– Choose a flat, open area at least 10 feet away from any structures, trees, or other flammable materials.
Materials Needed:
– Recycled bricks, stones, or metal scraps for the fire pit structure.
– A fire-rated liner or insert for safety.
– Gravel or crushed stone for the base.
– Optional: old pallets or reclaimed logs for seating.
Construction Steps:
Prepare the Base:
– Mark a circle with a desired diameter (usually 3-4 feet).
– Dig down approximately 6 inches to create a stable base.
– Fill the base with gravel or crushed stone and level it.
Build the Fire Pit:
– Use the recycled materials to construct the fire pit walls, carefully placing each piece for stability.
– Install a fire-rated liner in the center to ensure fire safety.
– Ensure all elements are securely placed and the structure is sturdy.
Add Seating:
– Arrange old pallets or reclaimed logs around the fire pit for a rustic seating area.
– Ensure all seating is stable and safe for use.
Color Scheme:
– Embrace the natural hues of the recycled materials, whether they’re weathered bricks, stones, or rusted metal, to enhance the rustic, sustainable aesthetic.
– Incorporate vibrant outdoor cushions or throws to add comfort and color contrast.
Chic Fire Pit with Water Feature Combo
Integrate the soothing sounds of water with the cozy warmth of a fire in your outdoor space by incorporating a chic fire pit with a built-in water feature. This innovative design harmonizes the natural elements, offering both visual appeal and auditory tranquility. The sleek combination of fire and water creates an elegant and modern focal point, perfect for enhancing ambiance during relaxing evenings or entertaining guests.
How to Achieve It
Select a Location:
– Choose a spacious, flat area at least 10 feet away from any structures or flammable materials.
– Ensure access to a power source for the water pump.
Materials Needed:
– A metal or stone fire pit bowl.
– Water basin and pump for the water feature.
– Heat-resistant sealant for waterproofing.
– Decorative stones or glass pebbles.
Construction Steps:
Design the Structure:
– Plan the layout with the fire pit at the center and the water feature around it.
– Sketch a design that allows for adequate space for both elements.
Install the Water Feature:
– Position the water basin around the fire pit and install the pump.
– Use heat-resistant sealant to ensure waterproofing between the water area and fire pit.
Set Up the Fire Pit:
– Securely place the fire bowl in the center of the configuration.
– Surround the fire pit with decorative stones or glass pebbles for a clean finish.
Color Scheme:
– Opt for sleek metallic or stone finishes like brushed steel or slate gray for a modern aesthetic.
– Use transparent or shimmering materials in the water feature for added elegance.

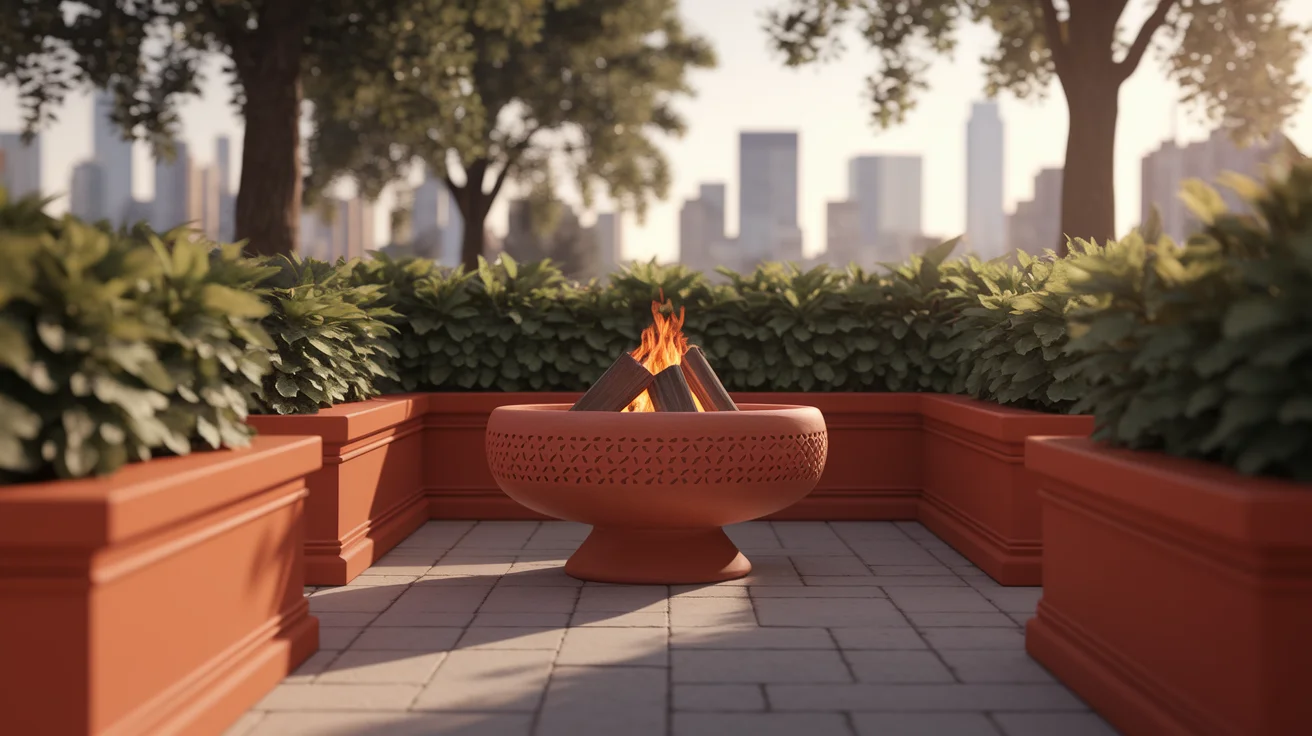
Terracotta Fire Pit with Garden Planters
Enhance your outdoor ambiance by combining the warmth of a terracotta fire pit with lush garden planters. The natural reddish-brown hue of the terracotta complements the greenery of the plants, creating a harmonious and inviting space. This design not only serves as a captivating focal point but also integrates your love for gardening with cozy fire gatherings.
How to Achieve It
Select a Location:
– Pick a level area that is at least 10 feet away from flammable structures or plants.
Materials Needed:
– Terracotta fire pit bowl or structure.
– Fire-rated liner for safety.
– Terracotta or clay garden planters.
– A selection of hardy, fire-resistant plants.
– Gravel or sand for the base.
Construction Steps:
Prepare the Base:
– Mark the desired area for your setup.
– Dig down around 6 inches and fill with gravel or sand to ensure stability.
Install the Fire Pit:
– Position the terracotta fire pit bowl securely in the prepared area.
– Insert the fire-rated liner to safeguard the structure.
Arrange Garden Planters:
– Surround the fire pit with terracotta planters, allowing easy access and maintenance.
– Plant fire-resistant greenery to add color and life to the setting.
Color Scheme:
– Emphasize the earthy tones of terracotta by using planters in natural shades.
– Choose plants with contrasting colors, such as deep greens or vibrant blooms, to enhance the overall aesthetic.
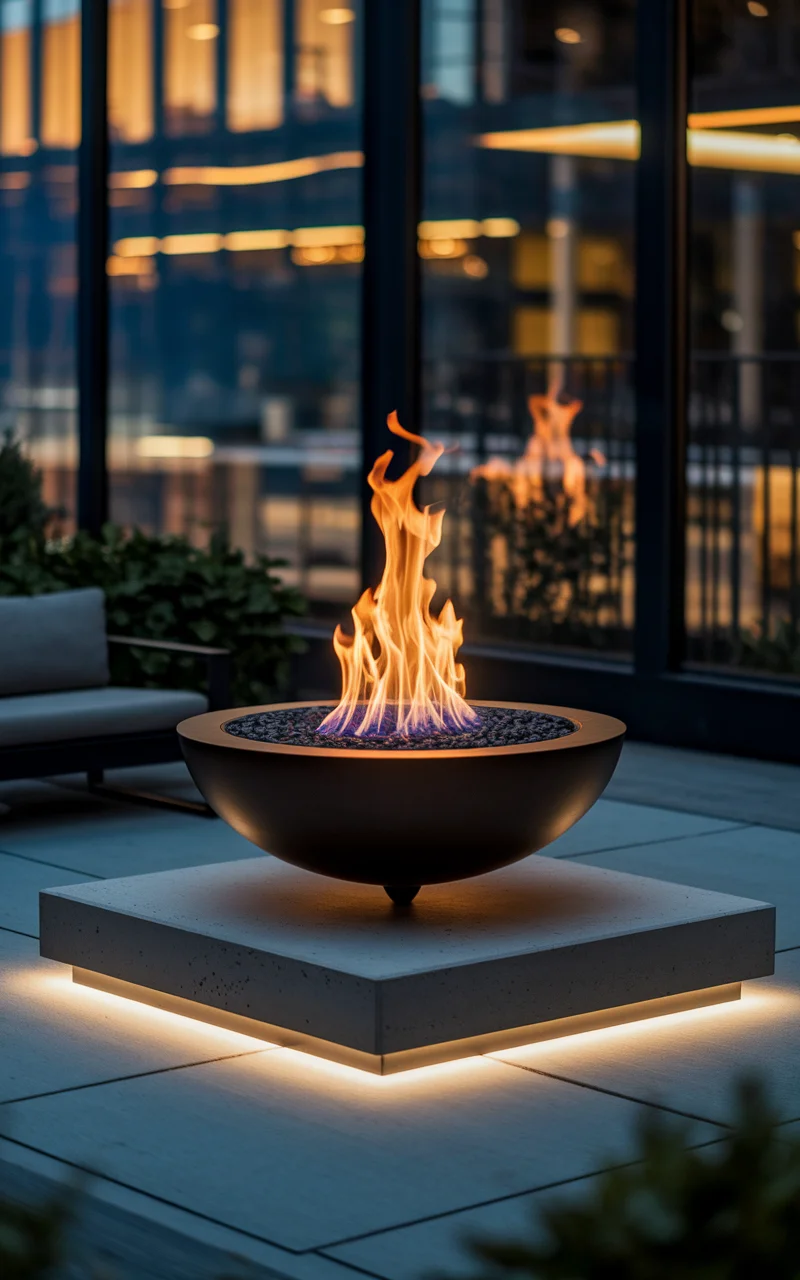
Floating Fire Pit with Underlit Base
Add a modern twist to your outdoor space with a floating fire pit featuring an underlit base. This contemporary design uses LED lighting to create an illuminating effect that makes the fire pit appear as though it’s levitating. The underlighting adds a dramatic and futuristic touch, especially during nighttime gatherings, making it a statement piece for any backyard.
How to Achieve It
Select a Location:
– Choose an open, flat area at least 10 feet away from structures and flammable materials.
– Ensure access to an electrical source for the underlighting.
Materials Needed:
– A metal or concrete fire pit bowl.
– LED strip lights with waterproof housing.
– A raised platform or base for the fire pit.
– Fire-rated liner for safety.
– Remote-control system for LED lights (optional).
Construction Steps:
Prepare the Base:
– Lay a foundation slightly larger than the fire pit to accommodate the lighting setup.
– Install a raised platform or base where the fire pit will sit.
Set Up the Fire Pit:
– Position the fire pit bowl on the raised platform.
– Insert a fire-rated liner for additional safety.
Install Underlighting:
– Attach LED strip lights around the perimeter of the base, ensuring they are securely fastened and properly sealed against moisture.
– Connect the LED lights to the power source, incorporating a remote-control system if desired for easy operation.
Color Scheme:
– Use neutral tones like black, silver, or slate for the fire pit to enhance the modern look.
– Choose cool-colored LED lights such as blue or white to create a sleek, contemporary ambiance.
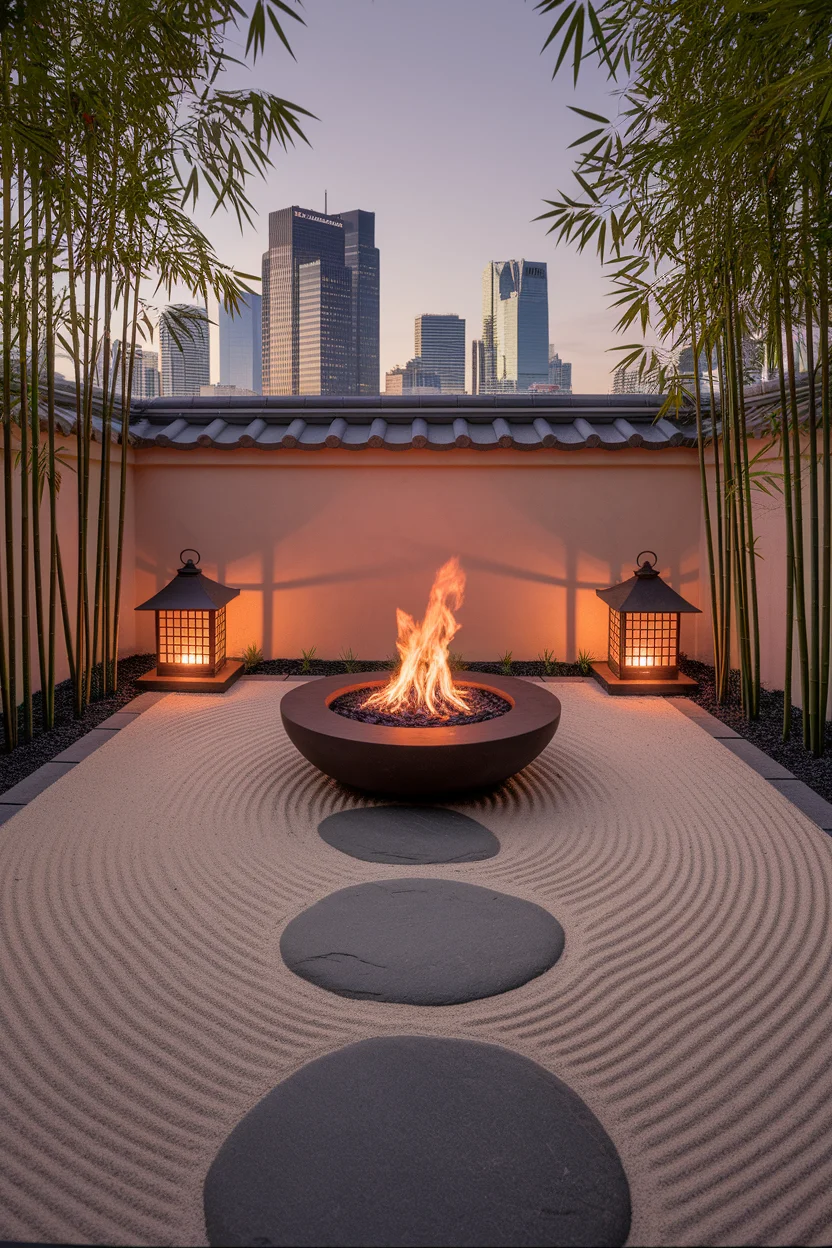
Japanese Zen Garden Fire Pit
Create a serene and meditative outdoor space by incorporating a Japanese Zen garden theme with a fire pit as its focal point. This design combines the simplicity and tranquility of a Zen garden with the warmth of a fire pit, encouraging peaceful reflection and relaxation. The use of natural elements like sand, stones, and plants enhances the calming atmosphere, making it a perfect retreat for quiet contemplation or intimate gatherings.
How to Achieve It
Select a Location:
– Choose a quiet, flat area in your yard that is free from overhanging branches and has at least 10 feet of clearance from structures or flammable materials.
Materials Needed:
– A simple, low-profile fire pit bowl or structure.
– Sand or fine gravel for the Zen garden base.
– Large, smooth stones or boulders for decorative accents.
– Bamboo or other native plants for added greenery.
– Traditional Japanese lanterns or lighting for ambiance.
Construction Steps:
Prepare the Zen Garden Base:
– Mark the desired perimeter of your garden area.
– Dig down slightly and fill the space with sand or fine gravel, raking it smooth to create a level surface.
Set Up the Fire Pit:
– Position the fire pit bowl centrally within the garden, ensuring it is stable and secure.
– Surround the fire pit with large stones or boulders as decorative elements and wind barriers.
Add Natural Elements:
– Plant bamboo or other native greenery around the periphery for a natural frame.
– Arrange traditional lanterns or low lighting to enhance the tranquil setting.
Color Scheme:
– Embrace natural tones like sandy beige, weathered stone gray, and fresh greens to maintain the Zen aesthetic.
– Use subtle lighting with warm hues to add a gentle glow to the space.