Homesteading, a timeless journey back to self-sufficiency, invites modern-day settlers to cultivate their own food in harmony with nature. Central to this lifestyle is the creation of a thoughtfully designed garden layout that maximizes the yield and health of crops while seamlessly integrating with the ecological balance of the land. As more families embrace sustainable living, homesteading garden layouts offer a canvas for innovation and tradition, transforming ordinary plots into thriving ecosystems of abundance and tranquility. Whether on a sprawling acreage or a compact urban lot, these garden design ideas cater to diverse spaces, climates, and aspirations, helping to nurture not only food but also a deep connection to the earth.
Mandala Garden Design
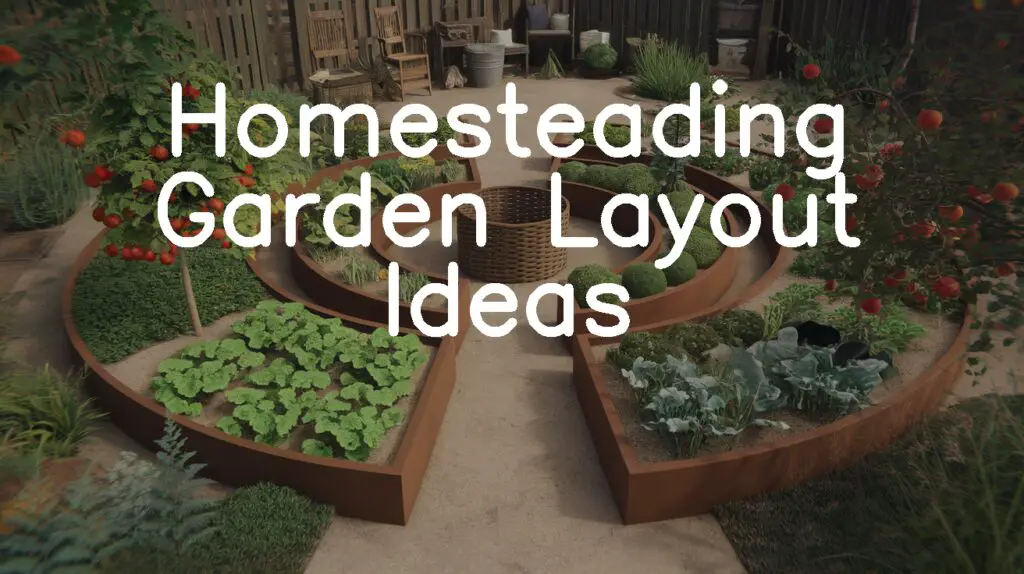
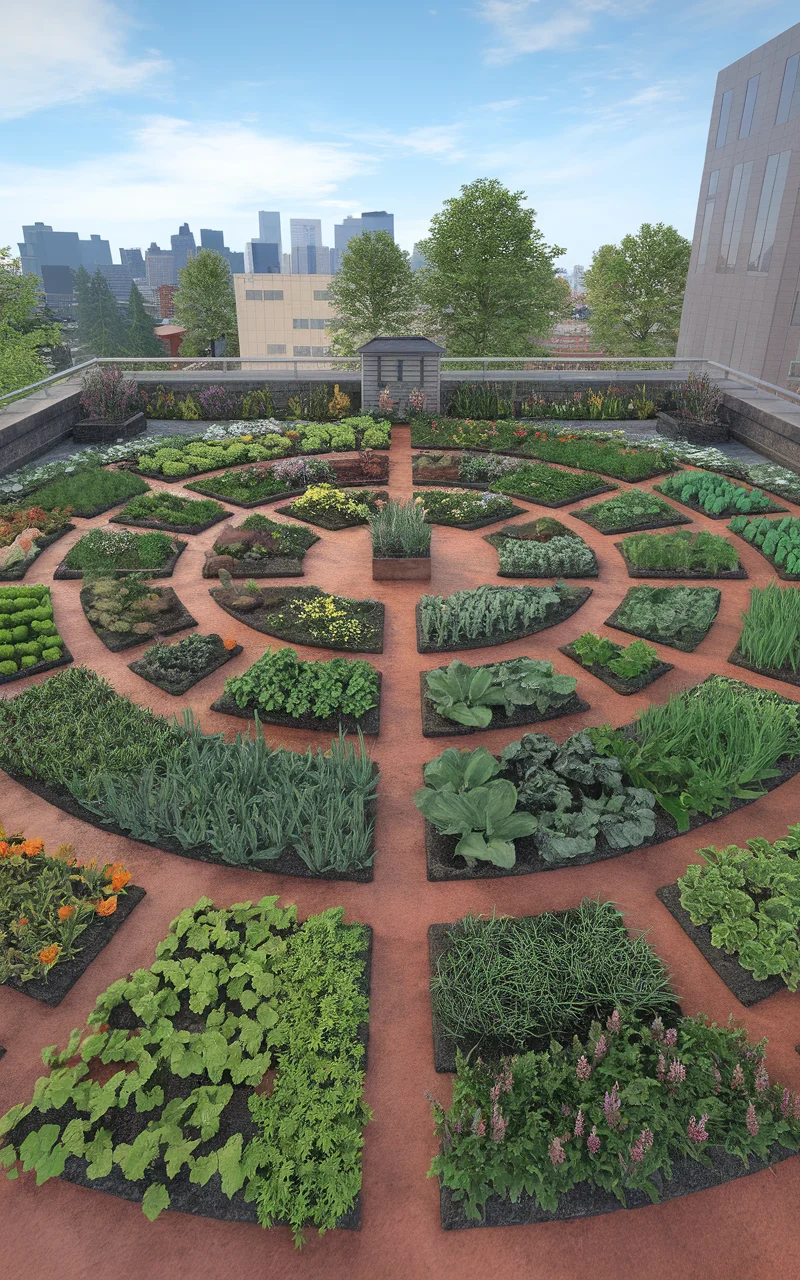
Mandala gardens are a captivating and efficient design for homesteading gardens, inspired by ancient patterns and permaculture principles. The circular, spiral layout of a mandala garden allows for maximum use of space and creates a visually pleasing, harmonious environment. This design is typically centered around a keyhole path, allowing easy access to the garden’s center and peripheral planting beds. The beds can be designed in concentric circles or wave-like patterns, accommodating various plant species and fostering biodiversity. The mandala garden can be color-themed, using vibrant greens mixed with flowering plants like marigolds and nasturtium for pops of red, orange, and yellow, creating an enticing garden collage.
How to Achieve a Mandala Garden Design
Site Selection:
– Choose a flat or gently sloped area with good sunlight exposure.
– Ensure proximity to a water source for easy irrigation.
Planning and Layout:
– Sketch out the garden design on paper first, focusing on a circular layout.
– Mark the center point and use a string from this center to outline your circles.
Soil Preparation:
– Clear the area of any grass or debris.
– Till the soil, enriching it with compost or organic matter for fertility.
Pathway and Bed Design:
– Construct keyhole paths for accessibility, considering a width that allows comfortable movement.
– Design planting beds around these paths in concentric or spiral configurations.
Plant Selection:
– Opt for a mix of perennial and annual plants.
– Incorporate companion planting for pest control and nutrient balance (e.g., beans with corn, tomatoes with basil).
Plant Arrangement:
– Use taller plants towards the center or back of the growing beds.
– Arrange plants in cascading heights to ensure optimal sunlight exposure.
Color Scheme:
– Use greens broadly, punctuated with brightly colored flowers.
– Consider companion flowers like calendula and borage to attract pollinators and repel pests.
Maintenance:
– Regularly mulch the beds to retain moisture and suppress weeds.
– Conduct routine checks for pests and diseases, using organic treatments as needed.
By implementing this mandala garden concept, homesteaders can enjoy not only the functional benefits but also the aesthetic allure such a garden offers.
Spiral Herb Garden
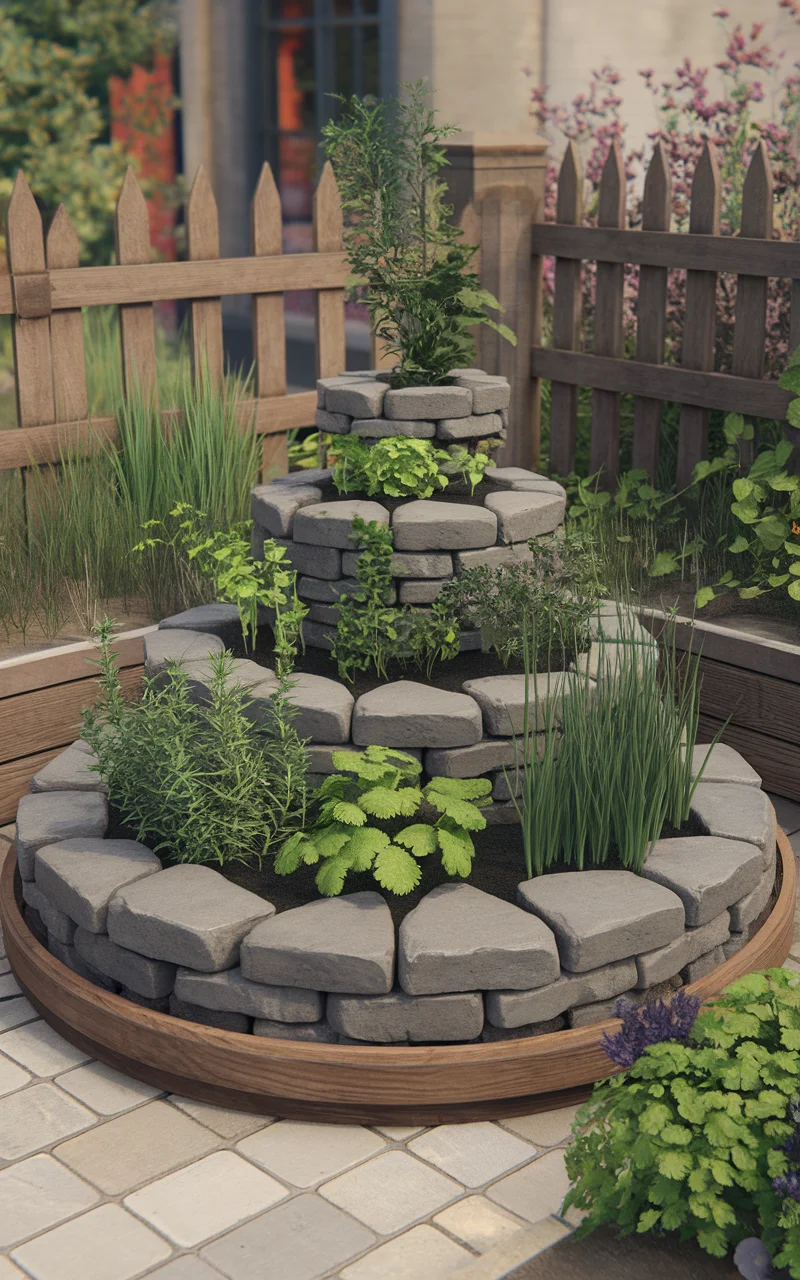
A spiral herb garden is an innovative and space-efficient design perfect for homesteaders seeking to maximize their garden’s productivity. This vertical, spiraling structure allows you to grow a variety of herbs in a compact area, making it ideal for small spaces. The spiral shape creates microclimates due to the varying heights, enabling diverse plant species to thrive in one cohesive design. The higher part of the spiral can be used for plants that require better drainage and more sun, while the lower sections can be home to moisture-loving plants that benefit from the shade. This arrangement not only optimizes space but also enhances the visual appeal of your garden, creating a striking feature that stands out.
How to Achieve a Spiral Herb Garden
Site Selection:
– Find a sunny location as most herbs require ample sunlight.
– Ensure proximity to a water source for easy watering.
Planning and Layout:
– Decide on the diameter and height of your spiral based on available space and herb needs.
– Sketch the spiral layout on paper for reference.
Material Gathering:
– Gather materials like stones, bricks, or reclaimed wood to construct the spiral structure.
– Acquire quality soil and compost to fill the spiral.
Construction:
– Begin building the spiral base from the inside out, using the gathered materials to shape the walls.
– Gradually increase the height as you move towards the center, creating a slope.
Soil and Planting:
– Fill the structure with layers of soil and compost, ensuring good drainage.
– Start planting herbs from top to bottom, placing sun-loving, drought-resistant varieties like rosemary and thyme at the top.
– Plant moisture-loving varieties like chives and parsley at the bottom where the soil retains more moisture.
Maintenance:
– Water regularly, paying attention to the varying needs of different herbs.
– Mulch around the herbs to retain moisture and prevent weed growth.
– Prune and harvest herbs routinely to encourage new growth and maintain structure.
Color Scheme:
– Enhance your herb spiral with splashes of color from flowering herbs like chives and lavender.
– Consider companion planting with brightly colored companion flowers like nasturtium or calendula for added visual appeal and pest control.
With its efficiency and appeal, a spiral herb garden can offer an abundance of fresh herbs while becoming a captivating focal point in your homesteading landscape.
Permaculture Guild Design
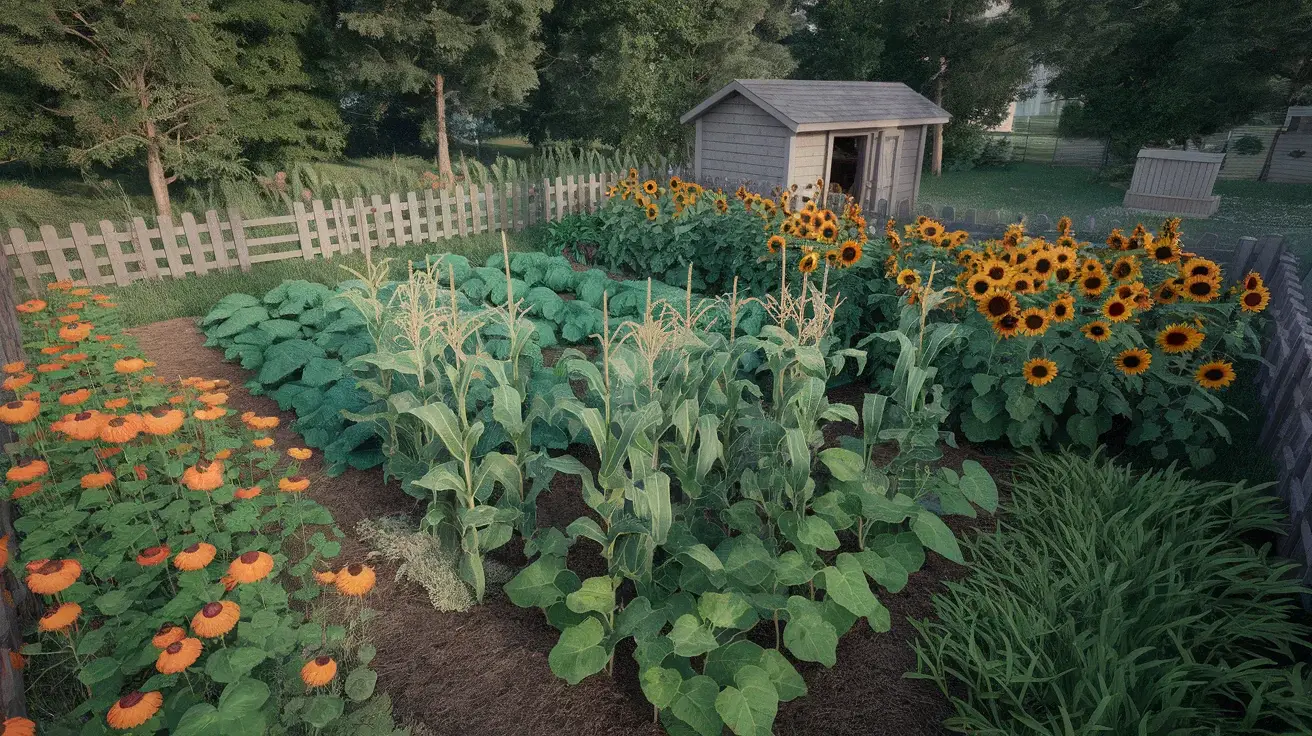
Permaculture guilds are an inventive and sustainable approach to garden design that mimics natural ecosystems. This method involves grouping plants that support each other, enhancing biodiversity, and promoting healthy, self-sustaining environments. A classic example is the “Three Sisters” guild, which incorporates corn, beans, and squash. The corn serves as a natural trellis for the beans, the beans add nitrogen to the soil, enriching it for all plants, and the squash sprawls across the soil, acting as a living mulch to suppress weeds. This synergistic relationship maximizes space, yields, and ecological harmony, making it an excellent addition to any homesteading garden.
How to Achieve a Permaculture Guild Design
Site Selection:
– Choose an area with appropriate sunlight exposure based on plant needs.
– Ensure proximity to a water source, as guilds need adequate hydration.
Planning and Layout:
– Identify plant combinations that form beneficial relationships.
– Sketch the layout, considering plant positions for best mutual support (e.g., tall plants should not shade sun-needing companions).
Soil Preparation:
– Clear the planting area of debris and unwanted vegetation.
– Amend the soil with compost and organic matter to enhance fertility.
Plant Selection:
– Choose a mix of plants that fulfill roles like nitrogen fixation, ground cover, pest deterrents, and nutrient accumulators.
– Include a balance of annuals and perennials to ensure continuous productivity and stability.
Plant Arrangement:
– Position taller plants strategically to provide support or shade where needed.
– Arrange companion plants close enough for them to interact but with enough space for growth.
Pollinator Attraction:
– Incorporate flowers like echinacea and sunflowers to attract bees and beneficial insects.
– Plant fragrant herbs like lavender or mint to deter pests and invite pollinators.
Maintenance:
– Apply organic mulch to conserve moisture and suppress weeds.
– Conduct routine inspections to manage pest and disease organically, supporting plant health.
– Rotate and add crops seasonally to maintain guild balance and soil fertility.
Color Scheme:
– Utilize a rich palette of foliage and blooms, offering lush greens alongside vibrant flower hues from companion plants.
– Integrate colorful edibles like rainbow chard or purple basil to enhance visual diversity.
Implementing a permaculture guild design will not only increase the resilience and sustainability of your homesteading garden but also create a thriving, attractive ecosystem that mimics nature’s own ingenuity.
Polyculture Vegetable Patch
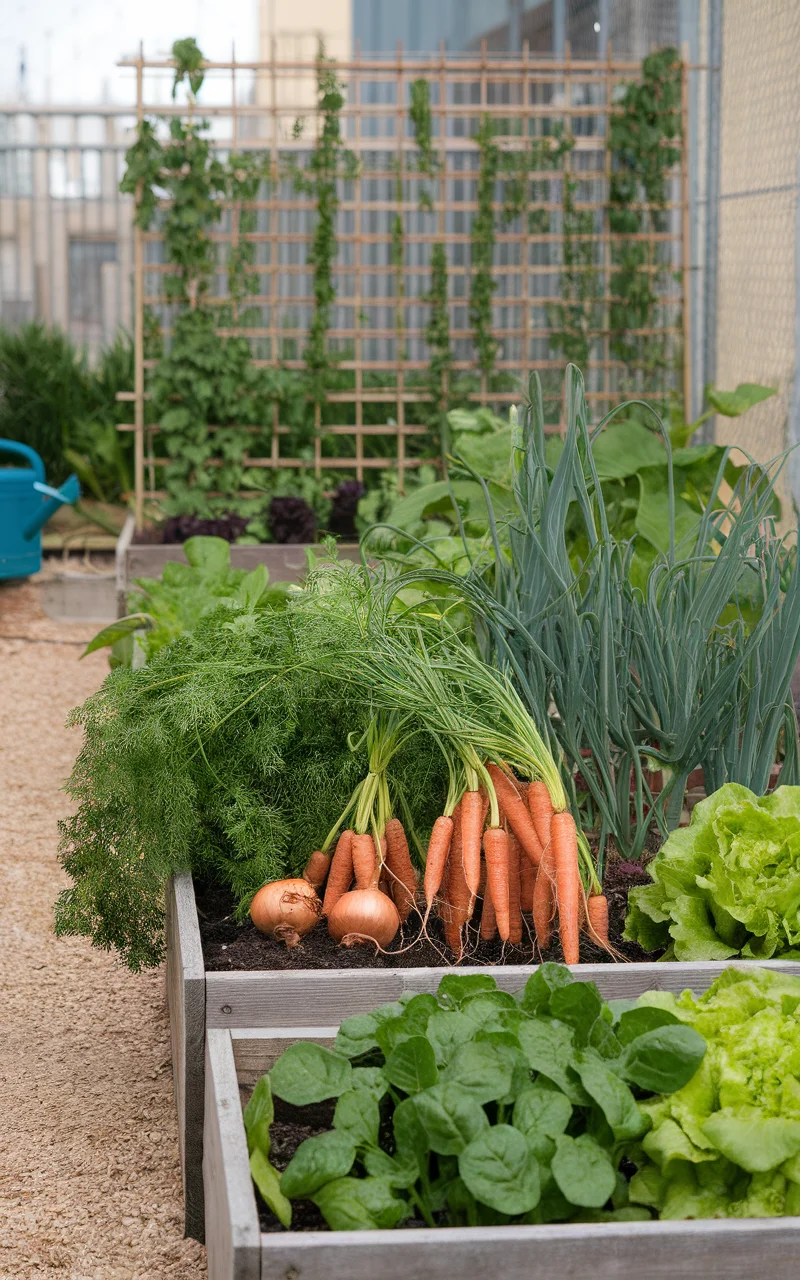
A polyculture vegetable patch is a diverse and sustainable gardening approach that mirrors natural ecosystems. By planting a variety of vegetables together, this design enhances biodiversity, reduces pest issues, and promotes healthy soil. Unlike monoculture systems, where single crops are grown in isolation, a polyculture approach combines compatible vegetables and herbs, leveraging their natural interactions for mutual benefit. For example, planting carrots alongside onions can help deter pests that target carrots, while bushy beans can provide nitrogen, benefiting neighboring plants. This method not only maximizes the yield of diverse crops but also fosters a resilient garden environment that requires less chemical intervention.
How to Achieve a Polyculture Vegetable Patch
Site Selection:
– Choose a location with ample sunlight and well-drained soil.
– Ensure easy access to a water source for consistent irrigation.
Planning and Layout:
– Research and select vegetable combinations with complementary growing habits and pest-deterring properties.
– Sketch your garden layout, allocating space for each plant type based on its growth requirements and interactions.
Soil Preparation:
– Clear the area of weeds and loosen the soil to promote root growth.
– Enrich the soil with organic compost to improve fertility and structure.
Plant Selection:
– Opt for a mix of root crops (e.g., carrots, radishes), legumes (e.g., beans, peas), leafy greens (e.g., lettuce, spinach), and alliums (e.g., onions, garlic).
– Incorporate companion herbs like basil or cilantro to enhance flavor and improve pest resistance.
Plant Arrangement:
– Alternate between deep-rooted and shallow-rooted plants to maximize space and nutrient uptake.
– Group plants with similar watering needs together to simplify maintenance.
Soil Cover and Mulching:
– Use organic mulch to cover exposed soil, retaining moisture and suppressing weeds.
– Plant a cover crop like clover around vegetables to fix nitrogen and protect the soil.
Integrated Pest Management:
– Introduce beneficial insects like ladybugs by planting flowers such as marigolds or zinnias.
– Employ natural pest deterrents, such as garlic or neem oil, to manage infestations.
Maintenance:
– Water regularly and adjust based on seasonal needs and plant requirements.
– Rotate crops annually to prevent soil depletion and reduce disease buildup.
Color Scheme:
– Include a variety of greens from leafy vegetables, alongside bright splashes from edible flowers such as nasturtiums.
– Use colorful vegetable varieties like purple carrots or yellow beets to add visual interest and diversity.
By integrating the principles of polyculture into your vegetable patch, you’ll create a vibrant, resilient garden that thrives naturally and sustainably. This approach not only enhances your homesteading experience but also enriches the land for future planting.
Hügelkultur Bed Design
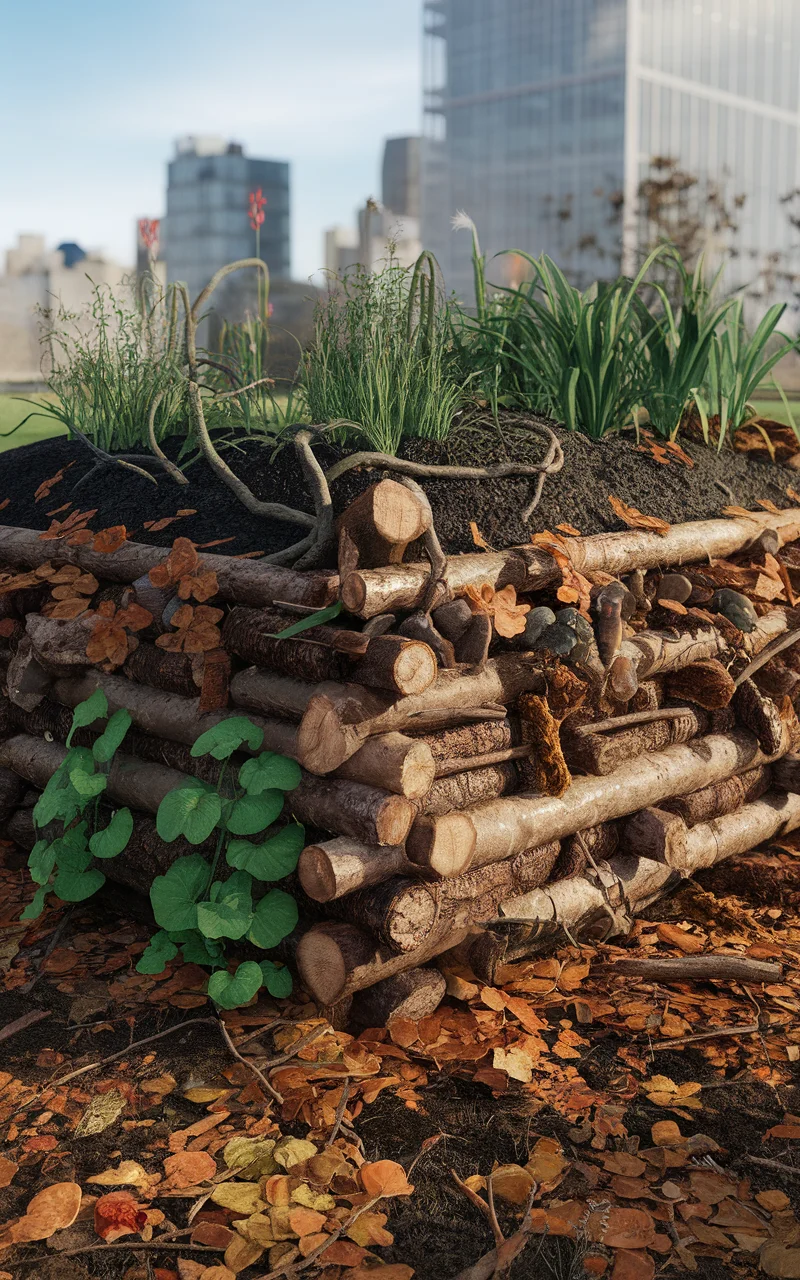
Hügelkultur bed design is an innovative and eco-friendly gardening technique ideal for homesteaders looking to enhance soil fertility and moisture retention naturally. This method involves creating raised garden beds using materials like logs, branches, leaves, and other organic debris, which decompose over time to enrich the soil. The raised structure allows for improved drainage and aeration, while the decaying wood within acts as a sponge, maintaining moisture levels even in dry periods. Hügelkultur beds are particularly beneficial for rocky or under-fertilized areas and can be customized in shape and size to fit your available space, making them versatile and sustainable for long-term productivity.
How to Achieve a Hügelkultur Bed Design
Site Selection:
– Choose a sunny location for optimal plant growth.
– Ensure the area has natural slope or drainage to prevent waterlogging.
Planning and Layout:
– Determine the desired shape and size of your hügelkultur bed.
– Sketch the layout, considering accessibility for planting and maintenance.
Material Gathering:
– Collect materials like logs, branches, twigs, leaves, and grass clippings.
– Acquire topsoil and compost for the top layer of the bed.
Construction:
– Lay down the largest logs and branches at the base to form the core.
– Add layers of smaller branches and twigs, followed by leaves and grass clippings.
– Cover the mound with a thick layer of compost and topsoil.
Planting:
– Choose crops suitable for your climate and the specific conditions of the bed.
– Plant deep-rooting vegetables like tomatoes and squash on the top, and moisture-loving crops like greens on the sides.
Watering and Maintenance:
– Water the bed thoroughly after planting to help settle the soil.
– Use mulch to retain moisture and suppress weeds.
– Monitor the bed regularly, adding organic matter as it settles and decomposes.
Color Scheme:
– Incorporate a mix of green foliage and colorful flowering plants like nasturtium or marigolds to enhance pollination.
– Consider using vibrant leafy vegetables like rainbow chard or red cabbage for added visual appeal.
By adopting the hügelkultur bed design, homesteaders can create a sustainable, low-maintenance garden that improves over time. This approach not only increases productivity but also supports a thriving ecosystem, contributing to a resilient and efficient homesteading environment.
Vertical Garden Tower
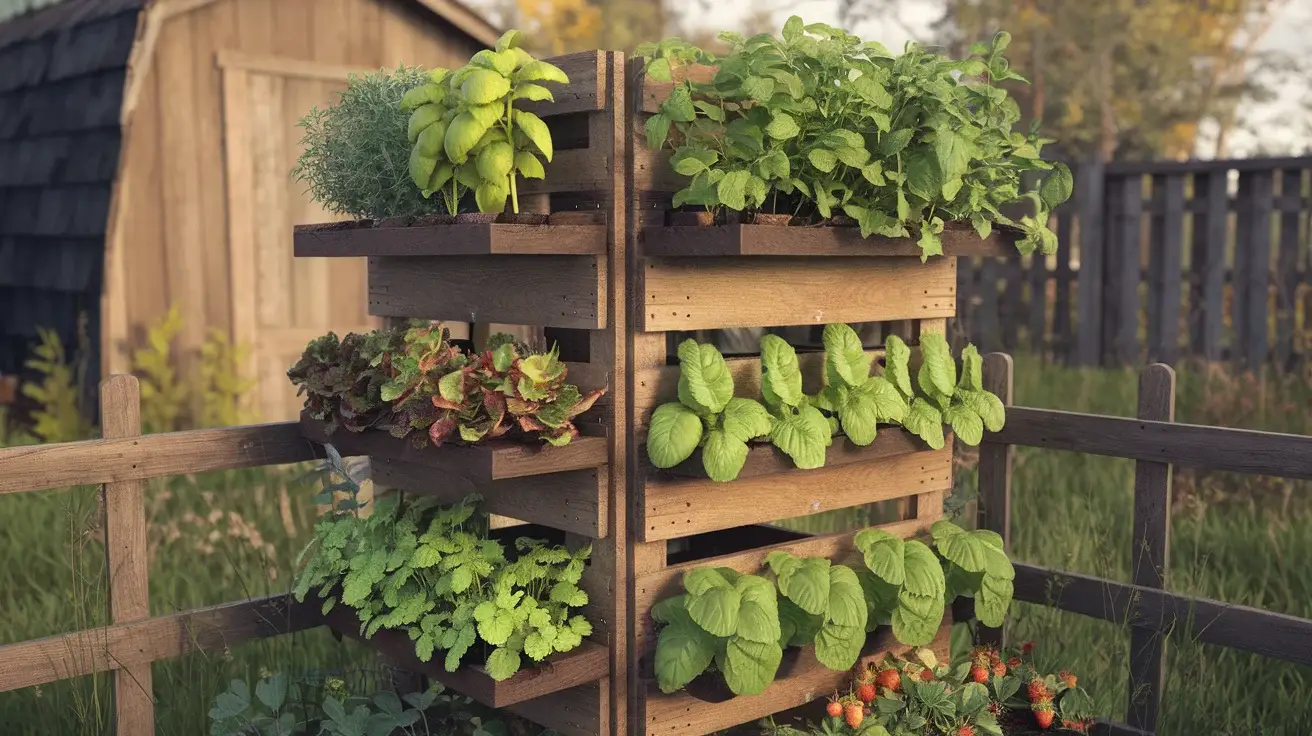
A vertical garden tower is a space-saving and resource-efficient design ideal for homesteaders who want to maximize their garden’s productivity, especially beneficial for those with limited garden area. This vertical gardening method involves stacking planters or specially designed towers to allow a variety of plants to grow upward instead of spreading out horizontally. The vertical garden tower offers distinct microclimates due to its height variation, enabling the cultivation of diverse crops in a compact space. This approach is particularly effective for growing herbs, leafy greens, strawberries, and even some types of flowers, offering a visually appealing, upright green oasis. Vertical garden towers can also incorporate a built-in watering system, reducing water consumption and ensuring even water distribution.
How to Achieve a Vertical Garden Tower
Site Selection:
– Identify a location that receives adequate sunlight for your chosen plants.
– Ensure access to a water source or utilize a self-watering system for convenience.
Planning and Layout:
– Decide on the size of the tower based on space availability and intended crops.
– Draft a simple sketch or plan to understand the arrangement and number of planters needed.
Material Gathering:
– Acquire stackable planters, a pre-made garden tower, or create one using materials like PVC pipes, pallets, or modular kits.
– Obtain quality potting soil and organic compost suited to your plant selections.
Construction:
– Assemble or set up the vertical garden structure according to your plan.
– Ensure the base is stable, and each level or planter is securely stacked or attached.
Planting:
– Fill each compartment or tier with a mixture of potting soil and compost.
– Plant upward-growing crops like herbs, lettuces, strawberries, and small flowers in appropriate tiers, considering their sunlight and water needs.
Watering and Maintenance:
– Incorporate a drip irrigation system or self-watering mechanism to reduce manual watering efforts.
– Regularly check for pests and diseases; use organic pest control methods if necessary.
– Prune and harvest plants routinely to encourage growth and productivity.
Color Scheme:
– Introduce vibrant elements by planting colorful flowers like petunias or nasturtiums among your herbs and greens.
– Utilize different shades of green from varied leaf textures and plant types to create depth and visual interest.
By implementing a vertical garden tower, homesteaders can efficiently utilize vertical space, reduce water usage, and enjoy a bountiful harvest of fresh produce and herbs. This innovative planting method not only maximizes small garden footprints but also adds vertical interest and beauty to your homesteading landscape.
Food Forest Design
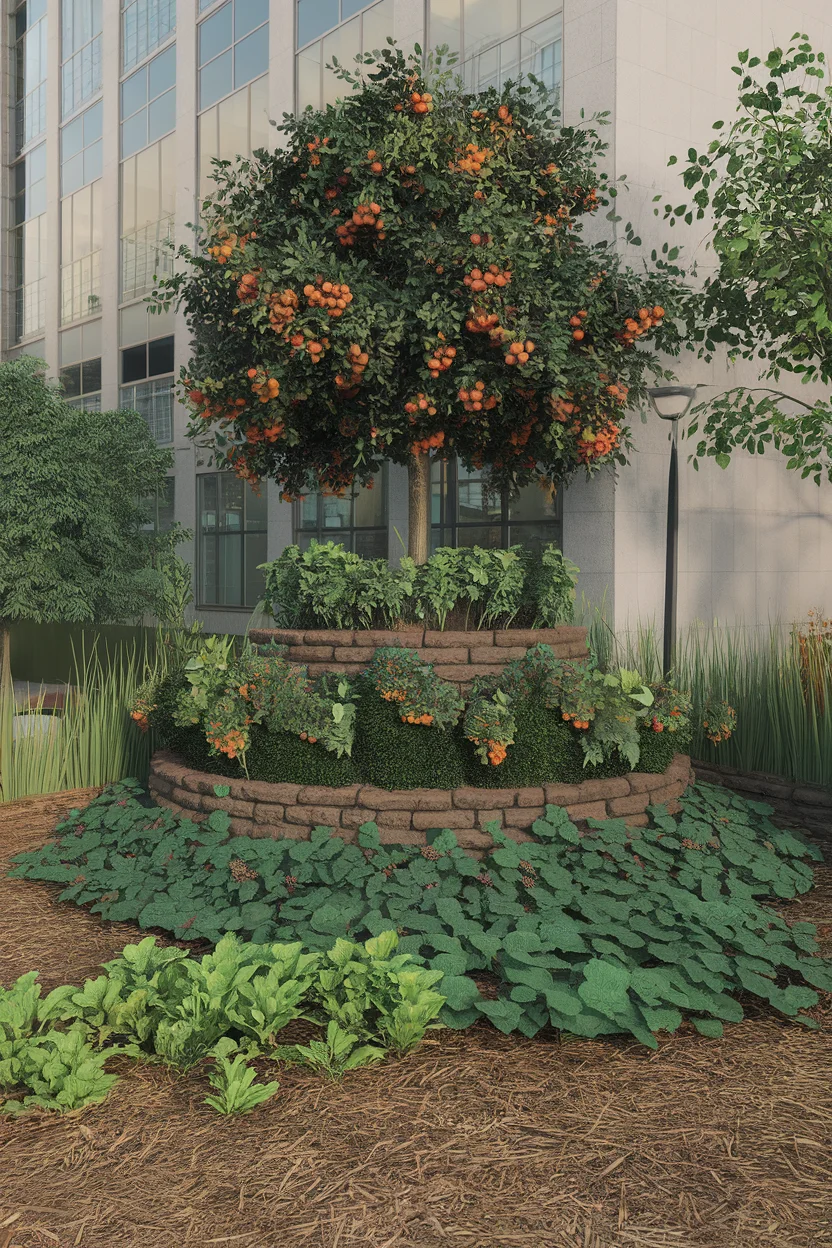
A food forest design is an ecologically sustainable and highly productive layout for homesteading gardens inspired by natural forest ecosystems. This method involves establishing a multilayered planted area that mimics a wild forest, where trees, shrubs, ground covers, and herbs grow together in harmony. The principle behind a food forest is to create a self-sustaining ecosystem that provides food and resources throughout the year while promoting biodiversity and soil health. Each layer of the forest serves a specific purpose: the canopy layer comprises fruit and nut trees, the understory may feature berry bushes, and the ground layer can be covered with perennial vegetables and herbs. This holistic approach leverages natural processes to build resilience and fertility within the garden.
How to Achieve a Food Forest Design
Site Selection:
– Choose a location with varying levels of sunlight and good drainage.
– Proximity to a water source is crucial for initial establishment.
Planning and Layout:
– Sketch a design featuring different plant layers: tall trees (canopy), medium-sized plants (understory), and ground covers.
– Plan for plant positions, ensuring enough space for growth without overshadowing each other unduly.
Soil Preparation:
– Clear the area of invasive plants and debris.
– Enrich the soil using compost, leaf mulch, and organic matter to promote fertility.
Layering Plants:
– Start planting with tall canopy trees like apple, pear, or nut trees.
– Introduce understory species such as berries and dwarf fruit trees to fill mid-level spaces.
– Plant herbs, clover, and other ground cover crops to enrich the soil and prevent erosion.
Companion Planting:
– Incorporate companion plants that assist growth, such as nitrogen-fixing shrubs like Siberian peashrub.
– Use aromatic herbs to deter pests and enhance the ecosystem (e.g., lavender, chamomile).
Water and Irrigation:
– Establish a watering regime during the initial years until the system becomes self-sustaining.
– Consider a swale or drip irrigation system to ensure efficient water use.
Pollinator Attraction and Pest Management:
– Plant a diverse array of flowers to entice pollinators like bees and butterflies.
– Use natural pest control by encouraging birds and beneficial insects, and employ organic methods where needed.
Maintenance:
– Regular mulching helps retain moisture and suppress weed growth.
– Prune trees and shrubs to manage growth and maintain health, fostering sunlight penetration to lower levels.
– Monitor forest health, replenishing organic matter annually to sustain soil fertility.
Color Scheme:
– Integrate trees and shrubs with a variety of foliage colors and textures, including greens, reds, and purples.
– Add vibrancy through flowering plants like calendula, coneflower, and bee balm for seasonal interest and beneficial insect attraction.
By creating a food forest, homesteaders can develop a productive, self-sustaining garden that embodies the ecological balance found in nature. This design offers year-round yields, ecosystem services, and aesthetic beauty, significantly enriching the homesteading landscape.
Keyhole Garden Design
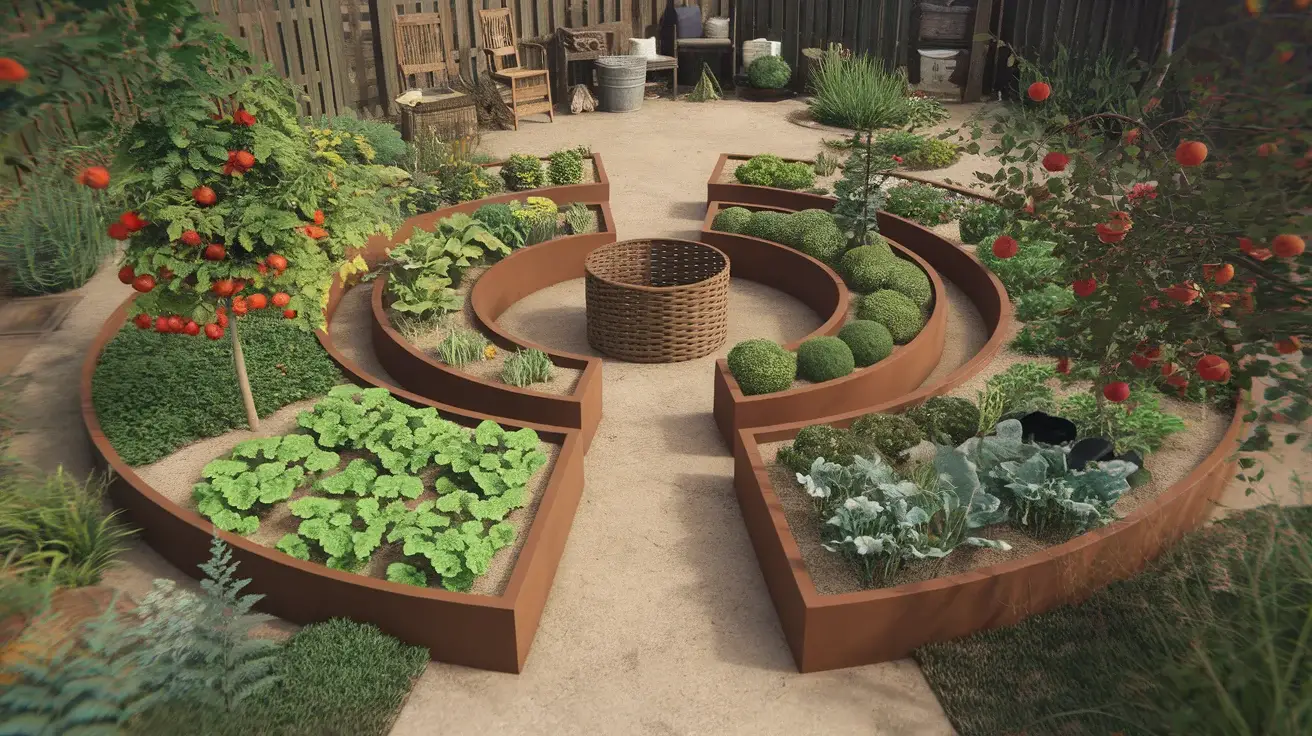
A keyhole garden is an efficient, low-maintenance design ideal for homesteading, particularly in areas with limited space or less fertile soil. Originating from African agricultural practices, this garden layout features a circular or semi-circular raised bed with a central composting basket and a keyhole-like path leading into it. This arrangement allows for easy access to the entire garden, facilitates efficient watering and composting, and maximizes nutrient recycling. The central compost bin serves as a continuous source of organic matter, enriching the soil and promoting healthy plant growth. The raised bed design not only improves drainage but also minimizes soil erosion, making keyhole gardens particularly well-suited for arid or drought-prone regions.
How to Achieve a Keyhole Garden Design
Site Selection:
– Opt for a sunny location to maximize plant growth.
– Ensure proximity to a water source for convenient irrigation.
Planning and Layout:
– Outline a circular or semi-circular shape, typically 6-8 feet in diameter.
– Mark an entry path resembling a keyhole, providing easy access to the center.
Material Gathering:
– Collect materials for the bed structure, such as stones, bricks, or wooden planks.
– Gather organic materials for the central compost bin, including kitchen scraps, leaves, and grass clippings.
Construction:
– Construct the perimeter of the bed using the chosen materials, forming a wall about 2-3 feet high.
– Place a cylindrical compost bin at the center of the garden, allowing it to extend above the bed’s surface.
Soil and Planting:
– Layer the base with coarse organic material like sticks and straw for drainage.
– Fill the bed with a mixture of soil and compost, slightly mounded towards the center.
– Choose a variety of plants suited to your climate, ensuring a mix of vegetables, herbs, and flowering plants.
Watering and Maintenance:
– Water the bed through the central compost bin, allowing nutrients to disperse naturally.
– Regularly add organic waste to the compost bin and turn it occasionally to facilitate decomposition.
– Mulch the garden bed to retain moisture and suppress weeds.
Color Scheme:
– Choose a mix of foliage and flowering plants for a vibrant visual effect.
– Opt for companion planting with marigolds, nasturtiums, or calendula to attract pollinators and deter pests.
By establishing a keyhole garden, homesteaders can create a nutrient-rich, water-efficient gardening system that requires minimal maintenance while producing an abundant and diverse harvest. This sustainable design not only enhances gardening productivity but also offers an attractive and accessible layout ideal for various climates and soil conditions.
Sunken Garden Design
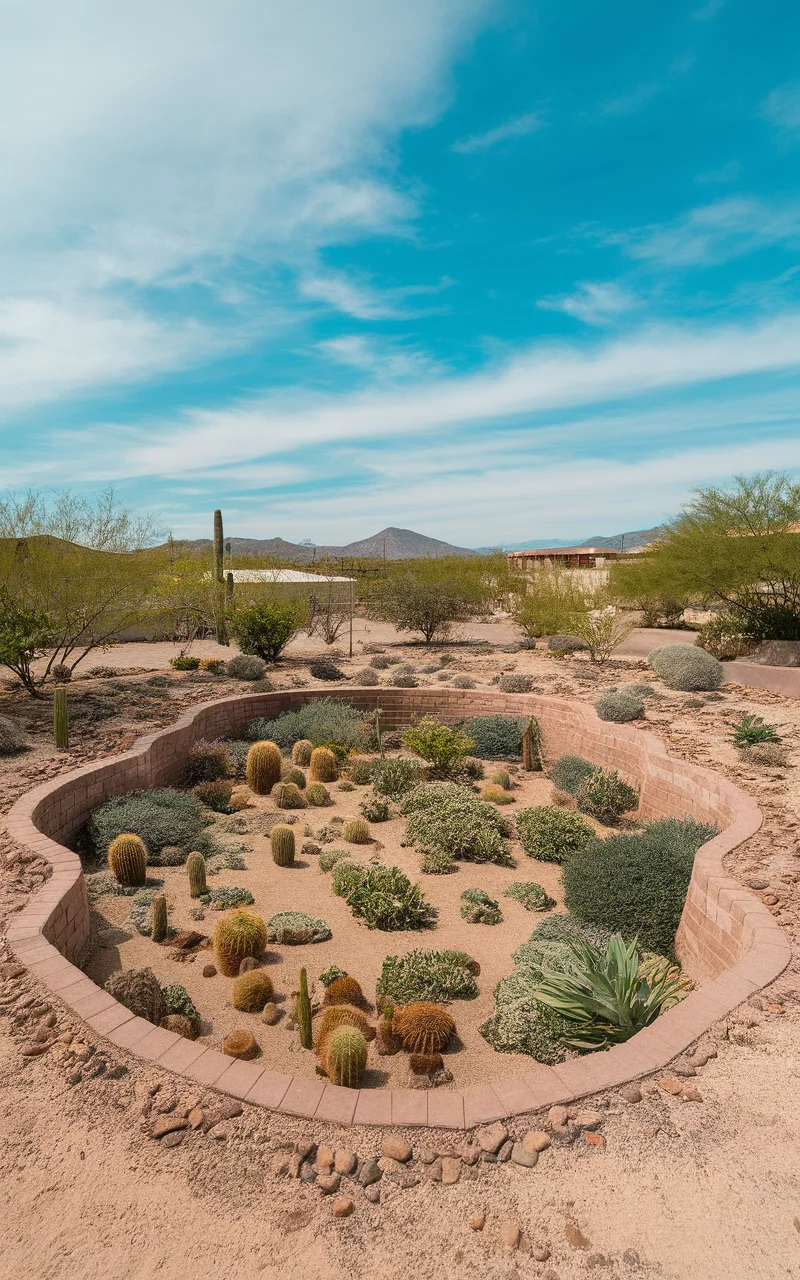
A sunken garden is a unique and resource-efficient layout for homesteading gardens, particularly suited for arid or windy climates. This design involves creating a garden bed set below the surrounding land surface, helping to conserve water and protect plants from wind exposure. By utilizing the natural landscape, a sunken garden captures and retains rainwater more effectively than traditional raised gardens, making it ideal for areas facing water scarcity. The recessed design also offers a microclimate that reduces evaporation and moderates temperatures, promoting healthy plant growth. Sunken gardens can be both functional and aesthetically pleasing, with terraced edges and diverse plantings contributing to a visually engaging and environmentally friendly homestead.
How to Achieve a Sunken Garden Design
Site Selection:
– Choose a location with naturally occurring depressions or soil that’s easy to excavate.
– Ensure the area receives sufficient sunlight for plant growth.
Planning and Layout:
– Outline the dimensions of your sunken garden, keeping in mind accessibility and drainage.
– Consider terracing the edges if on a slope, to prevent erosion and create planting levels.
Excavation:
– Dig your garden area to the desired depth, typically 1-2 feet deep.
– Shape the edges or terraces, using the excavated soil to create a berm around the garden’s perimeter.
Soil Preparation:
– Ensure the garden base has good drainage; amend the base with sand if the soil is clay-heavy.
– Mix in compost and organic matter to enrich the soil and improve fertility.
Plant Selection and Arrangement:
– Select drought-tolerant plants that can thrive in a more water-conserving environment, such as succulents, beans, and drought-tolerant herbs like rosemary or thyme.
– Plant taller species along the berm or terraced edges to shield smaller plants from wind.
Irrigation and Maintenance:
– Use a drip irrigation system to minimize water loss and accurately deliver moisture to roots.
– Regularly mulch the surface to prevent evaporation and suppress weeds.
– Monitor for any water pooling and adjust soil or drainage as necessary.
Color Scheme:
– Integrate a mix of green foliage with drought-resistant flowering plants like lavender, sage, or ornamental grasses for added texture and color.
– Use varied plant heights and colors to create contrast and depth within the sunken environment.
By adopting a sunken garden design, homesteaders can maximize water efficiency and create a resilient garden ecosystem that thrives even under challenging environmental conditions. This sustainable approach not only optimizes natural resources but also enhances the visual appeal and productivity of your homesteading landscape.
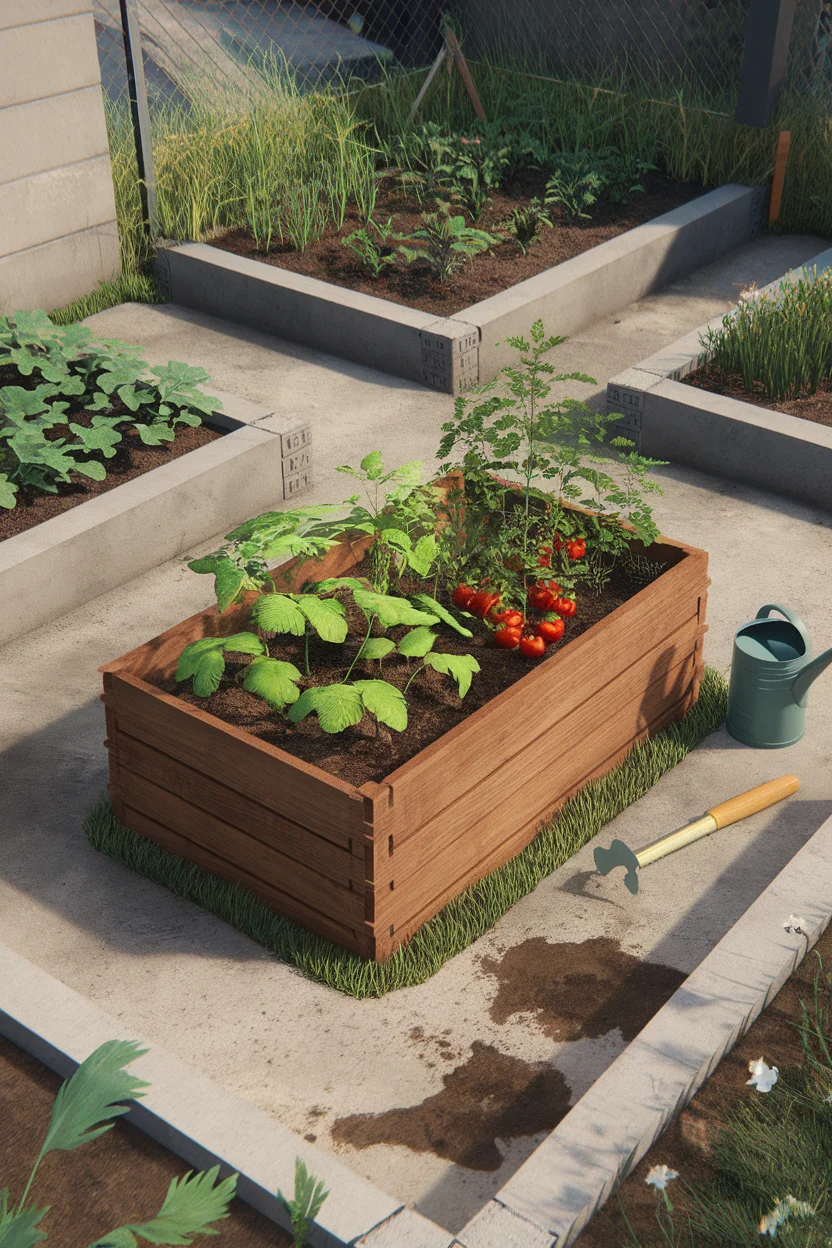
Raised Wicking Bed Design
Raised wicking beds offer an innovative solution for homesteaders aiming for efficient water use and enhanced crop growth. This design combines the accessibility of raised beds with a self-watering system, making it ideal for areas with limited water availability. Wicking beds involve a water reservoir at the base that allows water to wick up through the soil directly to plant roots, ensuring consistent moisture levels. This method minimizes water waste, reduces the frequency of watering, and prevents surface evaporation. Raised wicking beds can be constructed using various materials including wood, metal, or recycled plastic, and are perfect for cultivating vegetables, herbs, and flowers in a controlled and productive environment.
How to Achieve a Raised Wicking Bed Design
Site Selection:
– Choose a level area with good sunlight exposure.
– Ensure easy access to a water source for filling the reservoir.
Planning and Layout:
– Determine the dimensions of your raised bed based on available space and gardening goals.
– Design the layout on paper, considering plant types and placement for optimal growth.
Material Gathering:
– Acquire materials for the bed structure such as wood, bricks, or corrugated metal.
– Gather a liner to create a waterproof reservoir, plastic piping for drainage, and quality potting soil.
Construction:
– Construct the raised bed frame to the desired height, typically 12-24 inches high.
– Line the interior with waterproof material to prevent water seepage.
– Install a pipe system for overflow and allow excess water to drain.
Reservoir and Soil Setup:
– Fill the bottom with a layer of gravel or scoria as a reservoir (around 4-6 inches).
– Place a layer of geotextile fabric over the reservoir material to separate it from the soil.
– Fill the remaining bed space with a mix of soil and compost, ensuring good capillary action.
Planting:
– Choose plants with similar water and nutrient needs for better resource management.
– Plant larger, water-demanding crops like tomatoes or cucumbers at the center, with less demanding varieties around the edges.
Watering and Maintenance:
– Fill the reservoir when necessary, observing plant moisture needs and seasonal variations.
– Regularly mulch the surface to retain soil moisture and regulate soil temperature.
– Inspect the overflow and piping system to prevent blockages and ensure proper drainage.
Color Scheme:
– Opt for a variety of green foliage, interspersed with colorful vegetables like rainbow chard or flowering herbs such as chives or nasturtium.
– Use mixed plant heights and textures to enhance visual interest and maximize planting space.
By integrating a raised wicking bed into your homesteading garden, you can achieve a highly efficient, sustainable, and productive growing space that saves water and maximizes plant health. This design offers both practical benefits and a visually appealing garden feature suitable for any climate.
