Looking to infuse some creativity into your living space without breaking the bank? The IKEA Kallax series, with its versatile and straightforward design, has become a staple for DIY enthusiasts seeking to transform their homes with minimal effort. From chic storage solutions to innovative room dividers, the Kallax’s modular simplicity opens up a world of customization possibilities. In this article, we’ll explore a range of inspiring hacks and ideas that breathe new life into these iconic shelves, offering both style and functionality to your home decor.
Idea: Montessori-Inspired Kids’ Toy Storage
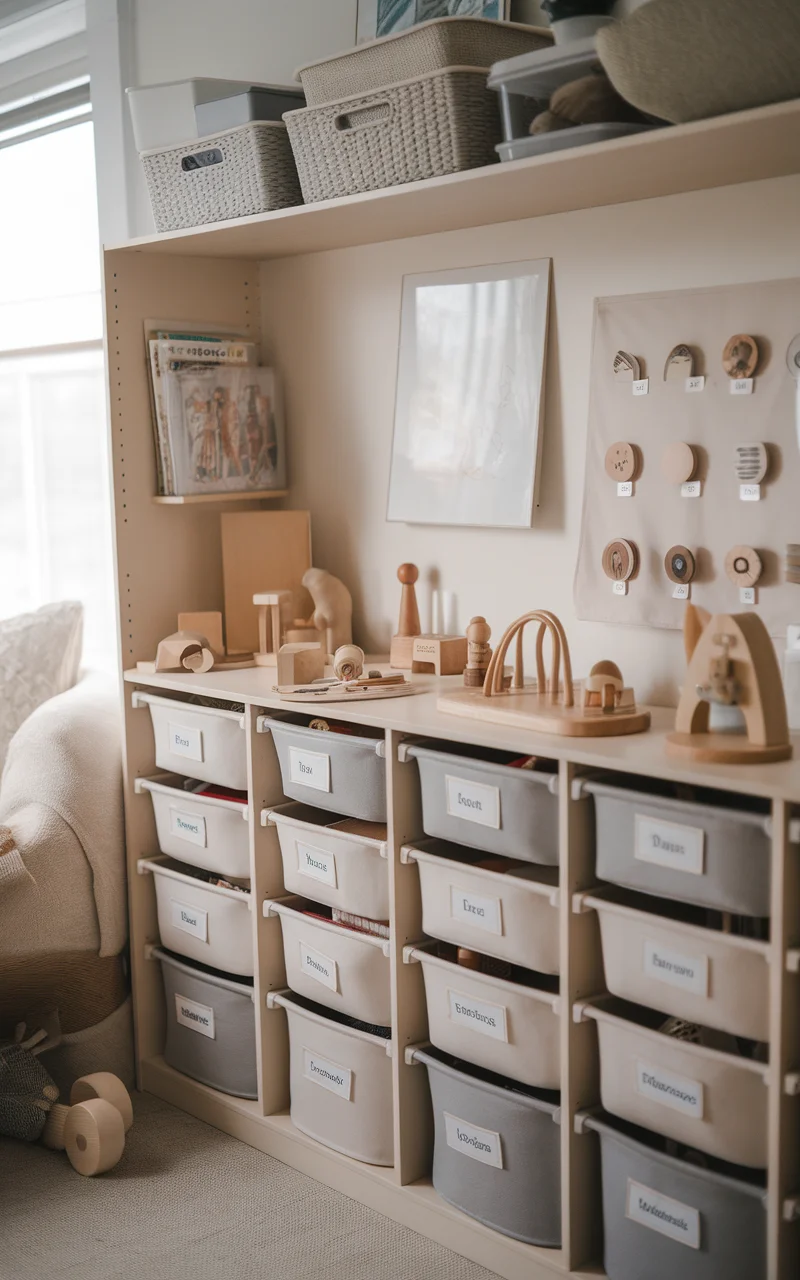
Transforming an Ikea Kallax unit into a Montessori-inspired toy storage solution can create an organized, visually appealing, and educational space for your child. This setup encourages independence and creativity by allowing easy access to toys and learning materials. With a thoughtful design, it can seamlessly blend into your child’s room decor.
How to Create Montessori-Inspired Toy Storage
Materials Needed:
– Ikea Kallax unit
– Baskets or bins in soft, neutral tones (e.g., beige, light grey)
– Wooden toys or bins
– Labels and label holders
– Optional: Cushions for a reading nook setup on top
Steps to Achieve the Look:
1.
Assemble the Kallax
: Follow Ikea’s instructions to assemble the Kallax unit.
2.
Choose Your Color Scheme
: Opt for natural, calming colors to promote a peaceful environment. Soft whites, gentle pastels, or earth tones work well.
3.
Organize the Baskets
: Use baskets or bins to categorize toys by type – e.g., blocks, puzzles, art supplies. This makes it easier for your child to find and return items.
4.
Add Labels
: Use labels with images and words to help your child identify where each toy belongs. This encourages early reading skills.
5.
Place Wooden Toys
: Display select wooden or educational toys directly on the shelves for easy access and a tactile, inviting environment.
6.
Create a Reading Nook
: If the Kallax is positioned horizontally, consider adding cushions on top to create a cozy reading nook that doubles as a play area.
7.
Safety Measures
: Anchor the unit to the wall for safety, as children are likely to pull on or climb the structure.
Final Touches
: Keep the top of the Kallax uncluttered, perhaps with a small houseplant or a sensory toy to complete the inviting and functional design.
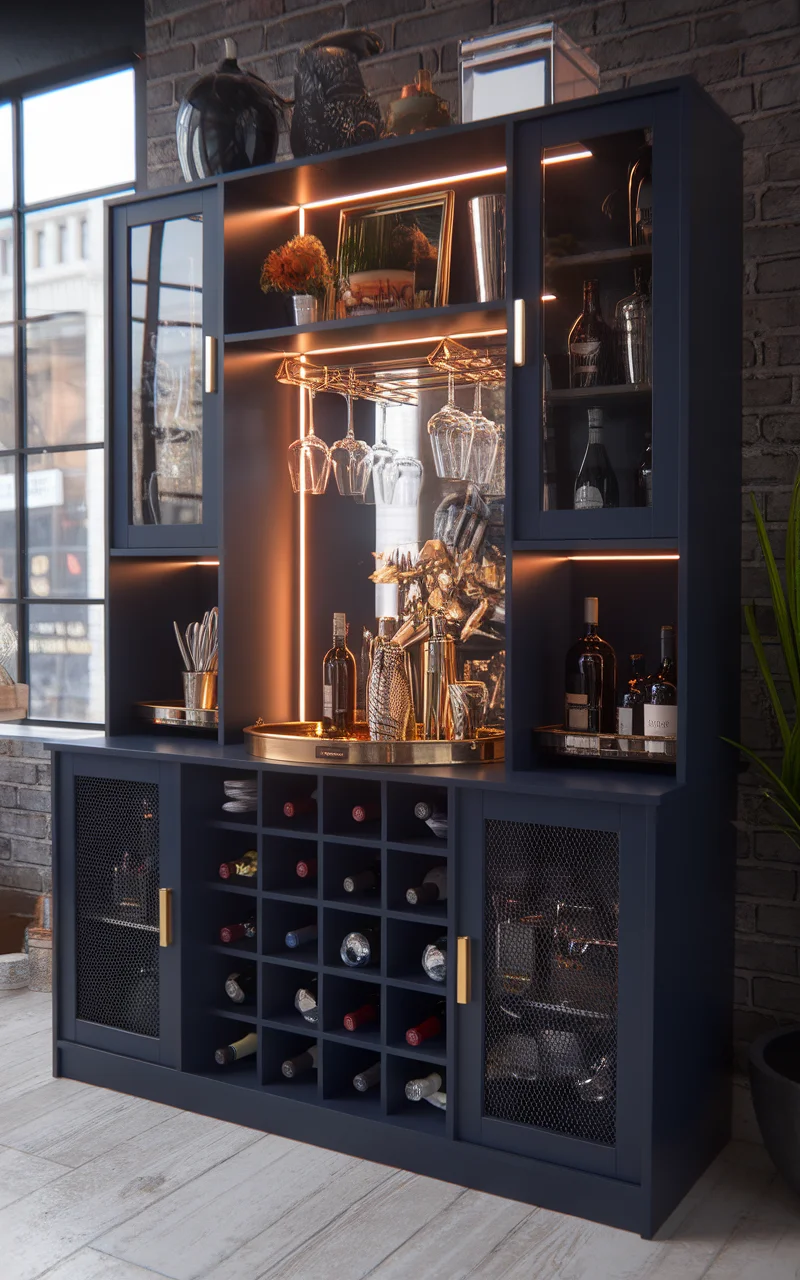
Idea: Chic Home Bar Station
Transforming an Ikea Kallax unit into a chic home bar station can add a touch of elegance to your living space or dining area. This hack blends functionality with style, offering a dedicated space for storing your favorite spirits, glassware, and bar tools. By customizing the Kallax, you can create an inviting spot for entertainment or a quiet evening drink.
How to Create a Chic Home Bar Station
Materials Needed:
– Ikea Kallax unit
– Wine rack insert (compatible with Kallax)
– Glass door or panel inserts (optional for a sleek look)
– LED strip lights
– Decorative trays or coasters
– Bar tools (e.g., shaker, strainer, jigger)
– Stylish baskets or bins
– Optional: Paint or contact paper for customization
Steps to Achieve the Look:
1.
Assemble the Kallax
: Follow Ikea’s instructions to put together your Kallax unit.
2.
Customize the Color Scheme
: Paint the unit or apply decorative contact paper to match your decor. Consider colors like deep navy, charcoal grey, or a glossy black for a sophisticated look.
3.
Install Wine Rack Inserts
: Choose inserts that fit within the Kallax compartments to store wine bottles efficiently.
4.
Add Glass Door Panels
: For a modern touch, attach glass door panels to some compartments, allowing a peek at your collection while keeping it dust-free.
5.
Lighting the Space
: Install LED strip lights under the top shelf or inside certain compartments for ambiance and to highlight your barware collection.
6.
Organize Bar Tools and Glassware
: Use decorative trays to group items like cocktail shakers, muddlers, and glassware. Organize them for easy access and display.
7.
Store and Style
: Utilize stylish baskets for items like bar napkins, coasters, or mixers. Personalize with decorative elements such as a small plant or a cocktail recipe book.
8.
Anchor for Safety
: If necessary, ensure the unit is anchored to the wall, especially if it holds heavy bottles or glassware.
Final Touches
: Ensure all elements are easily accessible and arranged attractively. Add personal touches, such as a framed photo, a piece of art, or a small bar sign, to complete the space and make it uniquely yours.
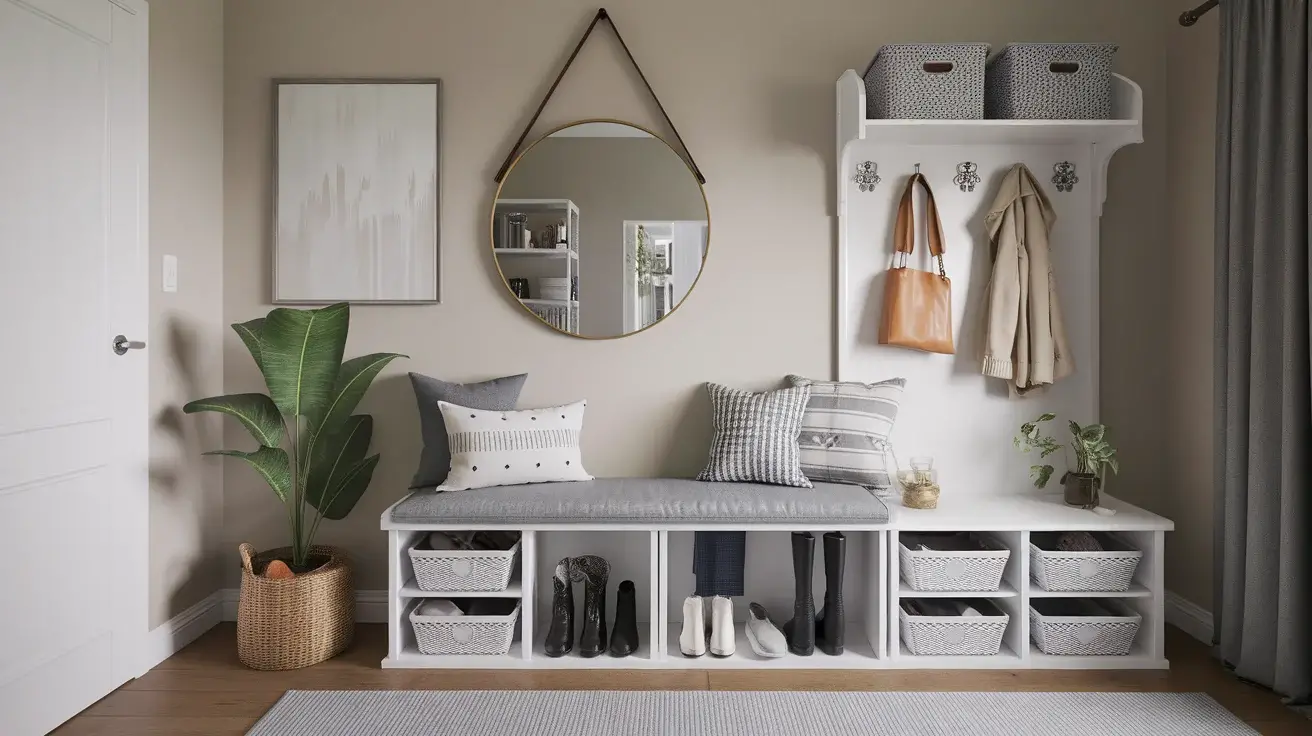
Idea: Stylish Entryway Storage and Seating
Transform your Ikea Kallax into a fashionable and functional entryway solution that serves as both storage and seating. This hack not only organizes shoes and accessories but also provides a convenient spot to sit while putting on your shoes. With a few modifications, your entryway can become an efficient and aesthetically pleasing space.
How to Create Stylish Entryway Storage and Seating
Materials Needed:
– Ikea Kallax unit (1×4 or 2×2 depending on space)
– Cushions or a custom-fit bench pad
– Baskets or bins for storage
– Decorative hooks for hanging coats or bags
– Paint or contact paper for customization (optional)
– Non-slip rug pad (if using a bench pad)
– Wall anchor kit for safety
Steps to Achieve the Look:
1.
Assemble the Kallax
: Follow Ikea’s instructions to assemble your Kallax unit. Depending on your space, you can choose a horizontal or vertical configuration.
2.
Customize the Color Scheme
: Paint the Kallax or use contact paper to match your entryway decor. Neutral tones such as white, beige, or light grey can make the space feel inviting and clean.
3.
Add Storage Baskets
: Select baskets or bins to fit inside the Kallax compartments. Use these to store shoes, scarves, gloves, or other entryway essentials.
4.
Install a Bench Pad
: Place cushions or a custom-fit bench pad on top of the Kallax for comfortable seating. A non-slip rug pad can help keep it in place.
5.
Mount Decorative Hooks
: Above the Kallax unit, install decorative hooks for hanging coats, bags, or hats, keeping them easily accessible as you enter or leave.
6.
Personalize and Decorate
: Optionally, add a mirror or artwork above the setup to enhance the visual appeal and create the illusion of more space.
7.
Ensure Safety
: Anchor the Kallax unit to the wall to prevent tipping, especially if it will be frequently used for seating.
Final Touches
: Keep the area organized by decluttering regularly, ensuring a tidy and welcoming entryway. Add decorative elements like a small potted plant or a seasonal wreath to bring warmth and character to the space.
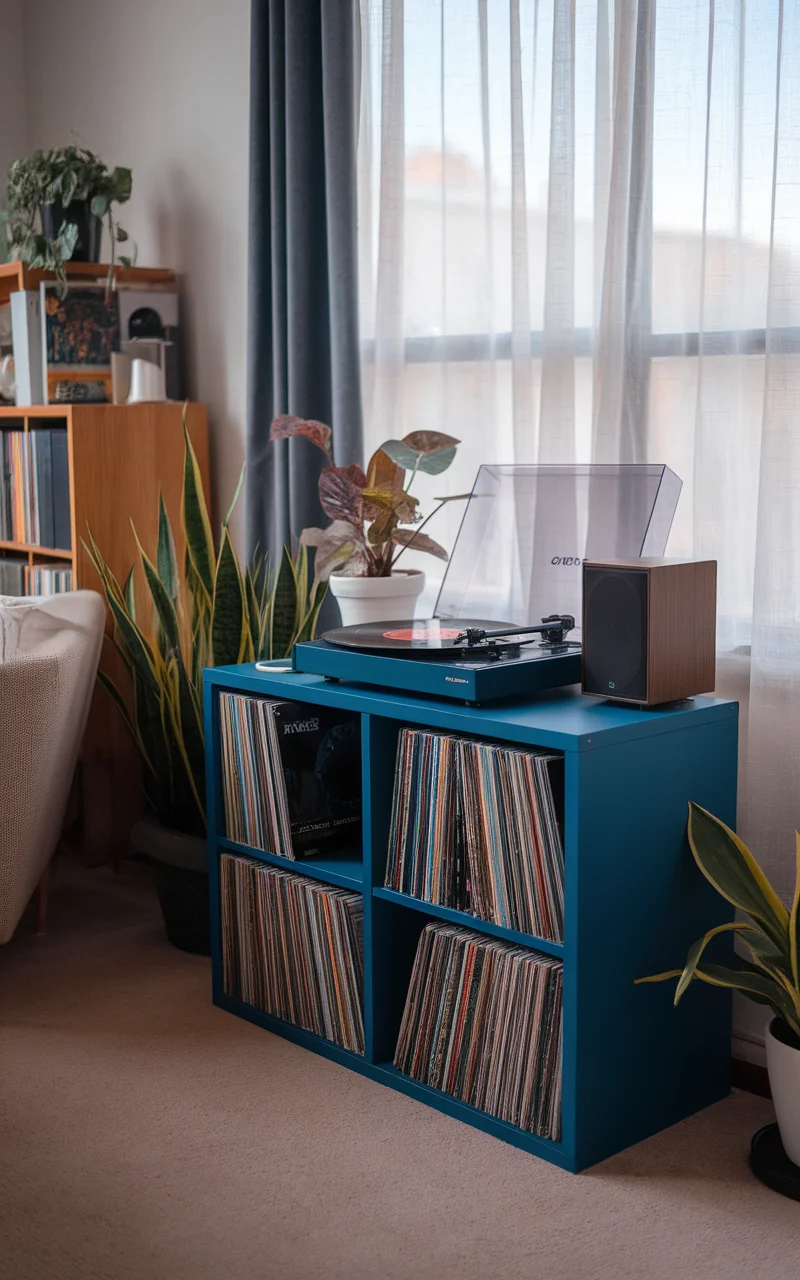
Idea: Record Player and Vinyl Storage Unit
Transform your Ikea Kallax into a stylish and functional record player stand and vinyl storage unit. This setup is perfect for music enthusiasts, offering a dedicated space for your record player, speakers, and vinyl collection, while adding a retro touch to your living space. With this hack, you can create an audiophile’s dream corner that is both organized and aesthetically pleasing.
How to Create a Record Player and Vinyl Storage Unit
Materials Needed:
– Ikea Kallax unit
– Vinyl record dividers or sections
– Record player stand or platform
– Speaker stands (optional)
– Vinyl frame or display (optional)
– Cable management tools
– Paint or contact paper for customization (optional)
– Non-slip pads for stability
– Wall anchor kit for safety
Steps to Achieve the Look:
1.
Assemble the Kallax
: Follow Ikea’s instructions to assemble the Kallax unit, opting for a size that fits your space and vinyl collection.
2.
Customize the Color Scheme
: Paint the unit or use adhesive contact paper to match your decor. For a classic look, consider natural wood tones or deep greens and blues.
3.
Install Record Dividers
: Use vinyl dividers within the Kallax compartments to neatly organize your record collection by genre or artist.
4.
Set Up the Record Player
: Place the record player on top of the Kallax or on a stand directly above it. Ensure it is on a stable surface using non-slip pads.
5.
Add Speaker Stands
: If your setup includes speakers, position them at either side of the Kallax on stands for optimal sound quality.
6.
Organize and Display Vinyls
: Arrange your vinyls within the dividers for easy access, and consider using a vinyl frame or display for your current favorite album on top.
7.
Manage Cables
: Use cable management tools to keep cords from the record player and speakers tidy and out of sight.
8.
Anchor for Safety
: Secure the Kallax unit to the wall with a wall anchor kit, ensuring that the structure is safe and stable.
Final Touches
: Personalize the space with decorative accents like a small lamp, a clock, or framed music posters. Ensure the area maintains a neat appearance by regularly organizing your collection and listening space, inviting you to enjoy your music in style.
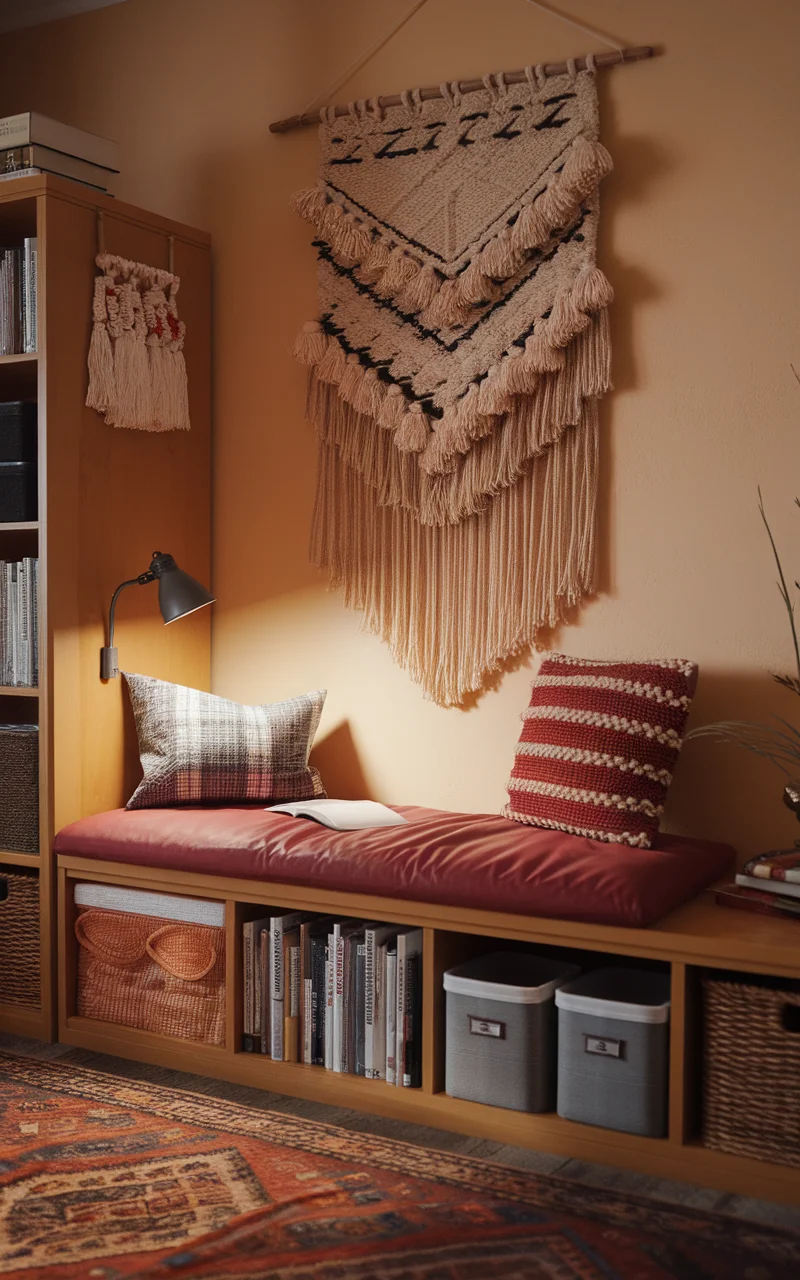
Idea: Cozy Reading Corner with Built-In Storage
Turn an Ikea Kallax unit into a cozy reading nook with built-in storage for books and reading essentials. This transformation creates a peaceful retreat within your home, perfect for book lovers who want an inviting spot to unwind with their favorite novels. By integrating comfortable seating and warm decor, you can design a charming and functional space that beckons relaxation and promotes literacy.
How to Create a Cozy Reading Corner with Built-In Storage
Materials Needed:
– Ikea Kallax unit
– Thick foam cushion or bench pad
– Throw pillows and blankets
– Baskets or bins for book storage
– Bookends or small shelves
– Adjustable reading light or lamp
– Decorative items (e.g., small plants, candles)
– Paint or contact paper for customization (optional)
– Non-slip rug pad (if using a bench pad)
– Wall anchor kit for safety
Steps to Achieve the Look:
1.
Assemble the Kallax
: Follow Ikea’s instructions to assemble your Kallax unit. Position it horizontally to create a shelf and seating combination.
2.
Customize the Color Scheme
: Paint the unit or use contact paper to reflect your personal style. Warm tones like cream, soft pastels, or mid-century modern shades enhance the cozy vibe.
3.
Add the Cushion Seat
: Place a thick foam cushion or bench pad on top of the Kallax to serve as comfortable seating. Utilize a non-slip rug pad to keep it secure.
4.
Organize Books
: Arrange books in the compartments along with bins or baskets for additional storage, making them easily reachable for a spontaneous read.
5.
Install Bookends or Small Shelves
: Use bookends or attach small shelves on the sides of the Kallax to display current reads or decorative items.
6.
Decorate with Pillows and Throws
: Select a variety of throw pillows and blankets to layer over the seating, adding comfort and inviting textures.
7.
Add Lighting
: Place an adjustable reading lamp or small lamp beside the unit to provide adequate lighting for evening reading sessions.
8.
Personalize with Decor
: Enhance the atmosphere with decorative elements like small plants, candles, or artwork, creating a personalized sanctuary.
9.
Ensure Safety
: Anchor the Kallax unit to the wall to prevent tipping, especially if it will be used as a seating option.
Final Touches
: Regularly reorganize and refresh the space by rotating books and decorative items, maintaining the inviting and clutter-free environment inherent to an ideal reading corner. Enjoy this retreat with your favorite beverage and immerse yourself in a world of stories.
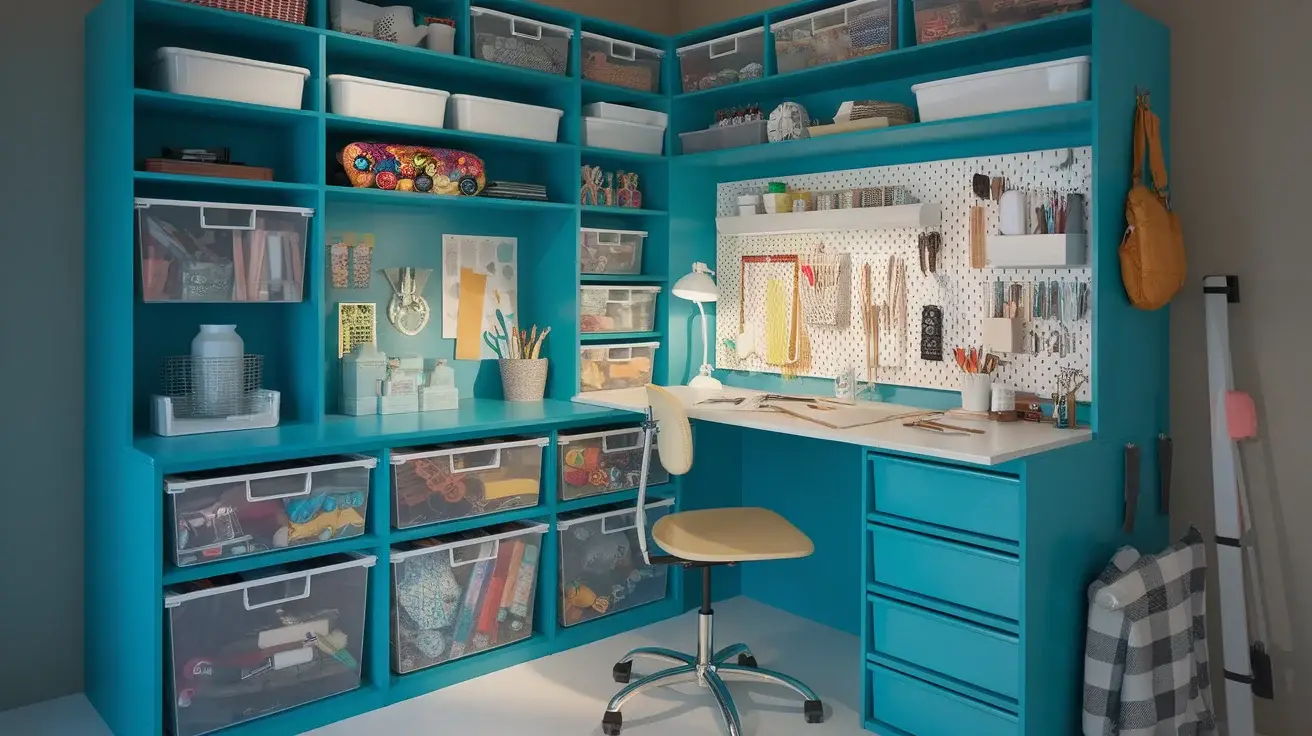
Idea: Crafting Corner with Built-In Organizer
Transform an Ikea Kallax into a vibrant crafting corner that combines functionality with creativity. This setup not only organizes crafting supplies but also offers a dedicated workspace for your artistic endeavors. By thoughtfully arranging the unit, you create an inspiring environment that encourages creativity and keeps your materials within arm’s reach.
How to Create a Crafting Corner with Built-In Organizer
Materials Needed:
– Ikea Kallax unit
– Transparent storage boxes or bins
– Crafting table or tabletop addition
– Pegboard or wall hooks
– Craft supply dividers
– Rolling chair or stool
– Paint or decorative contact paper for a personalized touch
– Non-slip pads
– Wall anchor kit for safety
Steps to Achieve the Look:
1.
Assemble the Kallax
: Follow Ikea’s instructions to assemble your Kallax unit. Consider positioning it vertically if space allows, as it maximizes storage and accessibility.
2.
Customize the Color Scheme
: Paint the unit or apply decorative contact paper to match your preferred aesthetics. Bright colors such as turquoise, yellow, or coral can inspire creativity and energy in your crafting space.
3.
Add a Crafting Table
: Attach a crafting table or sturdy tabletop to the Kallax unit to provide ample workspace for projects. Ensure a non-slip pad underneath to keep it steady.
4.
Organize with Transparent Storage
: Use transparent storage boxes or bins to easily see and access crafting supplies. Categorize items like paper, fabric, or yarn for efficient organization.
5.
Install Pegboard or Wall Hooks
: Set up a pegboard or wall hooks above or beside the Kallax to hold tools like scissors, rulers, and ribbons. This allows you to keep frequently used items within reach.
6.
Utilize Craft Supply Dividers
: Insert dividers in the Kallax compartments to section off small supplies such as beads, buttons, or paints, ensuring everything has its dedicated space.
7.
Arrange Comfortable Seating
: Place a rolling chair or stool by the crafting table for comfort while working on projects.
8.
Final Accents
: Add personal touches with decorative elements like a small plant, a corkboard for inspiration, or a favorite piece of artwork to make the space uniquely yours.
9.
Ensure Safety
: Secure the Kallax unit to the wall with an anchor kit to prevent tipping, maintaining a safe crafting environment.
Final Touches
: Keep your crafting corner clutter-free by organizing it regularly and refreshing materials as needed. Enjoy a space dedicated to fostering your creativity and nurturing your artistic passions.
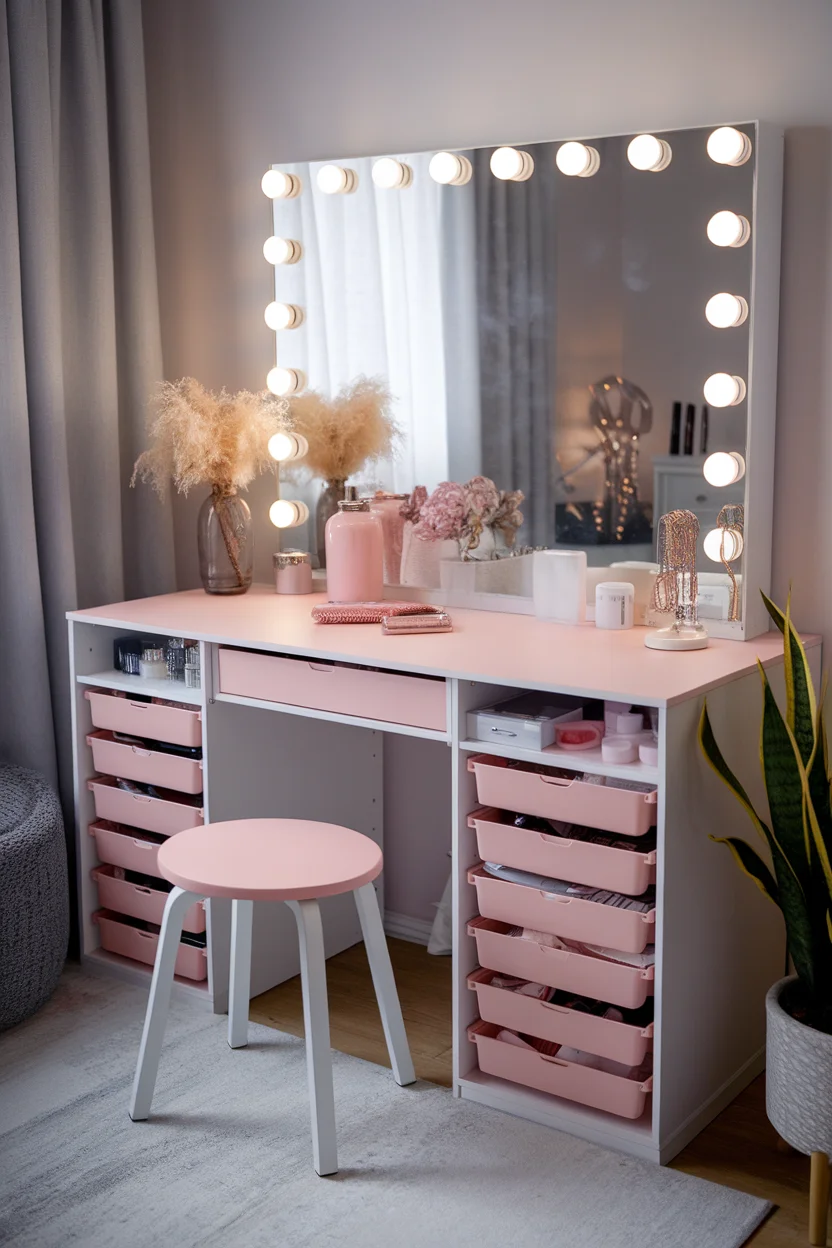
Idea: Bedroom Vanity with Storage
Transform an Ikea Kallax unit into a chic and functional bedroom vanity with integrated storage. This hack offers a stylish solution for organizing makeup, beauty products, and accessories while providing a dedicated space for your daily grooming routine. By elegantly customizing the Kallax, you can create a personal beauty station that combines convenience with a touch of glamour.
How to Create a Bedroom Vanity with Storage
Materials Needed:
– Ikea Kallax unit
– Mirror (wall-mounted or tabletop)
– Makeup organizer inserts or trays
– Drawer inserts for Kallax compartments
– LED vanity lights or light strip
– Vanity stool or chair
– Paint or contact paper for personalization
– Decorative items (e.g., small plant, jewelry holder)
– Wall anchor kit for safety
Steps to Achieve the Look:
1.
Assemble the Kallax
: Follow Ikea’s instructions to assemble your Kallax unit, configuring it based on your space and storage needs.
2.
Customize the Color Scheme
: Paint the unit or apply contact paper that reflects your personal style. Consider pastel shades like blush pink or soft lavender for a feminine touch.
3.
Install the Mirror
: Position a mirror above or on the Kallax unit, choosing between a wall-mounted option or a tabletop mirror depending on your preference.
4.
Organize with Inserts
: Utilize makeup organizer inserts or trays within the Kallax compartments to categorize and store cosmetics, brushes, and other beauty essentials.
5.
Add Drawer Inserts
: Incorporate drawer inserts to neatly store smaller items or overflow products, keeping everything tidy and accessible.
6.
Enhance with Lighting
: Attach LED vanity lights around the mirror or install a light strip on the underside of a shelf for optimal lighting during makeup application.
7.
Select a Vanity Stool
: Choose a comfortable vanity stool or chair that complements your color scheme, ensuring ergonomic support during use.
8.
Decorate with Personal Touches
: Add decorative elements like a small plant, a jewelry holder, or a favorite perfume bottle to personalize your vanity space.
9.
Ensure Safety
: Anchor the Kallax unit to the wall with a wall anchor kit to prevent tipping and ensure your setup is secure.
Final Touches
: Regularly organize and declutter your vanity area, keeping it fresh and inviting. Enjoy a dedicated beauty haven that simplifies your daily routine and adds elegance to your bedroom decor.
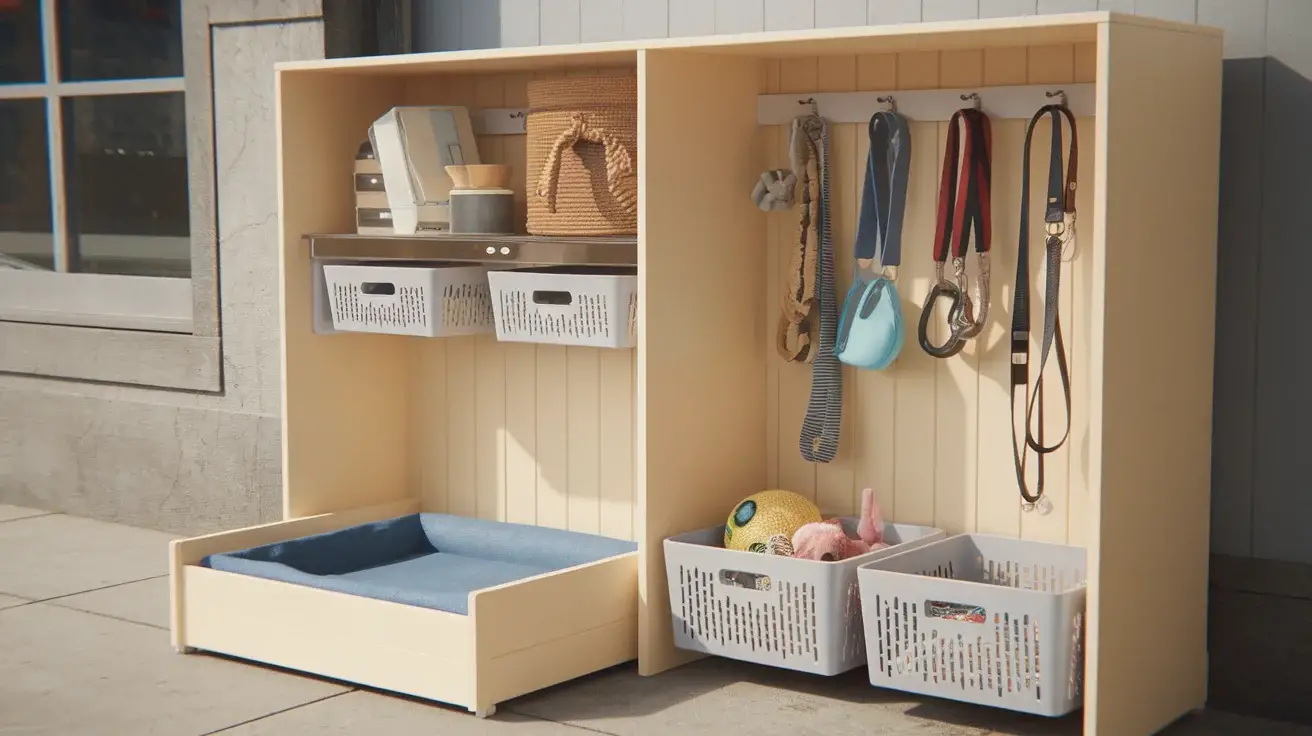
Idea: Pet Nook and Supply Station
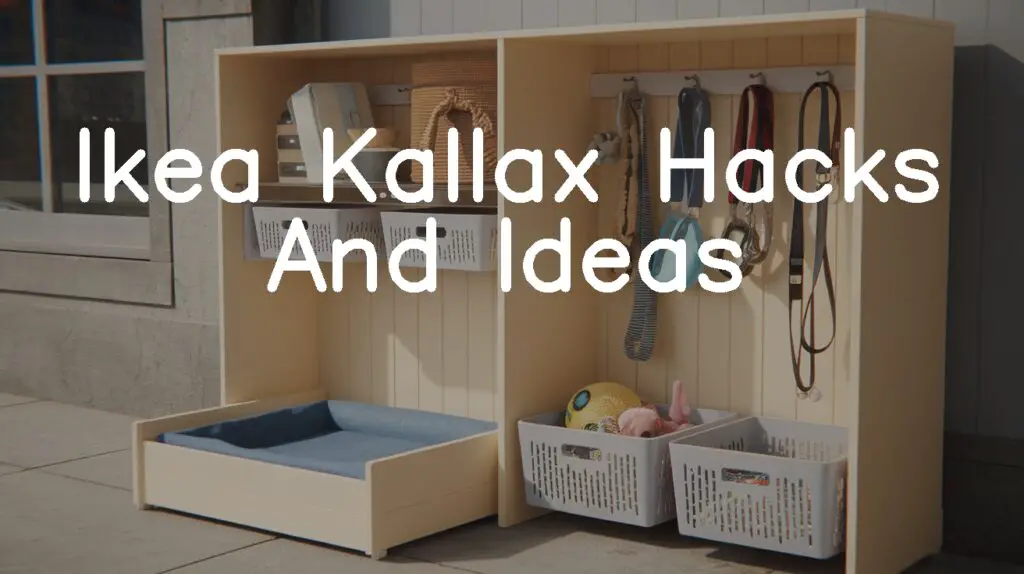
Transform an Ikea Kallax unit into a dedicated pet nook and supply station for your furry friend. This setup serves as an organized hub for pet essentials such as food, toys, and grooming supplies, while also providing a cozy space for your pet to relax. By customizing the Kallax to meet your pet’s needs, you can create a functional and charming space that seamlessly integrates into your home decor.
How to Create a Pet Nook and Supply Station
Materials Needed:
– Ikea Kallax unit
– Fabric baskets or bins for storage
– Pet bed or cushion
– Wall hooks for leashes and collars
– Toy storage bin
– Food and water bowls
– Paint or contact paper for personalization
– Non-slip rug pad or pet mat
– Wall anchor kit for safety
Steps to Achieve the Look:
1.
Assemble the Kallax
: Follow Ikea’s instructions to put together the Kallax unit, positioning it horizontally to create low access for your pet.
2.
Customize the Color Scheme
: Paint the unit or use contact paper to blend with your home decor. Soft, soothing colors like pastel blue or beige work well and create a calming atmosphere for pets.
3.
Set Up the Pet Bed
: Place a comfortable pet bed or cushion inside one of the lower compartments, ensuring it’s easy for your pet to access and cozy enough for relaxation.
4.
Add Storage Baskets
: Utilize fabric baskets or bins in the other compartments to store pet essentials like grooming tools, treats, and food supplies.
5.
Install Wall Hooks
: Position hooks next to the Kallax unit for hanging leashes, collars, or harnesses, keeping them conveniently organized.
6.
Organize Toys
: Use a dedicated bin for toys, placing it at a reachable height for your pet to encourage play and independence.
7.
Place Food and Water Bowls
: Designate an area near the Kallax for food and water bowls. Use a non-slip rug pad or pet mat underneath to prevent movement and protect your floor.
8.
Personalize with Decor
: Add decor items like a framed photo of your pet or a small plant to enhance the aesthetic appeal of the space.
9.
Ensure Safety
: Secure the Kallax unit to the wall with a wall anchor kit to prevent tipping, ensuring a safe environment for both you and your pet.
Final Touches
: Regularly refresh the space by organizing toys and restocking supplies as needed. This personalized pet nook offers your furry companion a delightful corner while maintaining a neat and integrated look within your home.
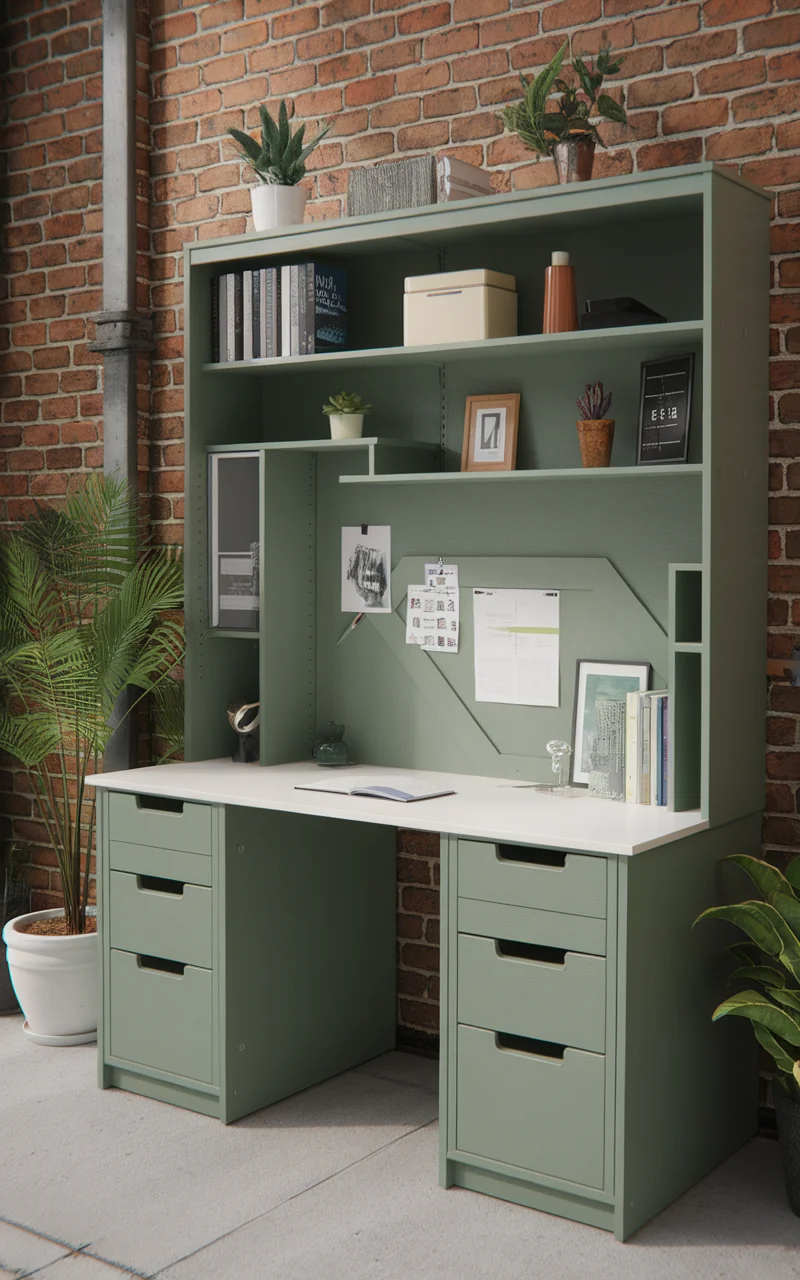
Idea: Creative Office Workspace
Transform an Ikea Kallax unit into a functional and stylish home office workspace that combines storage with productivity. This hack reorganizes your office supplies and equipment, providing a dedicated area for focused work and creative projects. By customizing the Kallax to suit your needs, you can create an inspiring environment that boosts efficiency and complements your home decor.
How to Create a Creative Office Workspace
Materials Needed:
– Ikea Kallax unit
– Desk tabletop or custom work surface
– Storage boxes or bins
– Cable management solutions
– Shelf inserts or dividers
– Desk lamp or adjustable lighting
– Office chair
– Paint or contact paper for customization (optional)
– Wall anchor kit for safety
Steps to Achieve the Look:
1.
Assemble the Kallax
: Follow Ikea’s instructions to assemble the Kallax unit, configuring it based on your space requirements.
2.
Customize the Color Scheme
: Paint the unit or use contact paper to match your office decor. Consider sophisticated shades like matte black, sage green, or clean white for a modern look.
3.
Add the Desk Surface
: Attach a desk tabletop or custom work surface to the Kallax. Ensure it’s securely placed and spacious enough for a computer and writing area.
4.
Organize with Storage Boxes
: Use storage boxes or bins within the unit to categorize office supplies like stationery, files, and electronic accessories.
5.
Install Shelf Inserts
: Incorporate shelf inserts or dividers to optimize storage, accommodating books, folders, or decorative items.
6.
Manage Cables
: Implement cable management solutions to keep cords tidy and hidden, creating a neat workspace.
7.
Set Up Lighting
: Place a desk lamp or adjustable lighting on the workspace to ensure adequate illumination for tasks and screen work.
8.
Choose a Comfortable Chair
: Select an ergonomic office chair that offers comfort and support during long work sessions.
9.
Ensure Safety
: Secure the Kallax unit to the wall with a wall anchor kit to prevent tipping and maintain a safe environment.
Final Touches
: Personalize your workspace with motivational artwork, plants, or a bulletin board. Regularly declutter and organize to keep your creative office workspace efficient and inspiring.
Idea: Modern Entertainment Center
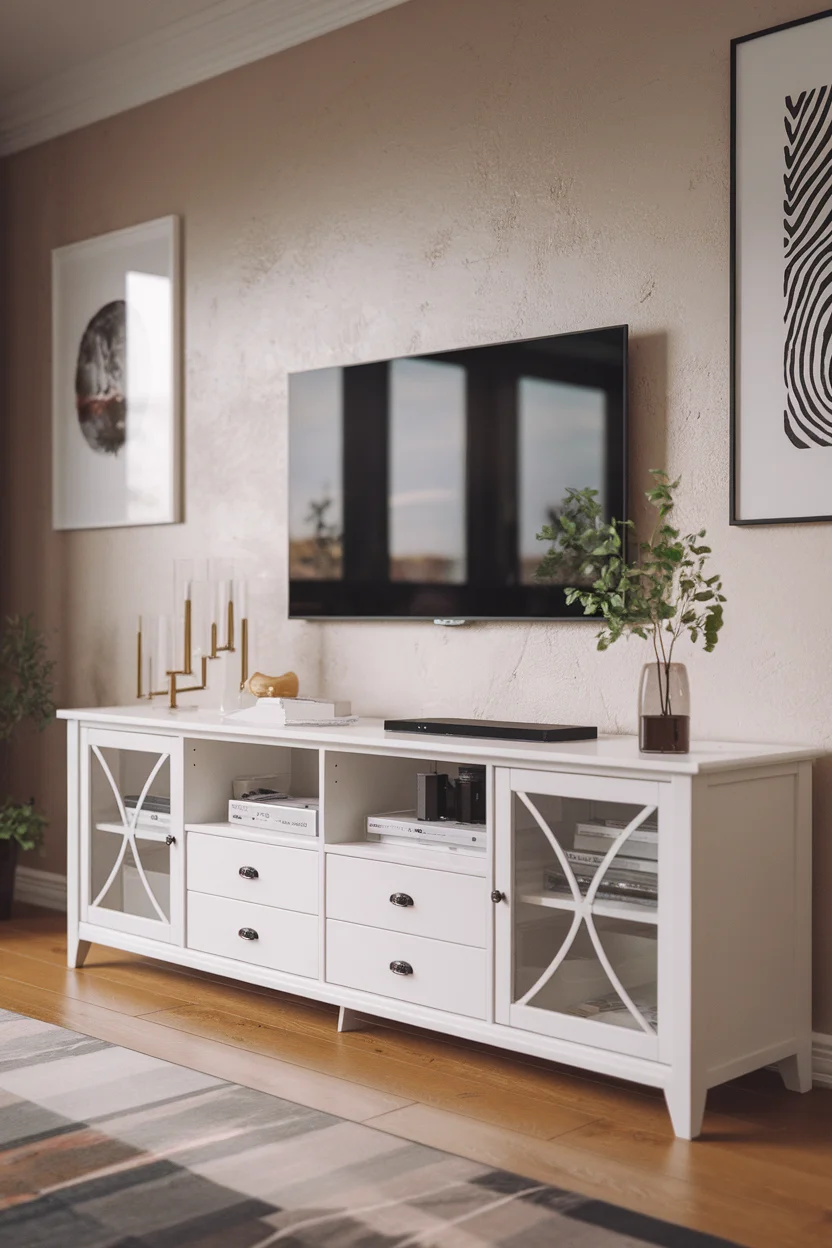
Transform your Ikea Kallax into a sleek and organized entertainment center that effortlessly integrates your media components and accessories. This hack enhances your living room’s functionality, offering a stylish spot for your TV, gaming consoles, and other electronic devices, while keeping cords and accessories tidy. With a modern touch, this setup can elevate the overall aesthetic of your entertainment space.
How to Create a Modern Entertainment Center
Materials Needed:
– Ikea Kallax unit
– TV mount or stand
– Cable management system
– Glass doors or panels (optional for a polished look)
– Storage baskets or bins
– LED light strips
– Paint or contact paper for customization (optional)
– Wall anchor kit for safety
Steps to Achieve the Look:
1.
Assemble the Kallax
: Follow Ikea’s instructions to put together the Kallax unit, selecting a size appropriate for your space and media components.
2.
Color Scheme
: Customize the unit with paint or contact paper to fit your room decor. Consider modern neutrals like white, charcoal grey, or a sleek matte black for a contemporary finish.
3.
Install TV Mount or Stand
: If using a TV mount, securely fix it above the Kallax for optimal viewing height. Alternatively, place the TV directly on top of the unit if using a stand.
4.
Add Cable Management
: Implement a cable management system to keep cords organized and hidden behind the unit, ensuring a clean and clutter-free appearance.
5.
Incorporate Glass Doors
: Attach optional glass doors or panels to some compartments for a polished look, while still allowing remote control functionality for devices.
6.
Organize with Baskets
: Use storage baskets or bins in the unit’s compartments to neatly store remote controls, gaming accessories, and other small items.
7.
Enhance with Lighting
: Install LED light strips along the inner shelves or behind the unit to create ambiance and highlight your entertainment space.
8.
Ensure Stability
: Use a wall anchor kit to secure the Kallax, especially important with attached electronics, to prevent tipping and ensure safety.
Final Touches
: Add decor elements like a small plant, artwork, or decorative objects to personalize and complete your entertainment center. Keep the setup organized by regularly tidying up cords and accessories, making your entertainment space both functional and visually appealing.
