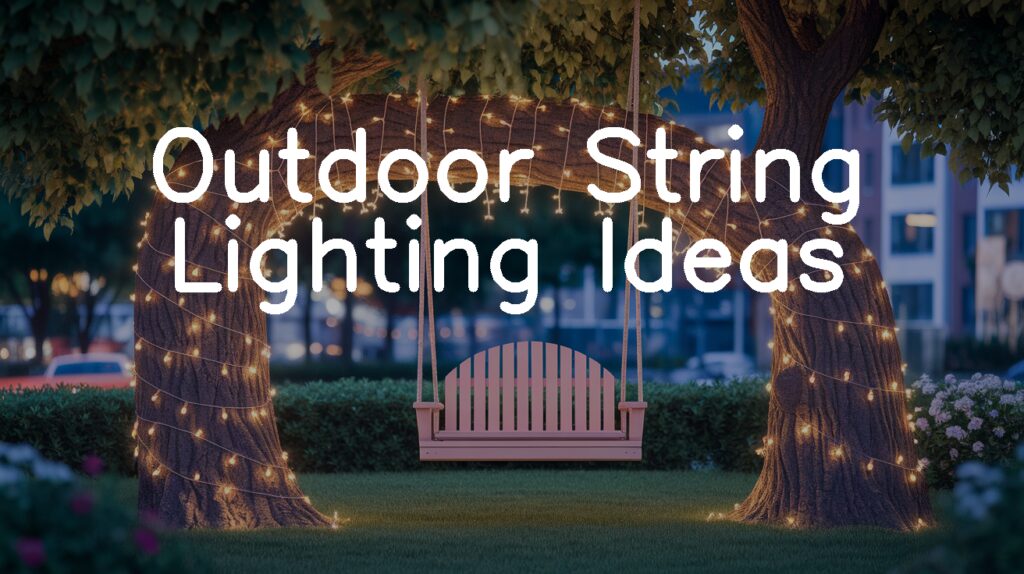
As the sun sets and the sky begins to twinkle with stars, the ambiance of your outdoor space can be transformed with the simple yet enchanting addition of string lighting. These versatile lights not only illuminate but also weave a tapestry of warmth and charm, making any patio, garden, or backyard come alive with a magical glow. Whether you’re planning a cozy evening with friends or a romantic dinner under the stars, outdoor string lighting offers countless possibilities to create an inviting and captivating atmosphere. Let’s explore some inspiring ideas to help you transform your outdoor area into an enchanting retreat.
Enchanted Garden Canopy
Transform your backyard into a magical retreat with an Enchanted Garden Canopy. By draping string lights overhead, you can create an intimate and whimsical atmosphere perfect for outdoor gatherings or a peaceful evening under the stars. Choose warm white or soft yellow lights to complement natural surroundings and evoke a cozy and inviting ambiance.
How to Achieve It
Materials Needed:
– Outdoor string lights (warm white or soft yellow)
– Poles or tall garden stakes
– Weatherproof extension cords
– Zip ties or hooks
– Timer or smart plug (optional)
Steps:
1.
Plan Layout:
– Determine the area where you want to create the canopy.
– Measure the space to calculate how many string lights you will need.
2.
Install Poles:
– Position poles or garden stakes at the corners of the area.
– Ensure they are securely anchored into the ground.
3.
String the Lights:
– Begin draping the string lights from pole to pole.
– Create a crisscross pattern or parallel lines for a denser canopy.
– Secure the lights to the poles using zip ties or hooks.
4.
Connect to Power:
– Use weatherproof extension cords to connect the lights to a power source.
– Consider using a timer or smart plug to automate the lighting schedule.
5.
Check Safety:
– Ensure all electrical connections are weatherproof and safe.
– Double-check that all fixtures are secure and away from water hazards.
6.
Enhance Atmosphere:
– Add fairy lights in nearby trees for an extended magical effect.
– Consider additional d??cor like lanterns or hanging plants for added charm.
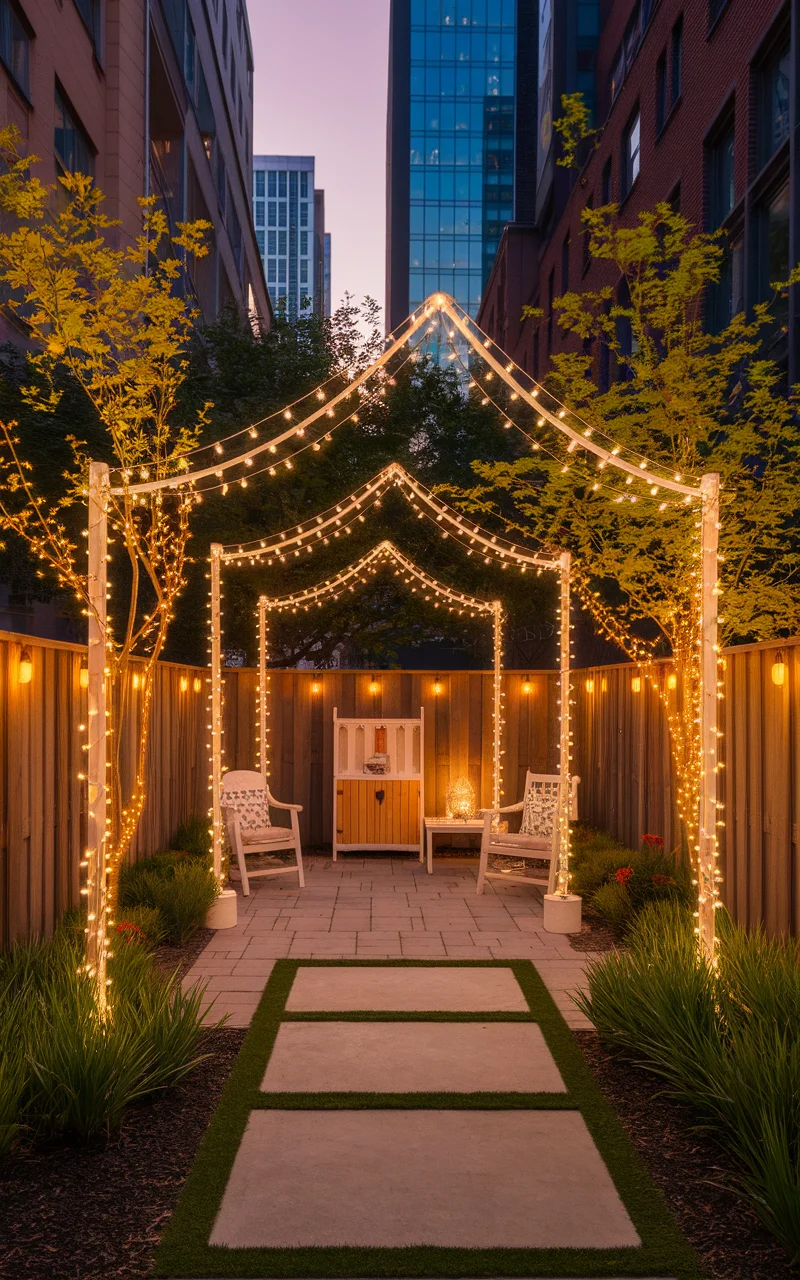
Rustic Pergola Illumination
Enhance the rustic charm of your pergola by weaving string lights through its beams, creating a cozy, inviting space perfect for dining or relaxing outdoors. Soft amber or vintage-style Edison bulbs can add a warm, nostalgic glow that complements wooden or natural stone elements, making evenings outside comfortable and atmospheric.
How to Achieve It
Materials Needed:
– Outdoor string lights (soft amber or Edison bulbs)
– Cable ties or metal hooks
– Extension cords
– Timer or smart plug (optional)
Steps:
1.
Measure and Plan:
– Measure the pergola’s dimensions to determine the number of light strings needed.
– Plan the lighting pattern, such as zigzag, perimeter, or cross-beam.
2.
Attach Hooks or Ties:
– Secure metal hooks or cable ties at regular intervals along the beams.
– Ensure they are firmly fixed to support the weight of the lights.
3.
String the Lights:
– Carefully thread the string lights through the hooks or use cable ties to secure them to the beams.
– Maintain a consistent sag for a uniform look.
4.
Connect to Power Source:
– Use extension cords to connect the lights to a power source safely.
– Employ a timer or smart plug to control lighting automatically.
5.
Safety Check:
– Verify that all electrical connections are weatherproofed.
– Ensure cords are neatly tucked away and not a tripping hazard.
6.
Enhance the Experience:
– Incorporate candles or lanterns for additional ambiance.
– Use soft textiles like cushions or throws for added comfort.

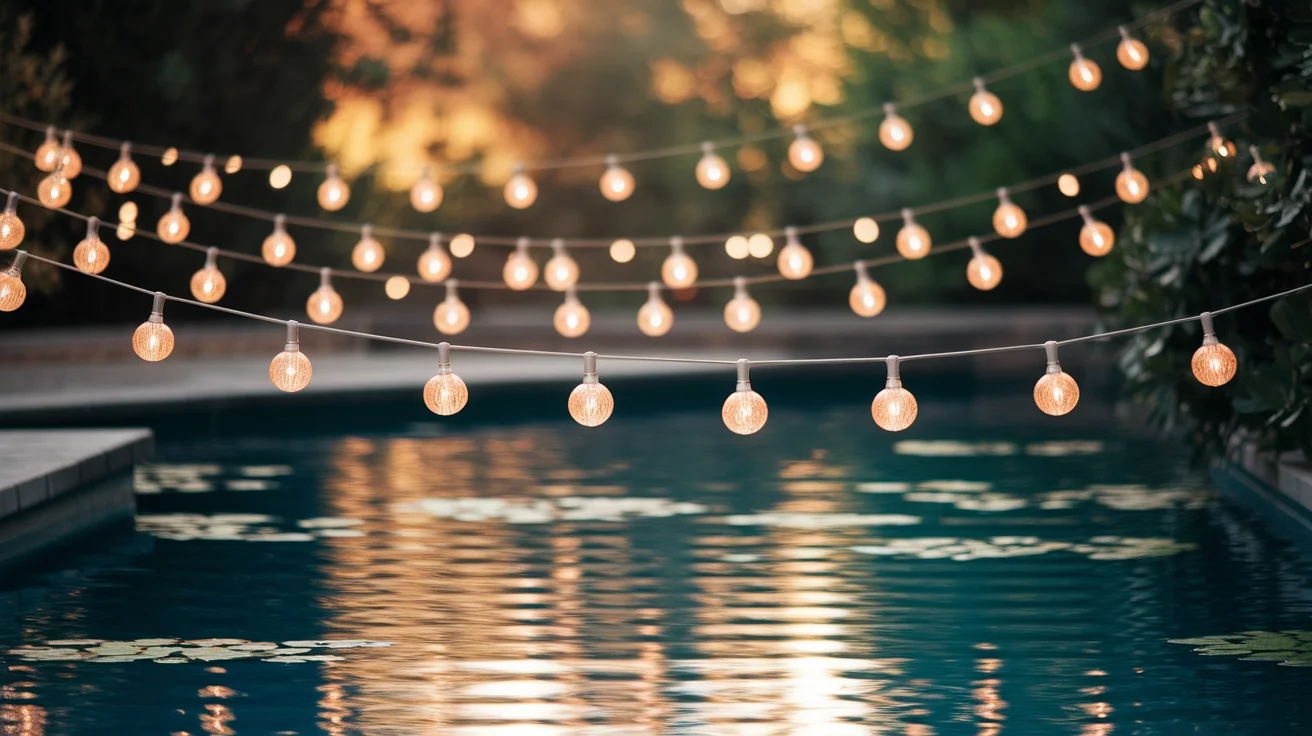
Floating Lantern Oasis
Create a tranquil atmosphere in your outdoor space with a Floating Lantern Oasis using string lights. Suspend strings of lantern-style lights above a seating area or over a body of water like a pool or pond to mimic the serene glow of floating lanterns. These lights not only provide gentle illumination but also add an exotic, peaceful feel reminiscent of a faraway retreat.
How to Achieve It
Materials Needed:
– Lantern-style outdoor string lights
– Clear fishing line or thin wire
– Extension cords
– Hanging hooks or command strips
– Timer or smart plug (optional)
Steps:
1.
Plan the Layout:
– Choose a location, either above a seating area or across a water feature.
– Measure the space to determine how many strings of lights you need.
2.
Set Up Hanging Points:
– Attach hooks or use command strips where you plan to hang the lights.
– Ensure they are securely fixed to hold the weight.
3.
String the Lights:
– Suspend the lantern lights using clear fishing line or thin wire to create an illusion of floating.
– Space the lanterns evenly for a balanced look.
4.
Connect to Power:
– Use extension cords to reach a power source, making sure connections are secure.
– Consider using a timer or smart plug for convenient control.
5.
Ensure Safety:
– Double-check all connections are weatherproof and safe from potential water exposure.
– Secure any loose cords to prevent tripping hazards.
6.
Enhance Concept:
– Integrate soft landscaping lights to highlight nearby plants or water features.
– Use light colors that reflect well on water, such as soft blues or greens, for added tranquility.
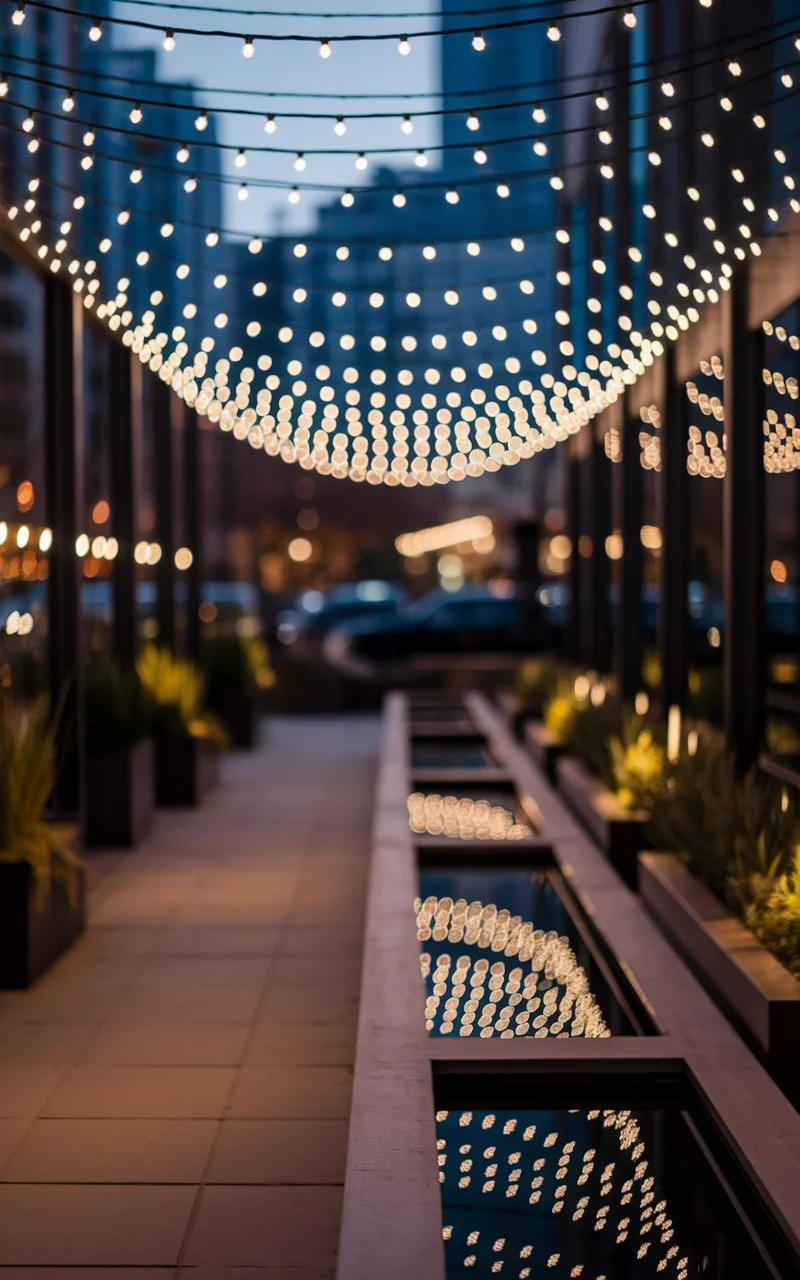
Starry Night Patio
Turn your outdoor patio into a captivating “Starry Night” by hanging string lights in a pattern reminiscent of a celestial sky. By using small, bright white or cool blue LED string lights, you can imitate the twinkling of stars, creating a serene and enchanting atmosphere perfect for evening relaxation or gatherings.
How to Achieve It
Materials Needed:
– Outdoor string lights (bright white or cool blue, LED preferred)
– Ceiling hooks or adhesive clips
– Extension cords
– Timer or smart plug (optional)
Steps:
1.
Plan the Layout:
– Decide the area of the patio to transform into your starry sky.
– Measure and outline the space to determine how many string lights are required.
2.
Install Hooks or Clips:
– Secure hooks or adhesive clips to the ceiling of your patio in a scattered pattern.
– Ensure they are firmly attached to support the lights.
3.
Hang the Lights:
– Drape the lights from hook to hook in a random, scattered manner to mimic stars.
– Allow some lights to hang down slightly to create depth and dimension.
4.
Connect to Power:
– Use extension cords to connect the lights to an accessible power source.
– Use a timer or smart plug for convenient, automated lighting control.
5.
Safety Check:
– Ensure all electrical connections are weatherproof and secure.
– Keep cords tidy and away from walking paths to prevent trips.
6.
Enhance the Atmosphere:
– Add complementary soft white or blue lanterns or candles around the patio.
– Consider using reflective surfaces like mirrors or water features to enhance the starry effect.
Vintage Bistro Charm
Elevate your outdoor dining or relaxation space with a Vintage Bistro Charm theme using string lights. Drape globe-style string lights between trees or posts to recreate the romantic atmosphere of a classic European caf??. These lights provide a soft, warm glow that highlights dining tables and seating areas, making your outdoor gatherings memorable and inviting.
How to Achieve It
Materials Needed:
– Globe-style outdoor string lights
– Sturdy posts or trees for anchoring
– Weatherproof extension cords
– Hooks or heavy-duty garden stakes
– Timer or smart plug (optional)
Steps:
1.
Plan the Layout:
– Identify the outdoor area you want to illuminate, like dining or lounging sections.
– Measure the space to determine the length of lights required.
2.
Position Anchors:
– Select trees, posts, or use heavy-duty garden stakes to serve as anchoring points.
– Ensure these are stable and can handle the weight of the lights.
3.
Hang the Lights:
– Drape the globe lights from anchor to anchor at uniform intervals.
– Opt for a swooping pattern for an elegant look reminiscent of bistro patios.
4.
Connect to Power:
– Run weatherproof extension cords to safely reach a power source.
– Utilize a timer or smart plug for automatic control and convenience.
5.
Safety Check:
– Verify all electrical connections are secure and protected from moisture.
– Ensure cords are neatly arranged to prevent tripping hazards.
6.
Enhance the Ambiance:
– Add wooden or wrought iron furniture to complement the bistro look.
– Use table runners or cloths in earthy tones or checkered patterns for a classic touch.

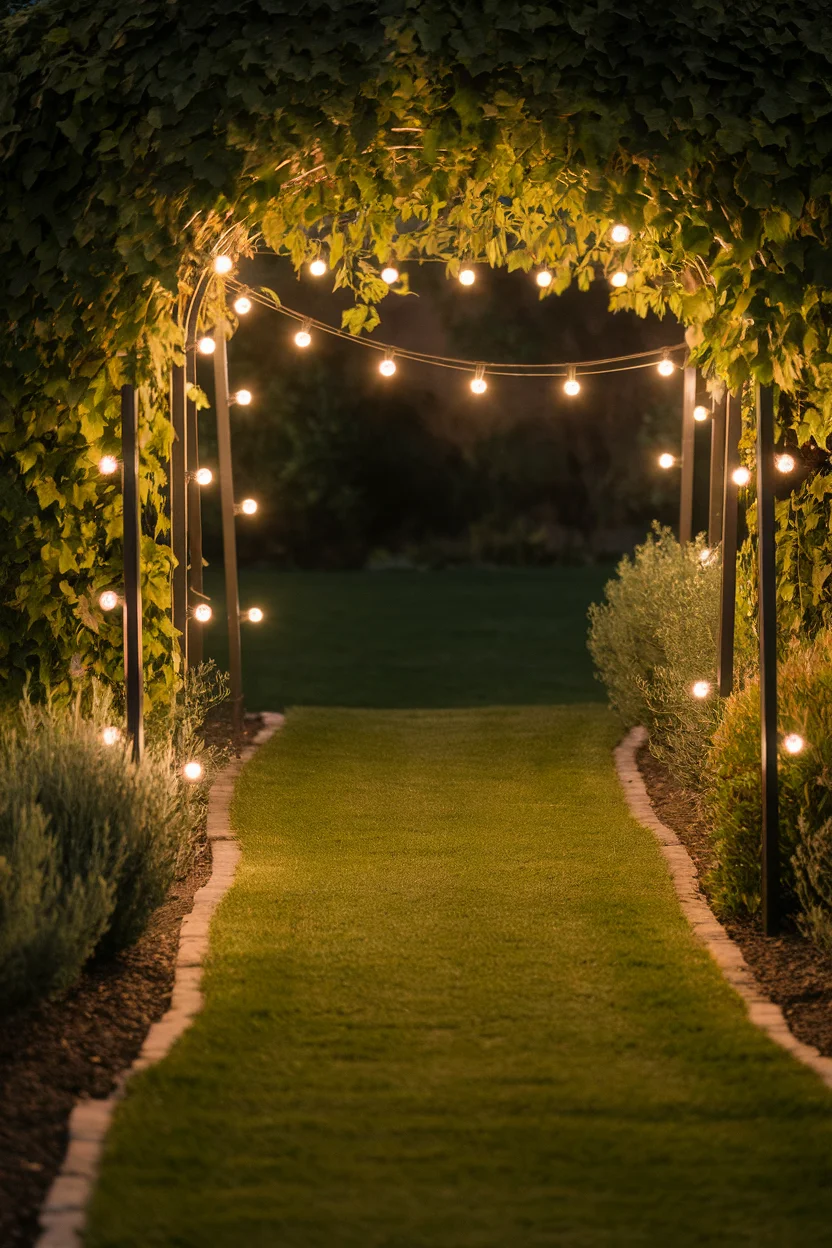
Illuminated Walkway Guide
Guide your guests with a beautifully lit pathway using string lights. Lay string lights along a garden path or walkway, providing both practical illumination and a decorative touch. Opt for soft, diffused lights that blend with the natural landscape, enhancing safety while creating a charming, welcoming environment.
How to Achieve It
Materials Needed:
– Low-voltage outdoor string lights
– Ground stakes
– Weatherproof extension cords
– Zip ties or cable clips
– Timer or smart plug (optional)
Steps:
1.
Plan Your Path:
– Identify and measure the walkway where you wish to place the lights.
– Determine the type and number of lights based on the path length.
2.
Install Ground Stakes:
– Position ground stakes along the edges of the path at regular intervals.
– Ensure they are securely embedded for stability.
3.
Lay the String Lights:
– Run the string lights along the stakes, securing them with zip ties or cable clips.
– Keep the lights slightly elevated off the ground to prevent damage and enhance visibility.
4.
Connect to Power:
– Use weatherproof extension cords to connect the lights to an outdoor power source.
– Consider using a timer or smart plug for automated cycling.
5.
Safety Checks:
– Double-check that all electrical connections are waterproof and safely tucked away.
– Ensure that the cords do not pose tripping hazards.
6.
Enhance the Aesthetic:
– Use light colors that complement the natural surroundings, such as soft whites or earth tones.
– Add nearby solar-powered garden lights for synchronized lighting along larger paths.
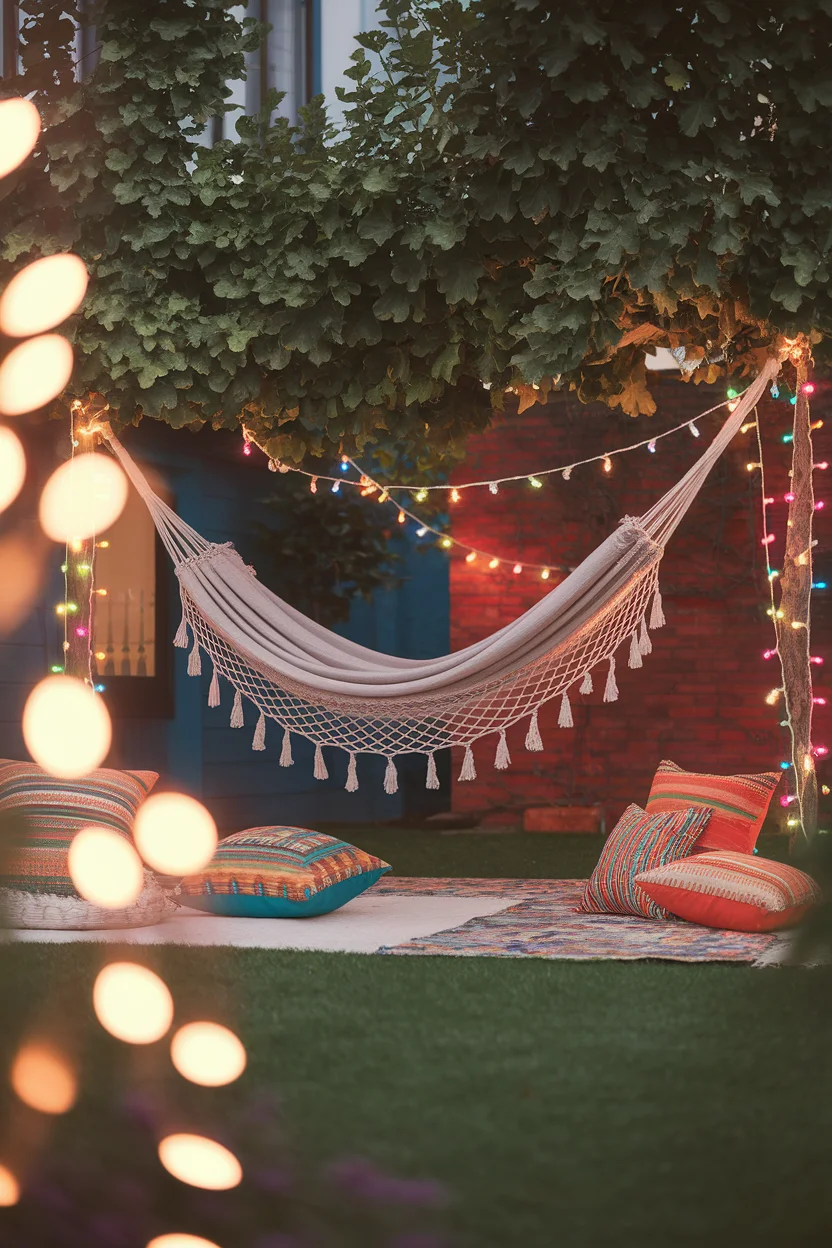
Bohemian Hammock Haven
Create a relaxing Bohemian Hammock Haven in your backyard by incorporating soft, draping string lights around a cozy hammock space. This setup provides a serene ambiance, perfect for unwinding with a book or taking a nap amidst gentle illumination. Use multi-colored fairy lights to add a playful, eclectic touch that reflects a carefree bohemian vibe, complementing colorful cushions and throws.
How to Achieve It
Materials Needed:
– Multi-colored outdoor string lights
– Sturdy hooks or eye bolts
– Hammock and support structures (trees or posts)
– Extension cords (long enough to reach power source)
– Weatherproof extension cords
– Decorative pillows and throws
Steps:
1.
Select the Site:
– Choose a location for your hammock, ideally between two trees or secure posts.
– Ensure sufficient space around the hammock for lighting and decoration.
2.
Install Support Hooks:
– Attach sturdy hooks or eye bolts to trees or posts, ensuring they can hold the weight of a hammock and lighting.
– Securely mount them at a comfortable height for sitting.
3.
Hang the Hammock:
– Suspend the hammock between the supports, ensuring it’s safely and comfortably positioned.
– Double-check that the hammock is stable and well-anchored.
4.
Arrange the Lights:
– Drape multi-colored string lights around the hammock support structures.
– Secure the lights using additional hooks or ties, allowing them to cascade lightly over the hammock space.
5.
Connect to Power:
– Use weatherproof extension cords to link the lights to an electrical outlet.
– Consider using a timer or smart plug for setting automatic lighting schedules.
6.
Safety Precautions:
– Ensure all connections are waterproof and free from direct exposure to moisture.
– Keep electrical cords and lights out of reach when the hammock is in use to prevent entanglement.
7.
Enhance the Space:
– Add vibrant cushions and throws in varied textures for a bohemian look.
– Incorporate woven rugs and small potted plants nearby to complete the cozy setting.
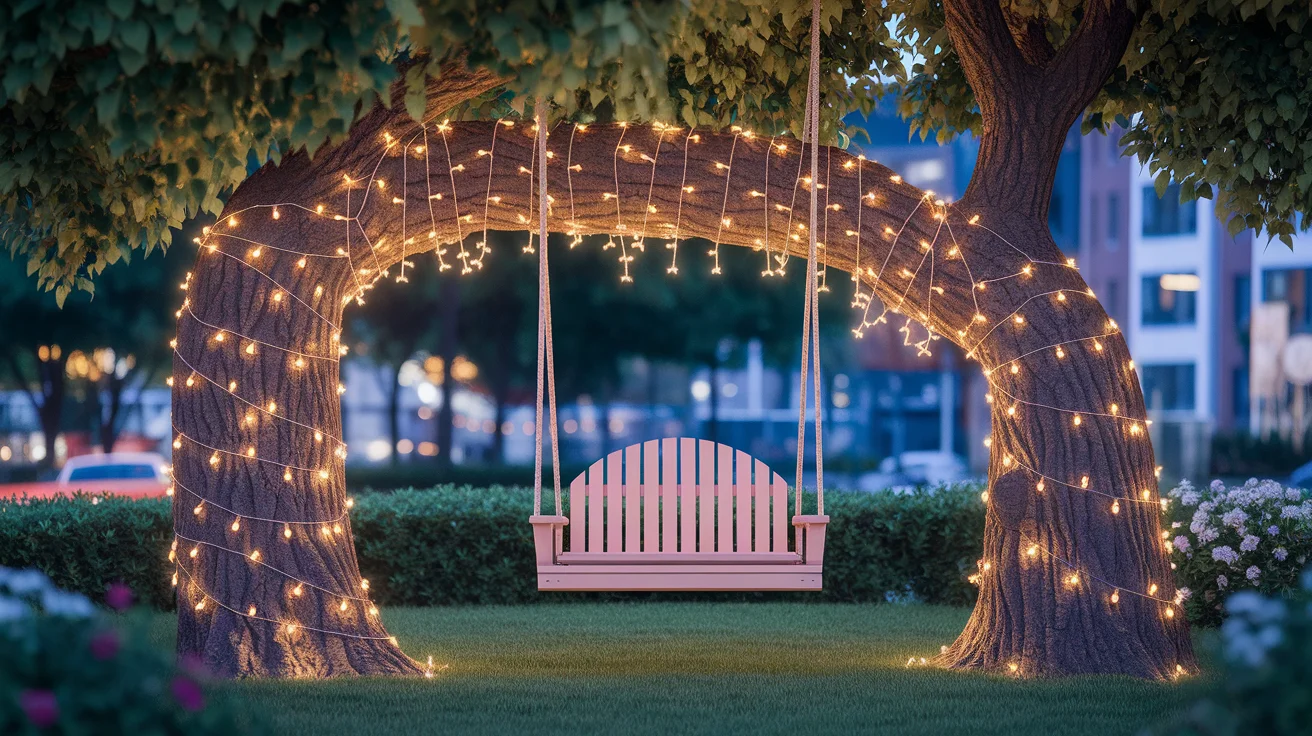
Fairytale Swing Retreat
Infuse a touch of magic into your outdoor area with a Fairytale Swing Retreat. Surround a tree swing with cascading string lights to create a charming nook that feels like it’s straight out of a storybook. This enchanting setup is perfect for nostalgic relaxation or whimsical family photos, bringing joy and warmth to your garden space.
How to Achieve It
Materials Needed:
– Outdoor string lights (warm white or pastel colors)
– Sturdy tree branch or swing set frame
– Swing with secure hanging ropes or chains
– Weatherproof extension cords
– Hooks or cable ties
– Timer or smart plug (optional)
Steps:
1.
Select the Location:
– Choose a solid, sturdy branch or frame that can safely support a swing.
– Ensure good ground clearance and a safe surrounding area.
2.
Install the Swing:
– Hang the swing securely from the branch or frame.
– Double-check stability and safety, ensuring all fixings are strong.
3.
Decorate with Lights:
– Wrap the string lights around the tree trunk and branch or frame.
– Allow the lights to cascade gently around the swing area, creating a halo effect.
4.
Connect to Power:
– Use weatherproof extension cords to connect the lights to an electrical outlet.
– Consider employing a timer or smart plug for convenient, scheduled lighting.
5.
Safety Check:
– Verify that all connections are waterproof and securely fastened.
– Ensure lights are out of the way of the swing path to avoid tangling.
6.
Enhance the Atmosphere:
– Choose a light color palette like pastels for a fairytale aesthetic.
– Add soft blankets or cushions to the swing for added comfort and style.
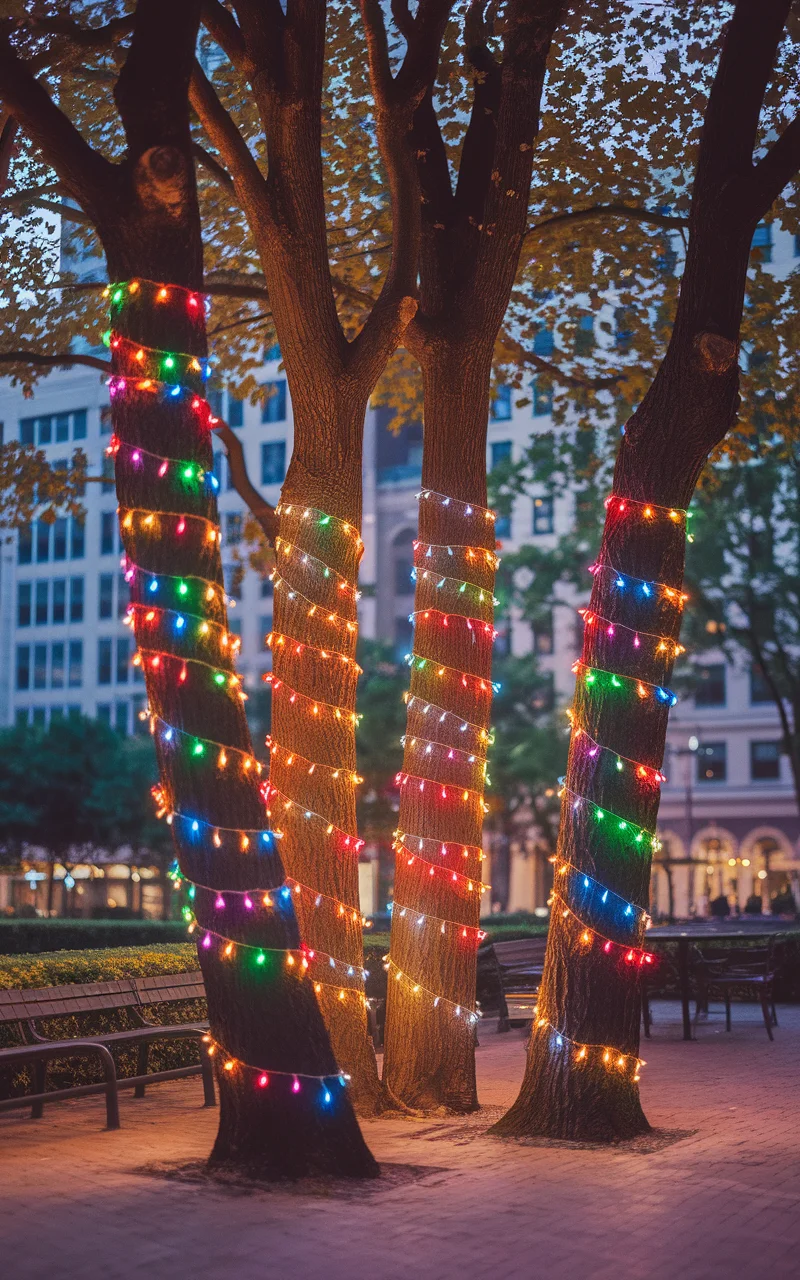
Twinkling Tree Grove
Transform a cluster of trees in your backyard into a mesmerizing Twinkling Tree Grove. By wrapping string lights around the trunks and branches, you can create an enchanting forest-like wonderland that serves as a beautiful focal point during evening gatherings. Choose cool white or multi-colored lights for a dynamic and sparkling effect that captivates guests and highlights the natural beauty of the trees.
How to Achieve It
Materials Needed:
– Outdoor string lights (cool white or multi-colored)
– Weatherproof extension cords
– Ladder
– Cable ties or clips
– Timer or smart plug (optional)
Steps:
1.
Select Trees:
– Identify a group of trees close together that can collectively create the grove effect.
– Ensure that the trees are healthy and can support the weight of the lights.
2.
Wrap Trunks:
– Start by wrapping string lights around the trunk of each tree, starting from the base going upward.
– Use cable ties or clips to secure the lights in place.
3.
Decorate Branches:
– Use a ladder to wrap lights around selected branches, spreading out for even coverage.
– Allow some lights to dangle slightly for a cascading twinkle effect.
4.
Connect to Power:
– Use weatherproof extension cords to connect the strands to an electrical outlet.
– Consider using a timer or smart plug to automate the lighting schedule.
5.
Check Safety:
– Ensure all electrical connections are waterproof and securely fastened.
– Keep wires organized and out of the way to prevent any tripping hazards.
6.
Enhance the Scene:
– Incorporate ground lighting or lanterns around the base of the trees for added depth.
– Choose additional d??cor like hanging ornaments to match the twinkling theme.
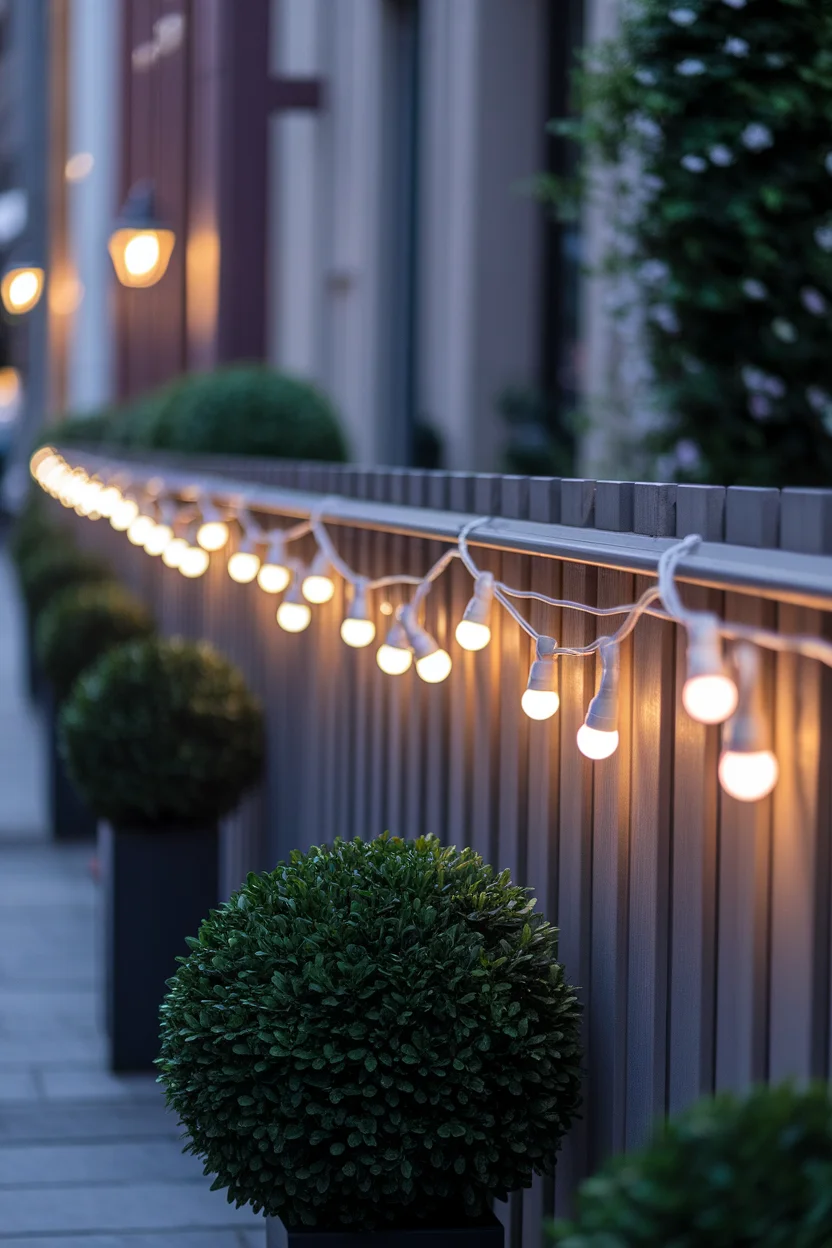
Elegant Fence Illumination
Add a touch of elegance to your outdoor space by incorporating string lights along your fence. This idea is ideal for defining the boundary of your yard while adding a soft, ambient glow that enhances your outdoor decor. Warm white or soft pastel lights can be used to create a serene and inviting atmosphere, perfect for evening gatherings or quiet nights outside.
How to Achieve It
Materials Needed:
– Outdoor string lights (warm white or soft pastel colors)
– Cable hooks or clips
– Weatherproof extension cords
– Timer or smart plug (optional)
Steps:
1.
Plan the Layout:
– Measure the length of your fence to determine the amount of string lights needed.
– Decide on the design pattern, such as straight lines or measured intervals for an artistic touch.
2.
Install Hooks or Clips:
– Secure cable hooks or clips along the top edge of the fence at regular intervals.
– Ensure they’re firmly attached to support the weight of the lights.
3.
Attach the Lights:
– String the lights across the fence, attaching them securely to each hook or clip.
– Maintain an even spacing for a tidy and uniform look.
4.
Connect to Power:
– Use weatherproof extension cords to connect the lights to an outdoor power source.
– Employ a timer or smart plug for automated lighting to suit your schedule.
5.
Safety Check:
– Verify all connections are waterproof and protected from weather exposure.
– Keep cords out of pathways to avoid tripping hazards.
6.
Enhance the Ambiance:
– Consider adding small potted plants or climbing vines along the fence to complement the lighting.
– Use additional d??cor like hanging lanterns or outdoor art to personalize the illuminated space.