Transforming your outdoor space into a magical retreat can be effortlessly achieved with the right pergola lighting ideas. Whether you envision cozy evenings under a warm, inviting glow or a vibrant alfresco dining experience, the illumination you choose can set the perfect mood for any occasion. By exploring a variety of creative lighting solutions, from twinkling fairy lights to elegant lanterns, you can enhance the aesthetic and functionality of your pergola while providing an enchanting ambiance that beckons you to unwind and enjoy the beauty of the outdoors well into the night.
Ambient String Lights for a Cozy Atmosphere
Create a warm and welcoming atmosphere in your outdoor space by draping ambient string lights across your pergola. This classic and budget-friendly lighting option not only enhances the aesthetic appeal of your pergola but also provides gentle illumination for evening gatherings or quiet relaxation.
How to Achieve Ambient String Lighting
Choose Your Lights:
Opt for weather-resistant LED string lights in warm white or soft yellow hues to ensure longevity and create a cozy glow.
Plan the Layout:
Decide whether to drape lights in a zig-zag, crisscross, or parallel pattern, taking into account the size and shape of your pergola.
Gather Tools and Supplies:
Purchase needed materials such as hooks or clips, extension cords, and a ladder for installation.
Install Hooks or Clips:
Securely attach hooks or clips along the beams of your pergola to hold the string lights in place.
Hang the Lights:
Carefully string the lights according to your planned design, ensuring they are evenly spaced and securely fastened.
Connect to Power:
Use outdoor-rated extension cords to safely connect your lights to a power source. Consider using a timer or smart plug for automated control.
Test and Adjust:
Once connected, turn on the lights to make sure they are working and adjust any sagging sections or spacing as needed to achieve the desired look.
Incorporating ambient string lights in your pergola will not only enhance its visual appeal but also create a cozy and inviting outdoor sanctuary.
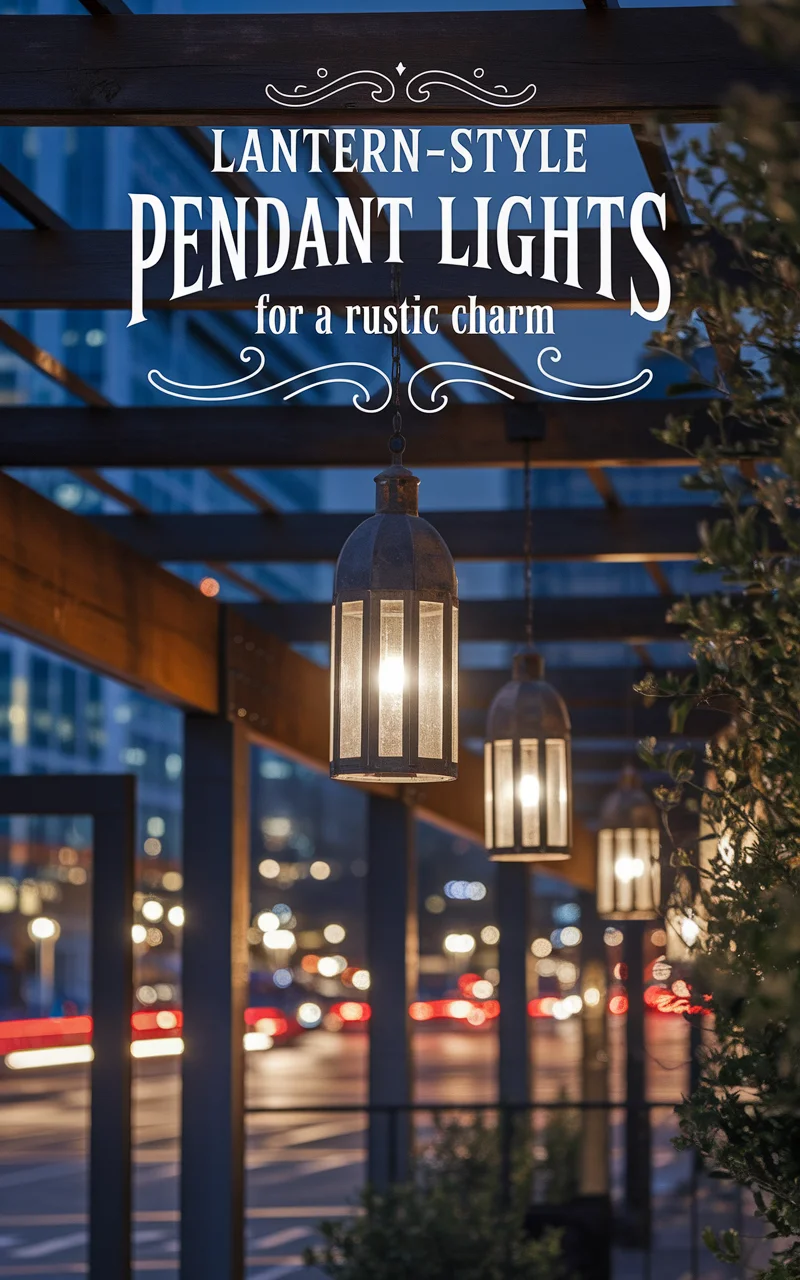
Lantern-Style Pendant Lights for a Rustic Charm
Introduce a rustic charm to your pergola by hanging lantern-style pendant lights. These fixtures not only add a vintage aesthetic but also provide focused ambient lighting that creates a warm and intimate setting for evening gatherings.
How to Achieve Lantern-Style Pendant Lighting
Choose Your Lanterns:
– Opt for weather-resistant lanterns in materials such as metal or wood, with glass enclosures for the light bulbs.
– Select lanterns that match your outdoor decor, such as iron for a rustic look or bronze for a more traditional feel.
Plan the Layout:
– Determine the number and location of lanterns to ensure even lighting, considering hanging them at varying heights for added interest.
– Measure the pergola’s dimensions to decide on the correct wire length and spacing between each pendant.
Gather Tools and Supplies:
– Needed items include pendant light kits, weatherproof wiring, a ladder, drill, hooks or ceiling-mounted light fixtures, and any needed connectors.
Install Hooks or Fixtures:
– Securely attach ceiling light fixtures or hooks to the pergola beams where each pendant light will be hung, ensuring they can support the weight of the lanterns.
Wiring the Lanterns:
– Run weatherproof wiring through the pergola structure, connecting each pendant light according to the electrical safety standards.
– Ensure all wiring is concealed or secured along the beams for a tidy appearance.
Hang the Lanterns:
– Attach each lantern securely to the already installed hooks or fixtures, adjusting their hanging length as per your design plan.
Connect to Power:
– Safely connect the pendant light wiring to a power source, and consider using a dimmer switch or smart plug for adjustable lighting levels.
Test and Adjust:
– Once installed, switch on the lights to ensure they are functional. Adjust the hanging heights or positioning if needed for an ideal aesthetic.
Selecting lantern-style pendant lights can beautifully transform your pergola into a stylish and intimate outdoor retreat, complementing rustic and classic garden designs.
Color-Changing LED Strips for a Dynamic Ambiance
Elevate your pergola with color-changing LED strips to create a dynamic and vibrant outdoor atmosphere. Ideal for those who enjoy customizing their space for various occasions, these LED strips offer a range of colors and effects that can be easily controlled via remote or smartphone app. Whether you’re hosting a lively party or seeking a calming retreat, these lights can adapt to any mood or event.
How to Achieve Color-Changing LED Strip Lighting
Choose Your LED Strips:
– Select weather-resistant, outdoor-rated LED strips that offer a wide range of colors and modes. Look for options with remote control or smartphone app compatibility for ease of use.
Plan the Layout:
– Decide on the placement of the LED strips, such as outlining the edges of the pergola or highlighting specific areas. Ensure the strips will cover the desired areas for a cohesive look.
Gather Tools and Supplies:
– Necessary items include LED strip lights, connectors, adhesive backing or mounting clips, a power adapter, and a ladder.
Install the Strips:
– Clean the surfaces where the strips will be attached. Use adhesive backing or mounting clips to securely affix the LED strips to the pergola beams.
Connect the Strips:
– Use connectors to link multiple strips if needed. Ensure all connections are secure and weatherproofed to prevent moisture damage.
Power the Strips:
– Attach the strips to a power source with the provided power adapter. Use a waterproof covering for any exposed connections to enhance safety.
Set Up Control Options:
– Configure the remote control or integrate the LED strips with a compatible smartphone app. This setup allows for easy color and mode changes.
Test and Adjust:
– Turn on the LED strips and cycle through the color options and modes to ensure all functions are operating. Adjust the placement if needed for optimal lighting effect.
By installing color-changing LED strip lights, you can effortlessly transform your pergola into a vibrant and versatile space that is perfect for entertaining or unwinding in style.

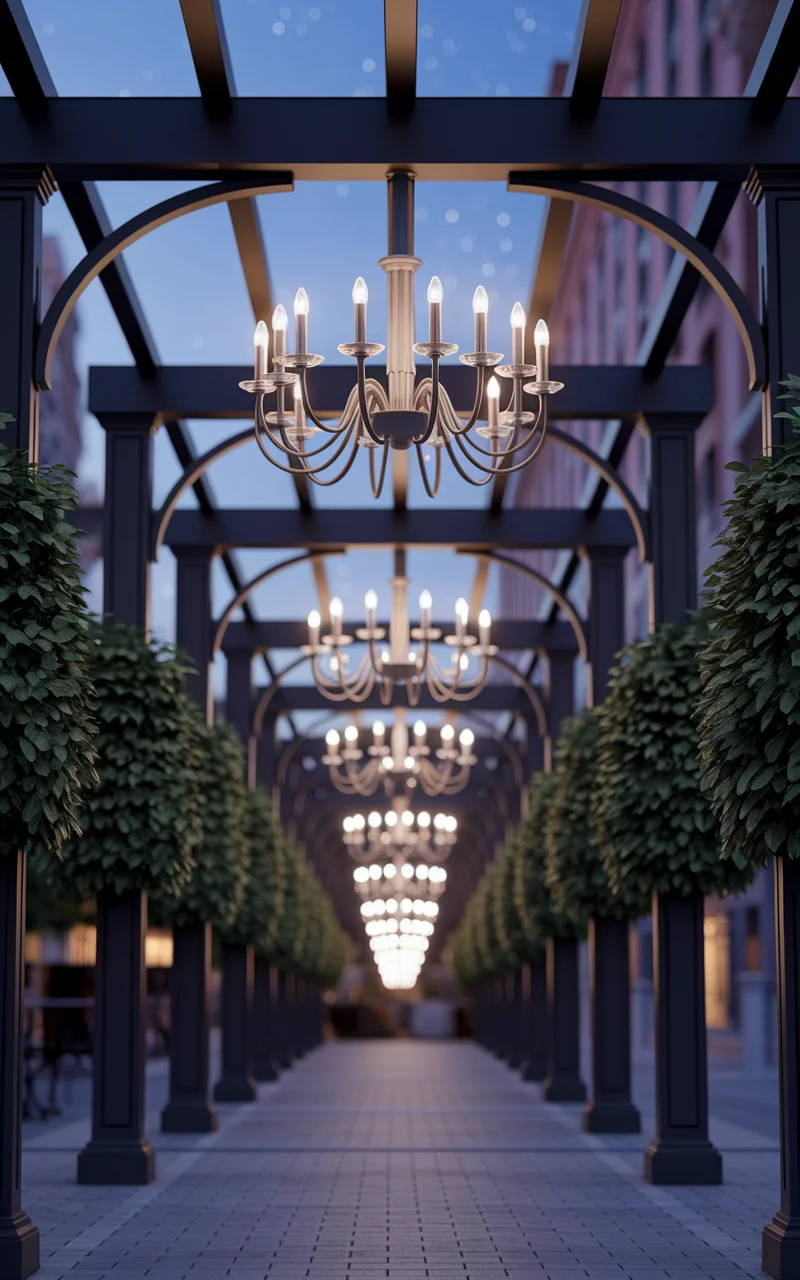
Candle Light Chandeliers for a Romantic Touch
Infuse a romantic and classic ambiance into your pergola by installing candle light chandeliers. These charming fixtures use either real candles or battery-operated LED candles to cast a soft, flickering glow that enhances evening meals or intimate gatherings. The gentle and cozy lighting will create a magical atmosphere under the starry sky.
How to Achieve Candle Light Chandelier Lighting
Choose Your Chandelier:
– Select a chandelier designed for outdoor use that accommodates candles. Consider wrought iron or rustic wood finishes for an elegant, vintage feel.
– Opt for LED candle alternatives for safety and ease of maintenance.
Plan the Layout:
– Decide on the ideal location to hang the chandelier for optimal illumination. Ensure it is centered and at a height that does not obstruct movement.
– Consider additional hanging points for stability if your pergola is in a windy location.
Gather Tools and Supplies:
– Gather necessary tools such as chains for hanging, a ladder, hooks, and safety wires for securing the chandelier.
Install the Chandelier:
– Use sturdy hooks and chains to hang the chandelier from the pergola beams. Ensure it is secure and balanced to prevent swaying.
Set Up the Candles:
– Arrange candles (real or LED) in the chandelier ensuring they are evenly spaced for balanced light distribution.
– If using real candles, ensure they are safely secured to prevent them from falling.
Connect to Power (for LED):
– If using LED candles, ensure they are charged and test their functionality before placing them.
Test and Adjust:
– Light the candles or turn on the LED lights to ensure they provide adequate coverage without being overwhelming.
– Make any necessary adjustments to the chandelier’s height or placement to perfect the ambiance.
A candle light chandelier not only elevates the visual appeal of your pergola but also creates an enchanting and warm environment perfect for romantic evenings.
Solar-Powered Deck Lighting for Eco-Friendly Elegance
Transform your pergola into an eco-friendly retreat with solar-powered deck lights. By harnessing the energy of the sun, these lights offer an energy-efficient and sustainable lighting solution. Solar-powered deck lights are perfect for subtly illuminating pathways and seating areas while adding a touch of elegance to your outdoor environment.
How to Achieve Solar-Powered Deck Lighting
Choose Your Lights:
– Select solar-powered deck lights that are designed for outdoor use. Look for models with built-in rechargeable batteries and automatic on-off sensors.
Plan the Layout:
– Decide on the strategic placement of the solar lights to guide guests and enhance safety. Common placements include along walkways, around the edges of the deck, or near seating areas.
Gather Tools and Supplies:
– Required items may include a drill, screws or mounting clips, and a measuring tape for installation support.
Install the Lights:
– Ensure that the lights are placed in areas with exposure to sunlight during the day. Follow the manufacturer’s instructions to secure the lights onto the deck surface or attach them using mounting clips.
Test Solar Exposure:
– Allow the solar panels to charge fully during daylight hours. Check that the panels have optimal exposure to sunlight to ensure efficient charging.
Test and Adjust:
– Once dusk falls, the lights should automatically illuminate. Observe the lighting effects and adjust their positioning if needed to achieve the desired illumination.
Using solar-powered deck lights not only enhances the aesthetic appeal of your pergola but also aligns with sustainable living practices by reducing your energy consumption.

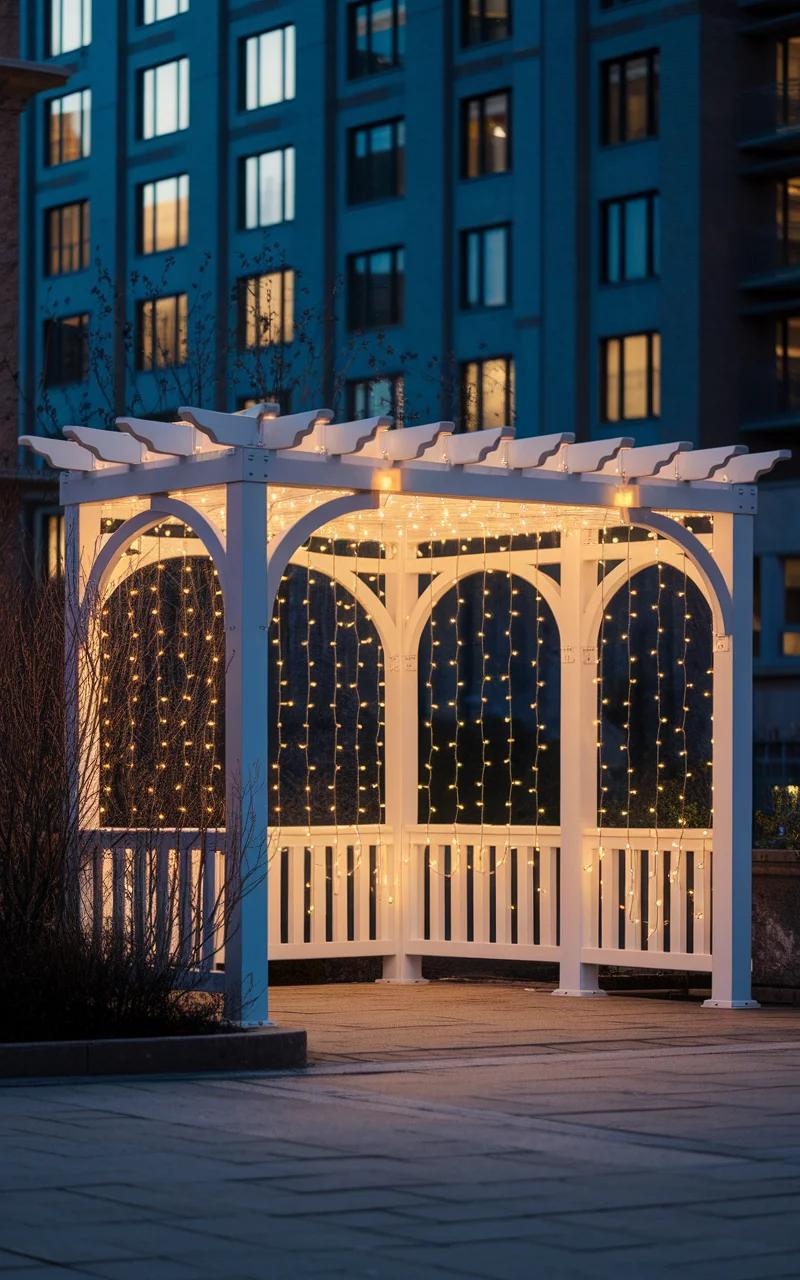
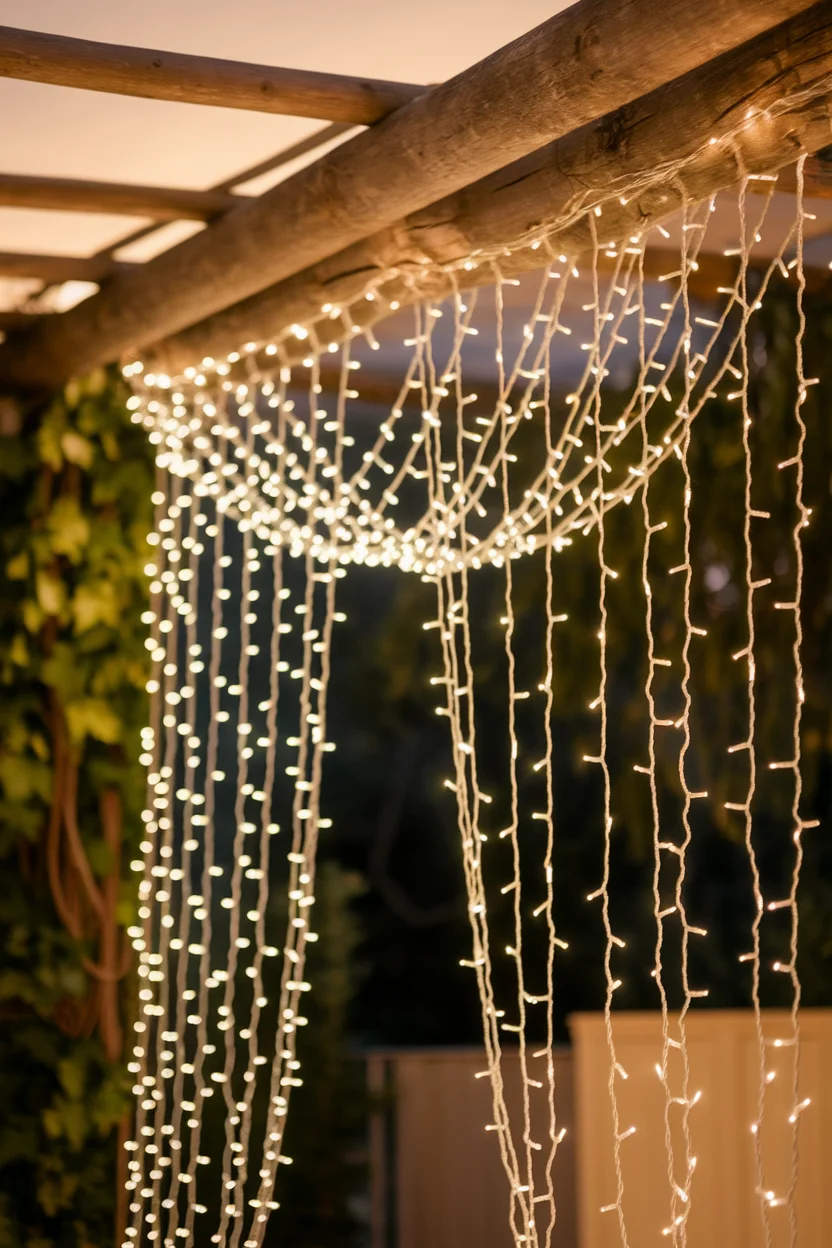
Fairy Light Curtains for a Dreamy Vibe
Create an enchanting and dreamy outdoor space by hanging fairy light curtains along the edges of your pergola. This ethereal lighting solution provides a soft, diffuse glow that adds a touch of magic to any setting, perfect for romantic dinners or serene relaxation under the stars.
How to Achieve Fairy Light Curtains
Choose Your Fairy Lights:
– Opt for outdoor-rated, warm white fairy lights to produce a delicate and inviting ambiance.
– Consider investing in battery-operated or solar-powered options for easy setup and energy savings.
Plan the Layout:
– Determine the sides of the pergola where you want the lights to fall like drapes. Consider the length and spacing for a cohesive and balanced look.
Gather Tools and Supplies:
– Gather necessary items such as hooks or adhesive clips, a ladder, extension cords if needed, and weatherproof batteries if applicable.
Install Hooks or Clips:
– Attach hooks or adhesive clips along the perimeter of the pergola where the lights will be hung, ensuring they are evenly spaced.
Hang the Curtain Lights:
– Drape the fairy lights to create a cascading effect, allowing them to fall like a curtain from the hooks or clips. Adjust for evenness and desired draping fullness.
Connect to Power:
– Ensure all connections are weatherproof if using plugs or extension cords. For battery or solar models, check that they are properly charged or positioned for optimal exposure.
Test and Adjust:
– Turn on the lights and make any necessary adjustments to the positioning or overlap to achieve a harmonious and magical look.
By incorporating fairy light curtains, your pergola becomes a whimsical and charming retreat, enveloped in a gentle and inviting glow that enhances any outdoor experience.
Under-Table LED Lighting for Subtle Elegance
Enhance your pergola’s dining or seating area with under-table LED lighting to create a subtle yet sophisticated atmosphere. This innovative lighting solution adds a gentle glow beneath tables or benches, creating an inviting ambiance for evening meals and gatherings. Whether you???re hosting a dinner party or enjoying a quiet dinner with family, under-table lighting complements any setting with a touch of elegance.
How to Achieve Under-Table LED Lighting
Choose Your LED Lights:
– Opt for waterproof, outdoor-rated LED light strips that provide a soft white or warm white glow for a subtle illumination effect.
Plan the Layout:
– Measure the dimensions under the table or seating areas to determine the length of LED strips needed. Decide on whether to use a continuous strip or multiple sections for larger tables.
Gather Tools and Supplies:
– Gather adhesive backing or mounting clips for securing the lights, a power adapter or battery pack, and a ladder or step stool for elevated installations.
Install the LED Strips:
– Clean the underside surface of the table or seating area where the strips will be attached. Use adhesive or mounting clips to affix the strips firmly.
Connect the Lights:
– Ensure all connections between LED strips and power sources are secure. For battery-operated options, install and charge the battery packs as needed.
Power the LED Lights:
– Connect the lights to a power source using a waterproof adapter or place battery packs discreetly under tables. Consider using a weatherproof box to protect connectors.
Test and Adjust:
– Turn on the lights and check for even illumination under the table. Make any necessary adjustments for balance or coverage, ensuring there is no harsh or direct glare.
Incorporating under-table LED lighting adds a layer of stylish illumination that enhances your pergola’s functionality and aesthetic with a refined glow perfect for enhancing nighttime outdoor gatherings.

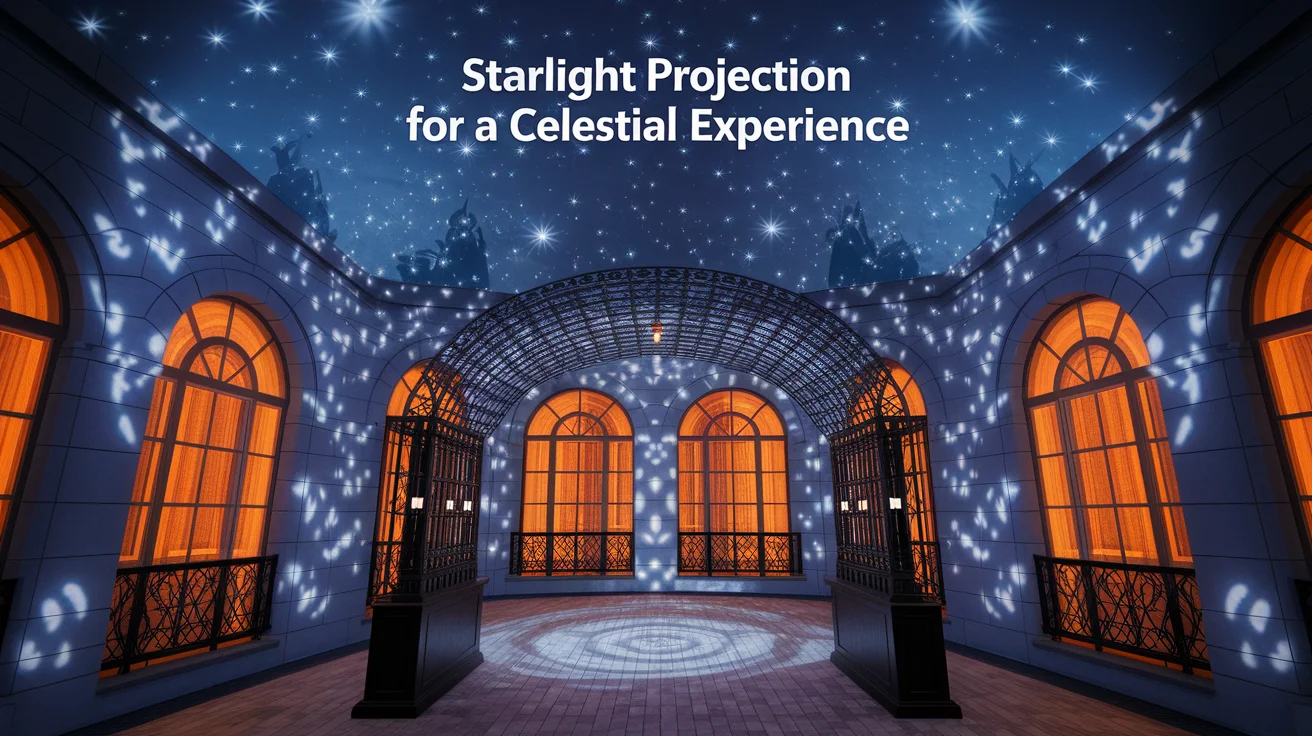
Starlight Projection for a Celestial Experience
Transform your pergola into a mesmerizing celestial haven with a starlight projection system. Ideal for creating a magical ambiance reminiscent of a night under a starlit sky, this lighting concept offers a sense of wonder and romance. The projection can cast thousands of tiny stars and patterns across your pergola, perfect for inspiring dreamy evenings or enchanted gatherings.
How to Achieve Starlight Projection Lighting
Choose Your Projector:
– Opt for an outdoor-rated starlight projector with customizable settings for star density, motion, and color. Look for models with weatherproof construction for outdoor use.
Plan the Placement:
– Decide on a location within or near the pergola where the projector can cover the desired area without obstruction. Consider height and angle adjustments for optimal coverage.
Gather Tools and Supplies:
– Required supplies include an extension cord, waterproof cable covers, and mounting equipment like a tripod or wall mount, if necessary.
Install the Projector:
– Secure the projector to a stable surface or mount it according to the manufacturer’s instructions, ensuring it is positioned to maximize the starlight effect across your pergola.
Connect to Power:
– Safely connect the projector to a power source. Use an outdoor-rated extension cord and waterproof covers to protect connections.
Customize the Projection:
– Adjust the settings on your projector to choose your preferred star patterns, colors, and effects. Many models include remote controls or smartphone app integration for ease of use.
Test and Adjust:
– Switch on the projector to test the starlight effect. Make any necessary adjustments to the projector???s angle, settings, or location to achieve a balanced and immersive celestial atmosphere.
Incorporating a starlight projection system into your pergola brings a touch of whimsy and celestial beauty, captivating guests and providing a serene backdrop for evenings spent outdoors.
Glowing Planter Lighting for Enchanting Greenery
Integrate the lush beauty of nature with mesmerizing glow by installing planter lights in and around your pergola. This unique lighting idea combines the ambiance of illuminated greenery with functional lighting, ideal for highlighting plant features and creating a serene nighttime environment. Glowing planters can enhance pathways or serve as focal points, enriching your outdoor space with their dual-purpose aesthetic.
How to Achieve Glowing Planter Lighting
Select Your Planters:
– Choose translucent or frosted planters designed to diffuse light for a gentle glow. Opt for LED-integrated planters or those that can accommodate LED light inserts.
Decide on Placement:
– Plan the strategic placement of illuminated planters to accentuate pathways, define seating areas, or highlight specific plants. Ensure an even distribution for balanced lighting.
Gather Tools and Supplies:
– Obtain LED light inserts or bulbs if not integrated, as well as extension cords if necessary. Ensure all components are suitable for outdoor use.
Install the Lighting:
– Position LED bulbs or light inserts within each planter, either under plant pots or integrated into the planter bases. Secure lights to prevent shifting or damage.
Connect to Power:
– Use outdoor-rated extension cords and any necessary adapters to connect planters to a power source. For wireless solutions, consider solar-powered options.
Test and Adjust:
– Once setup is complete, switch on the lighting to ensure all planters glow consistently. Adjust placement or light intensity for aesthetic balance and desired ambiance.
By incorporating glowing planters, you fuse the tranquility of nature with soft illumination, creating an enchanting and elegantly illuminated outdoor setting perfect for relaxation or evening gatherings.

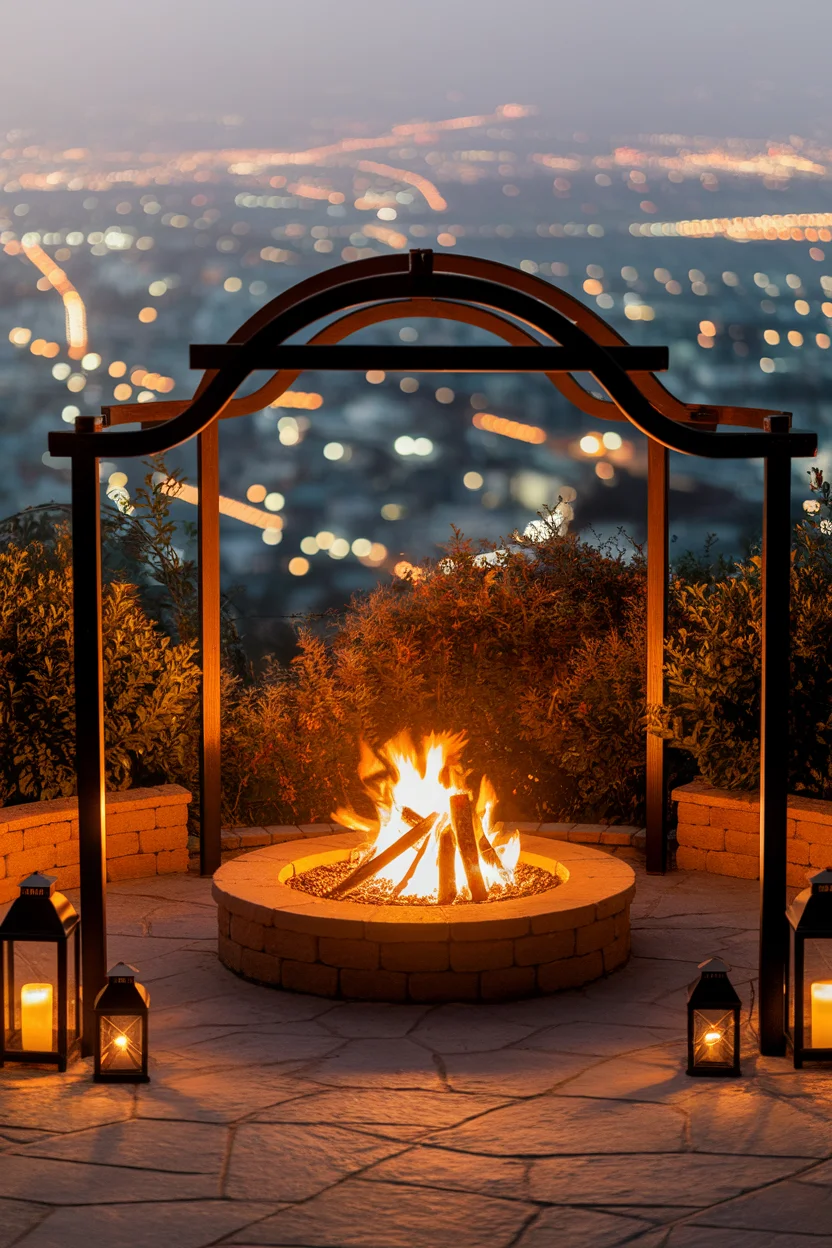
Fire Pit Lighting for a Warm and Inviting Outdoor Retreat
Add a touch of warmth and inviting charm to your pergola with fire pit lighting. This approach not only provides sufficient illumination but also creates a cozy and intimate gathering space. The flickering flames add dynamic visual interest, perfect for enjoying cool evenings with family and friends.
How to Achieve Fire Pit Lighting
Select Your Fire Pit:
– Choose a fire pit suitable for under-pergola use, ensuring it’s safely designed for enclosed spaces. Options include propane, natural gas, or small smokeless wood-burning models.
– Consider portable fire pits for flexibility or permanent installations for a stable, long-term setup.
Decide on Placement:
– Identify a safe, central location within your pergola for the fire pit, ensuring ample clearance from overhead structures and surrounding furniture to avoid heat damage or accidents.
– Secure any necessary permits and adhere to local fire codes and regulations.
Gather Tools and Supplies:
– Obtain necessary materials including the fire pit, heat-resistant mats, safety screens, and additional seating arrangements.
Install the Fire Pit:
– Set up the fire pit according to the manufacturer???s instructions, ensuring a stable and secure placement. Use a heat-resistant mat underneath to protect your flooring, if applicable.
Connect to Fuel Source (if needed):
– Safely connect to a gas line if using a propane or natural gas fire pit, ensuring all connections are tight and leak-free. For portable propane models, attach the propane tank securely.
Enhance with Additional Lighting:
– Add ambient lighting like lanterns or solar lights for complementary illumination that enhances safety and visibility around the fire pit.
Test and Adjust:
– Light the fire pit and observe its effects. Ensure flames are controlled and adjust any settings or safety screens to maintain a cozy yet secure environment.
The integration of a fire pit within your pergola not only offers warmth and light but also fosters communal interaction, creating a perfect setting for evenings filled with storytelling and relaxation against a backdrop of flickering flames.